Blog > How To Make A Website
Posted By Create
Jump to section:
- Step #1 - Choose Your Website Builder
- Step #2 - Find Your Domain Name
- Step #3 - Get Started
- Step #4 - Adding Your Content
- Step #5 - Build Your Online Shop (Optional)
- Step #6 - Creating Quality Content
Having a website is a must for every business. It helps people to find you, explore your products or services and discover what your business is about.
Building a website yourself is an optional, but rewarding challenge. There are plenty of amazing designers who are willing to help, but the barrier for getting started isn’t as high as you might imagine.
There’s no longer any need to know how to code, you don’t need to be a hosting expert, or set up any technical aspects on the backend. It can be just a creative process where you bring your brand to life, unhindered by the complexities Developers have to overcome.
Want Your Own Website?
Start Building Today!
No credit card needed. By submitting this form you agree to our T&Cs and Privacy Policy.
That said, no doubt you’d like to have some idea of where to begin!
That’s where this article comes in. We’ve broken the process down piece-by-piece so you can see exactly what you need to put on the to-do list - as well as see just how possible it is for you to build a beautiful website yourself:
STEP #1: Choose Your Website Builder
A Website Builder is software that allows you to build and manage a website without any need to know how to code. It can be the easiest way to get your website published when you find the right one for you.
Create is a website builder that has been designed to enable any small business owner to build a website and get online. Instead of needing to know code, pages are built through Content Blocks that you can easily drag & drop onto the page.
What’s more is that you can easily get started and build from a template framework. There are website designs for all kinds of business types that are the starting point for your creative process, allowing you to create something truly unique to you.
Here are 7 ways Create makes it easy for you to get your business online:
#1 Everything is Included
Many website-building platforms advertise themselves as “free”, but there will always be hidden extras, such as hosting costs, SSL, essential features etc. With a website builder solution like Create, you pay for everything at once. It’s that easy.
#2 It’s Beginner-Friendly
Create makes it easy to start a website: you can choose a template, organise your layout, add your content, and get it live on the internet in a matter of minutes - no matter your level of experience with websites.
#3 Every Website Made On Create is ‘Responsive’
This means that whatever device your website is viewed on, your pages will adjust to fit that screen for your user. This isn’t always the case with other platforms and it can be very frustrating for users on mobile or tablets.
#4 Your Own Dedicated Account Manager
At Create we offer every one of our customers their own Account Manager from the moment they start their free trial. Your Account Manager is with you every step of the way, and can help you with advice on how to set up your website, getting more visitors and making more sales (if you have a shop). We’re a small British company and every customer is important to us - we take the time to get to know you and your website needs.
#5 Perfect for Websites of Any Size - Big or Small
Some of our customers have huge websites that generate thousands of pounds in sales every month, and other websites are tiny and just have company information. Whatever your type of website, we can handle it.
#6 No Hidden Costs - We DON’T Take a Percentage of Your Sales
Lots of our customers use Create to start and run online shops. Unlike lots of other website builders, we don’t take a percentage of your sales: you keep every penny you make.
#7 You Don’t Need To Worry About Hosting
Your website and all your pages, text, images and more all have to be saved somewhere and need to be viewable on the web. This is Hosting and it is usually an additional cost to keep your website live. With Create, your hosting is included in the price of your package.
STEP #2: Find Your Domain Name
What Is a Domain Name?
A domain name is the web address that identifies you, such as www.create.net.
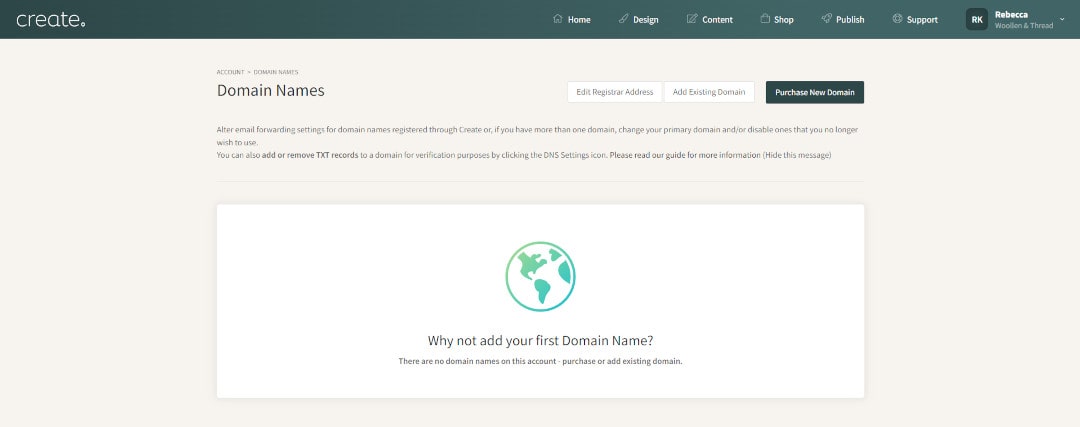
Where Do I Get a Domain Name?
There are lots of places to buy domains, but the easiest way to do it is with Create. Simply start a free trial (there’s no commitment and we don’t ask for credit card details), and then follow these steps to see what domains are available.
What Kind Of Domain Name Should I Pick?
It depends on what sort of website you are making. If your website is a portfolio / personal website, yourname.com is the obvious choice. If your website is for your company or services, yourcompanyname.com is best.
Domain names normally end in .com, but there are loads of other extensions available as well. We would suggest using .co.uk as your domain name extension if you’re based in the UK and have no plans to expand to do business overseas. Otherwise, .com is always a safe bet.
What Else Should I Consider When Choosing My Domain Name?
If you don’t want to use your full name or company name, there are other things you can consider:
#1 Does it describe who you are? If your website is about you, does your domain name describe who you are? ‘Does what it says on the tin’ isn’t just a Ronseal advert slogan from the 1990s - use it to describe you and your website, so if you’re an artist from Newcastle who works primarily in watercolours, your domain could describe this: NewcastleWatercolourArtist.co.uk is one example.
#2 Will people remember it? If you’re going to be telling people your domain name to drum up business, will people remember it? If the domain name is long, spelt in a unique way, or doesn’t make sense, potential visitors may forget it. Make sure it’s catchy and easy to remember!
#3 Is it different enough? Have you done your research to see if other people are using similar domain names? If there’s a big website using a domain similar to what you want to use, consider using something else. There are over 600 million domain names in use at the moment, but that doesn’t mean you can’t find something unique that sets you apart from others.
#4 Is it something you’d be proud to use? What you decide on now is something you could still be using in 10 years' time. That doesn’t mean you can’t change it at any time - you can - but it’s best to choose something that will stand the test of time.
What Shouldn’t You Choose?
Your domain name should be an inviting label for your brand. Remember that in a domain name, the words won’t be separated with punctuation, so make sure that they work well together as a whole.
Some particularly unfortunate domain name examples include:
-
‘teacherstalking.org’ (meant to be Teachers Talking, not Teacher Stalking).
-
‘choosespain.com’ (meant to be Choose Spain, not Chooses Pain).
-
‘childrenswear.co.uk’ (Children's Wear, not Children Swear).
Avoid mistakes like these when coming up with your own domain name - it’s amusing but will damage your credibility.
There are still plenty of great domain names out there. Use this advice to make sure you pick the one that’s right for you.
For more help, check out Create’s full guide on domain names >>
Step #3: Get Started
Once you’ve laid the foundations for your new website, you can get on with developing the site itself. The great thing about using a website builder like Create is that you can be up and running in just a few hours.
With Create, you don’t need to be an expert designer to make your perfect site. We provide custom-made templates to get you started, and you can edit these as much as you want. Remember, with a website you can tweak and customise it as often as you like, even after it’s live.
NOTE: We encourage everyone to have a go at designing their site but we understand not everyone feels comfortable doing so. If you feel this way, we are able to support you through our Design Services.
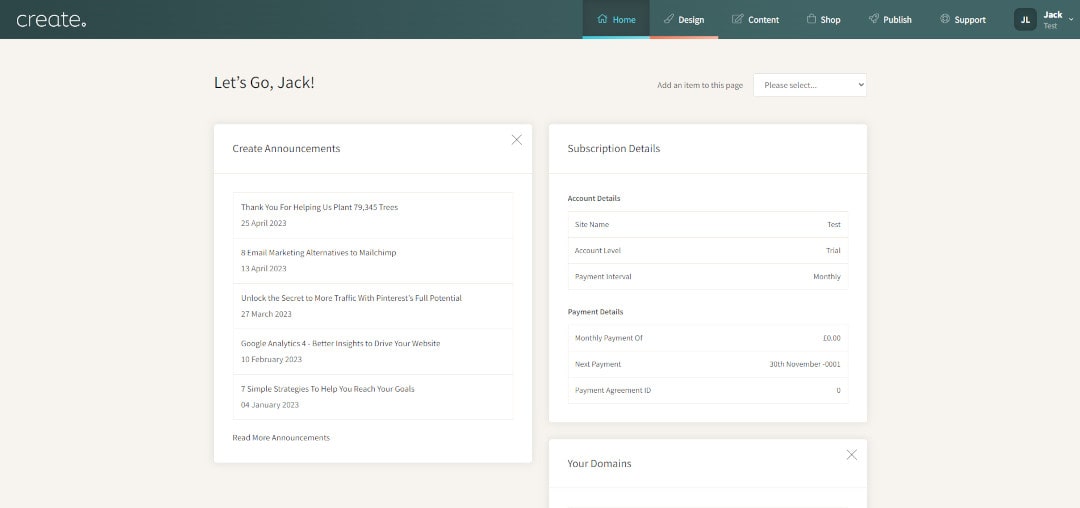
Start Your Free Trial
It’s simple and fast to start a free trial with Create. Simply enter your full name and email address and you’ll get instant access to the Create platform. From here you can play around with the design, content and shop features of your site - without spending a penny!
Want Your Own Website?
Start Building Today!
No credit card needed. By submitting this form you agree to our T&Cs and Privacy Policy.
Choosing a Template
Now it’s time to focus on the design side of things by choosing a Template. This is a framework that pre-selects some straightforward design choices such as colours and fonts.
This is only meant as a guide for you to work from, and each template is completely customisable. We find it’s much easier to have this groundwork in place to start from instead of a blank canvas!
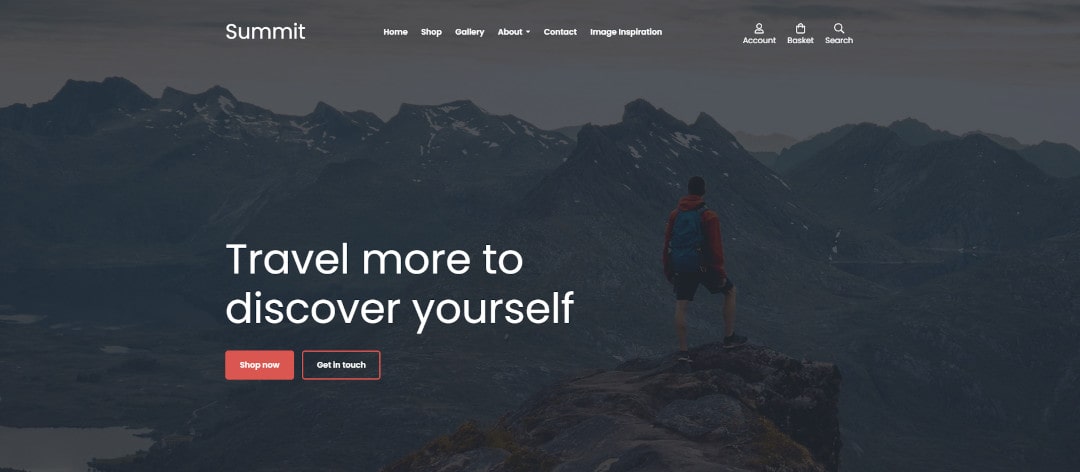
The Summit Template exclusively on Create. This template will adjust your font, colour scheme and more. All of which can be adjusted to your preference.
How To Choose a Template for Your Site
#1 Go to the Design tab in the Top Menu
Create takes you through each stage of making your website. Everything is clearly labelled. It might seem like a lot to keep in mind, but don’t worry - we’ll take you through it one step at a time.
#2 Pick a Template
Now you’ve accessed the Design area, you can choose from the range of original Templates in the left-hand column.
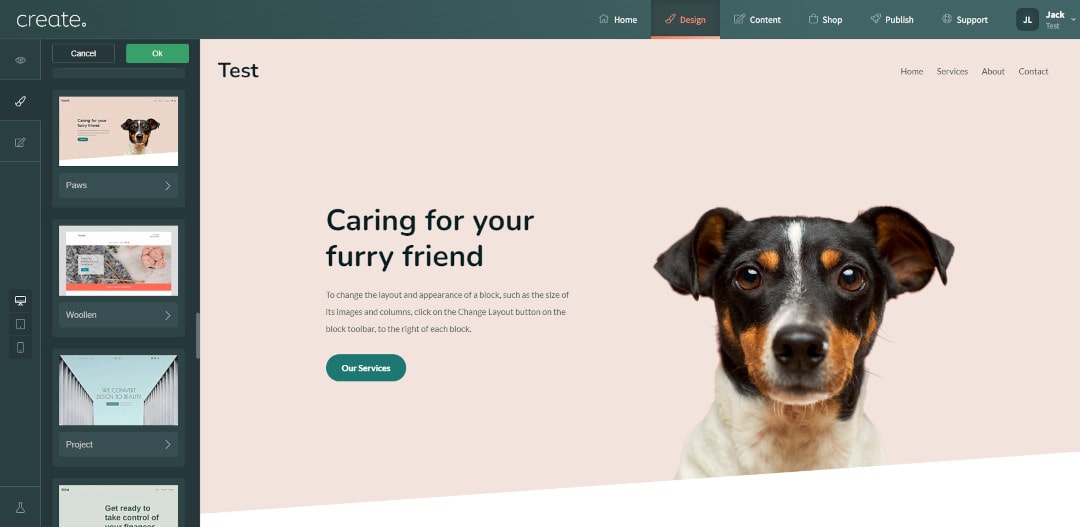
When choosing a Template, it’s a good idea to think about what sort of colour scheme and layout fits best with your brand. For example, if you are selling gardening products, a theme with green, earthy colours, would work better than reds and yellows.

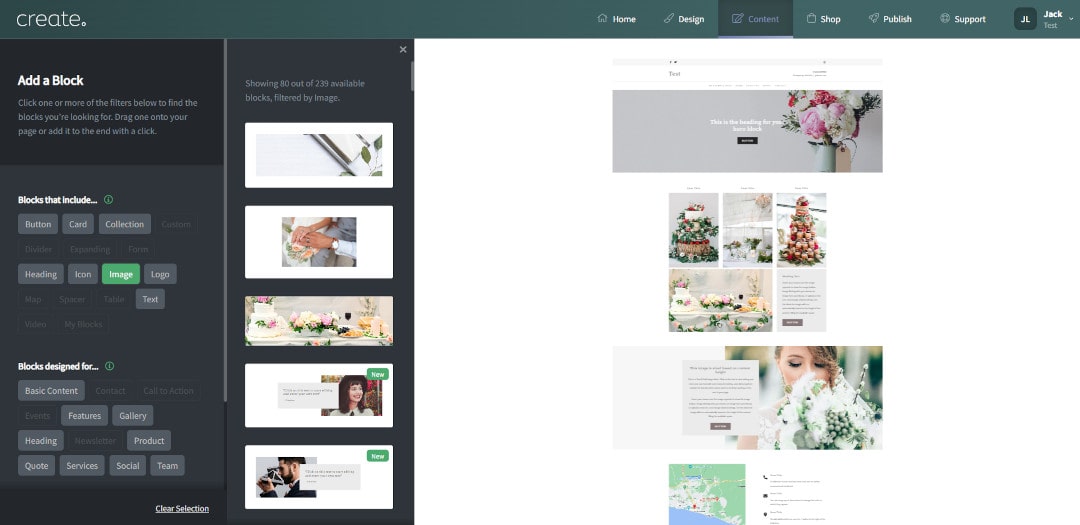
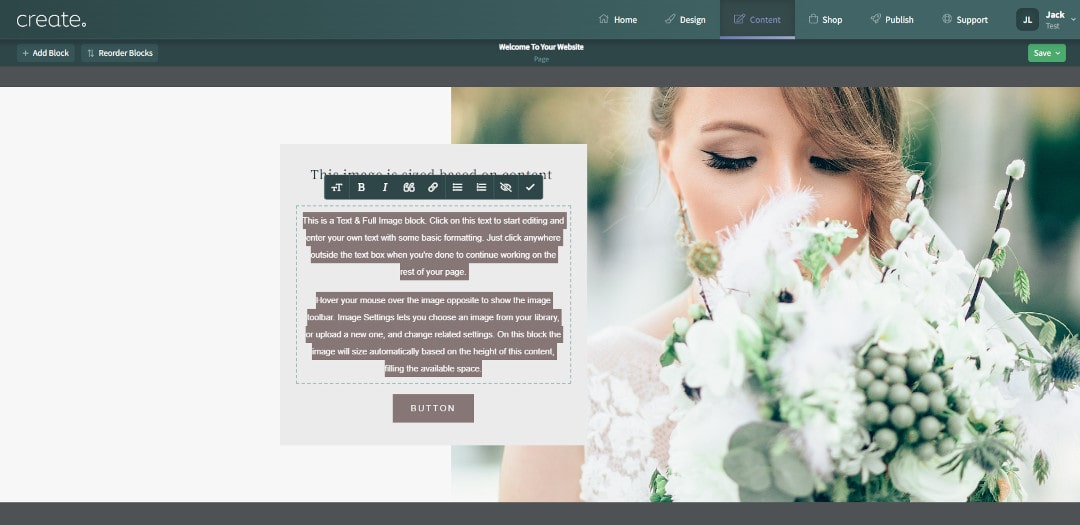
The Jewle Template exclusively on Create. This Template features muted colours and bridal whites instead of bold and vibrant colours. Perfect to create the dreamy feel appropriate for many wedding websites.
You don’t need to feel any pressure selecting the template that’s right for you. You can simply pick any design that you like or one that seems to fit closely with your industry. As previously mentioned, each is fully customisable and you can change this at any time in the future too.
Step #4 Adding Content
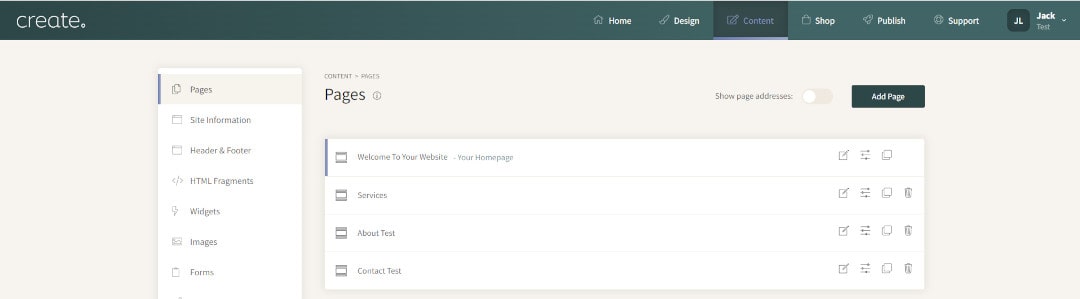
Now you’ve picked your Template, it’s time to add your content. Simply click on the Content tab at the top of your Create dashboard.
How To Add Pages
You’ll find there are some default pages already set up for you. Any of these can be customised and adapted to your needs, or you can start building a new page:
#1 Add Page: Once you’re in the Content section, click on the Add Page button in the top right.
#2 Choose Page Type: Once you’ve added a Content Page, you can then choose the type of page you’d like to include. You’ll then need to add some details about the page, such as the page title and meta info (you can come back to these details at any time).
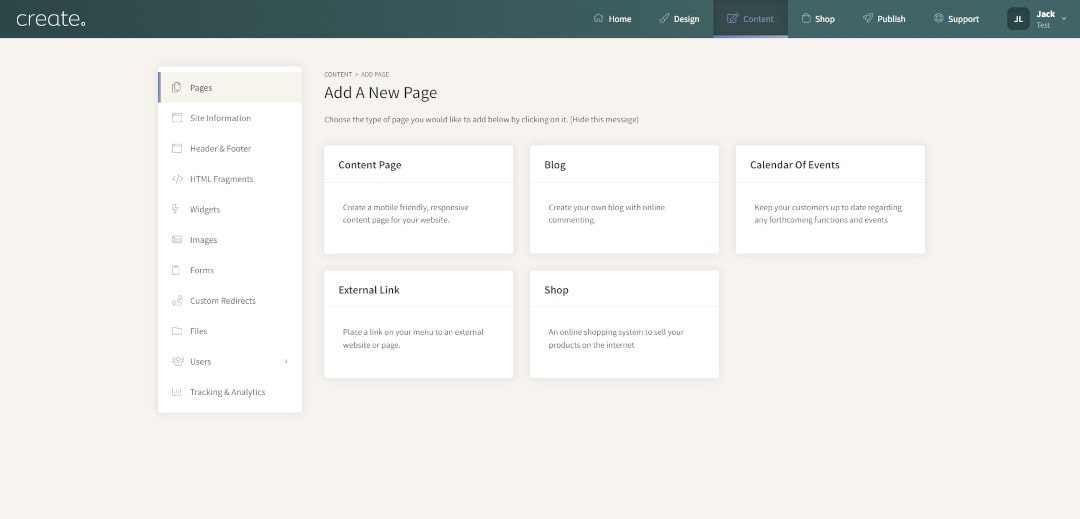
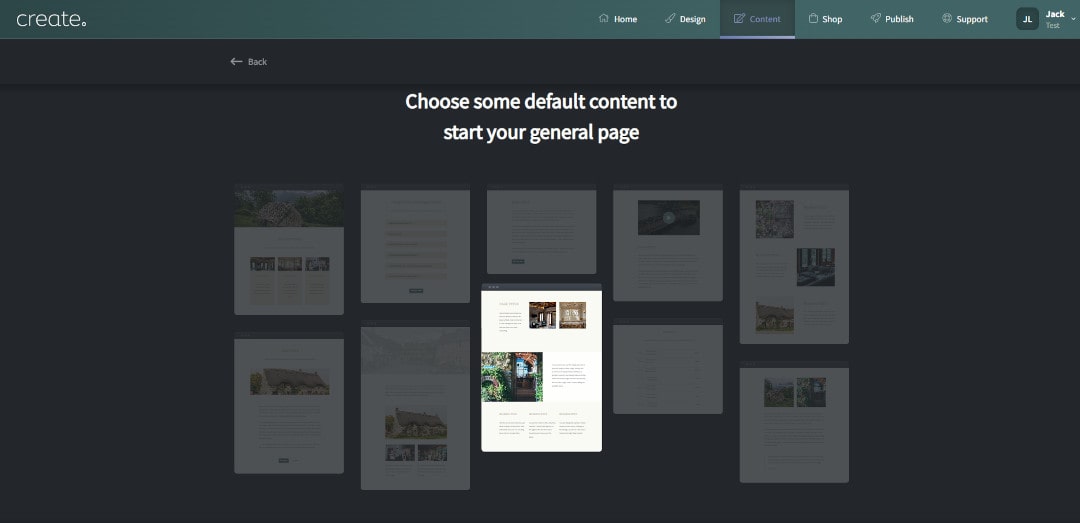
#3 Select Your Page Preset: The next step is to select a Page Preset to build from. You can start from a blank canvas if you so choose, but many people find having some content on the page to work from helpful.
#4 Add Your Content: Now your page has been created, you can customise it and add text and images using our wide selection of Content Blocks
How To Add Content Blocks
Content Blocks are how you structure your pages in Create. There are loads of Blocks to fit lots of different purposes. For example, you’ll find Blocks that feature text and images, Blocks for headings and buttons, and many more.
Here’s how you can add and customise Content Blocks on your pages:
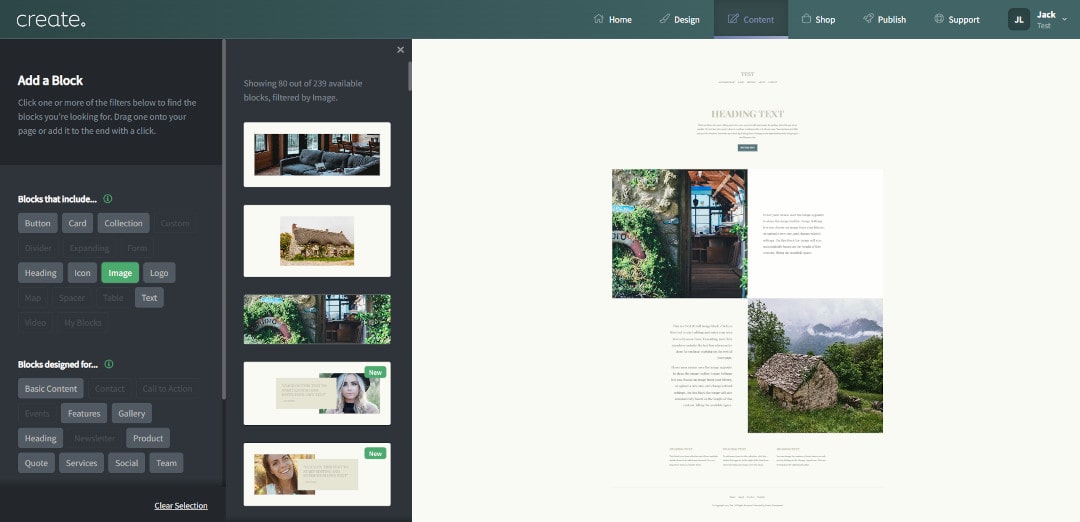
#1 Use the Block Filters: When editing a page under the Content tab, click +Add Block in the top left to open the Block Filter Menu. You can select filters to find Blocks that include certain elements or Blocks that are designed for a certain purpose.
When you’ve found a Block that you like, you can click it to add it to the bottom of your page, or drag and drop it into the space on the page you’d like.
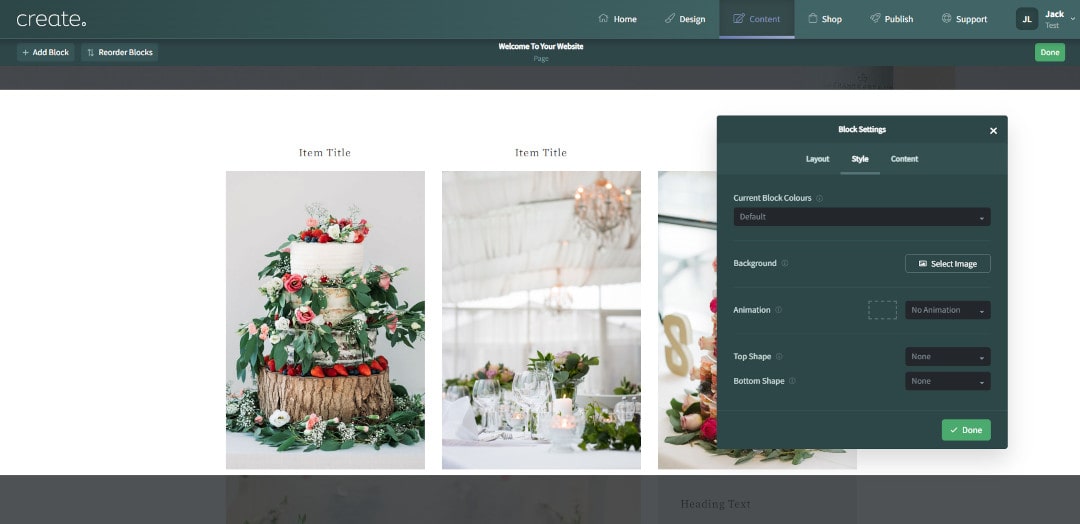
#2 Customise Block Settings: Each Block can be customised in a number of ways, for example; adjusting the space around the content, adding in additional headings and buttons, changing style features and more. These options can be accessed on the right when you hover over a Block.
Find out more about Block Settings >>
How To Add Text
Adding your own text to your pages is simple. When editing a Content Page, anywhere you see text on the page, just click on the text to make it editable. You can then write your content and edit it using the toolbar above the text area.
How To Add Images
Images are going to be really important for your website. They help to connect your audience with your brand in a way that words can't. On Create, you can easily upload your own images, or import professional free photography through our Unsplash integration.
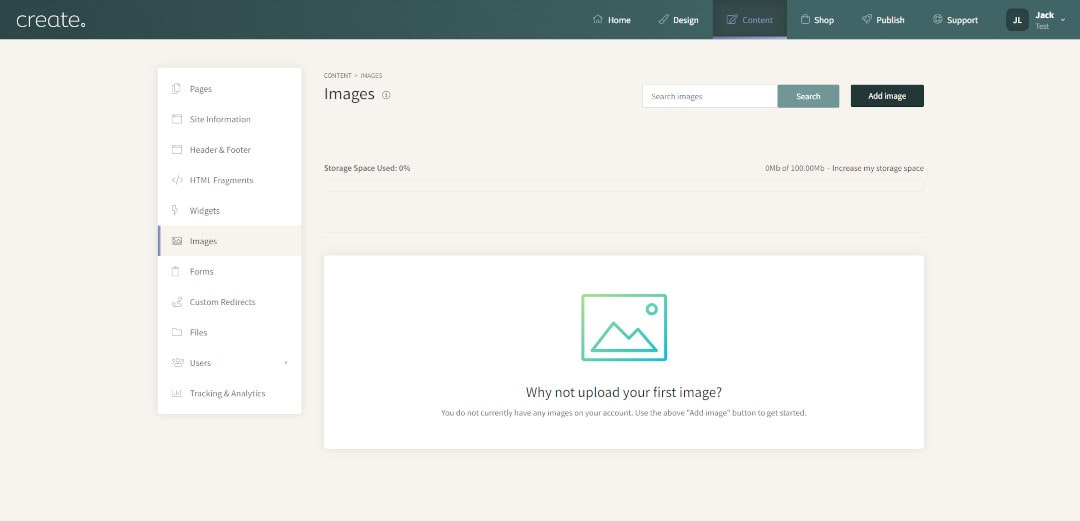
#1 Upload Images in Bulk: From your Content tab, select Images from the sidebar. Here you can upload all the pics you want to use on your site in one place. Click Add Image to upload from your computer.
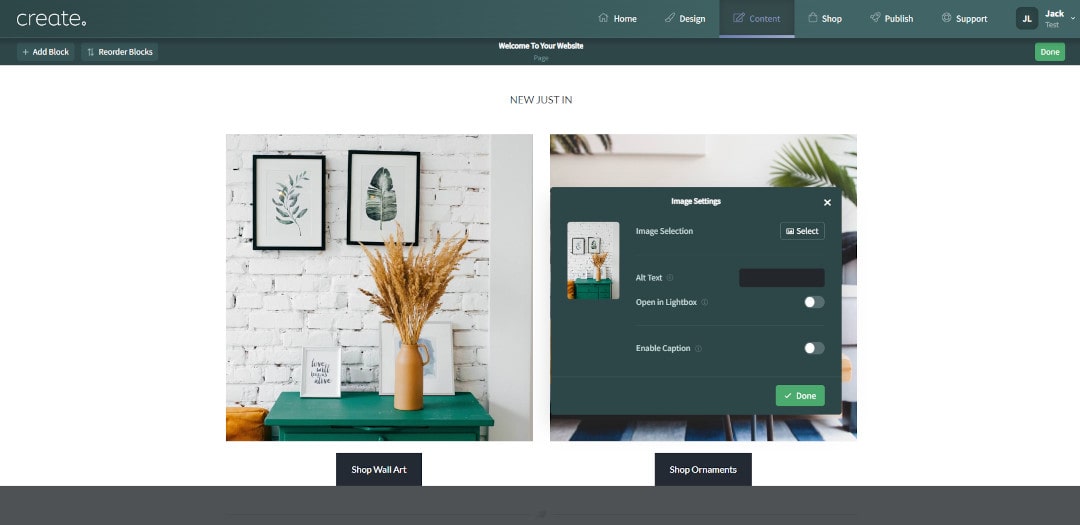
#2 Insert Images on Pages: You can insert any images onto a page that you’ve already uploaded to your library. You can also upload images on the go. When editing a Content Page, hover over any image and click Image Settings and the Select button to open your library or upload a new image
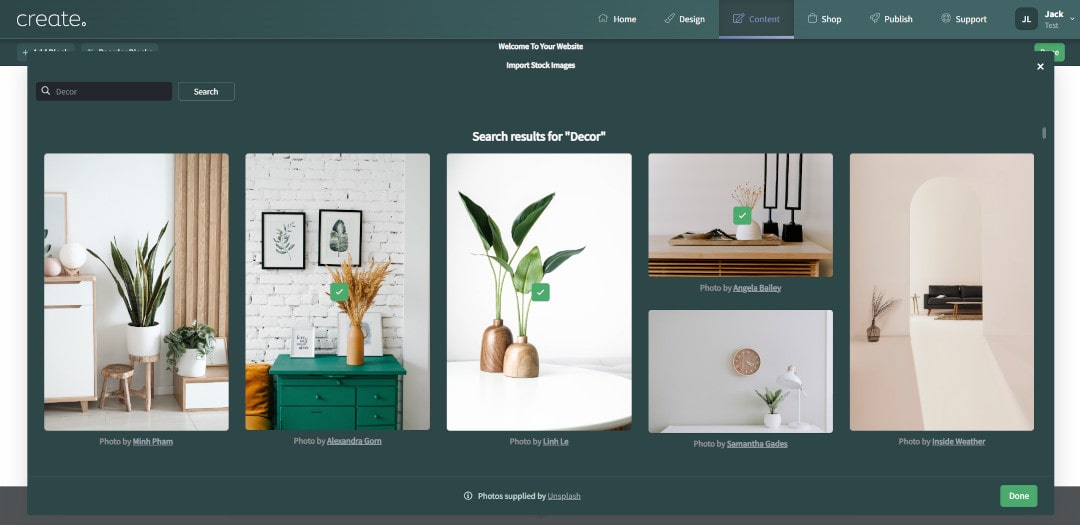
#3 Import Unsplash Images: In that same Image Selection area, you’ll also see the option to Import Stock Images. You can search for the images you want and select any to use on your website for free. Simply click on the ones you like to add them to your image library.
Step #5 Build Your Online Shop (Optional)
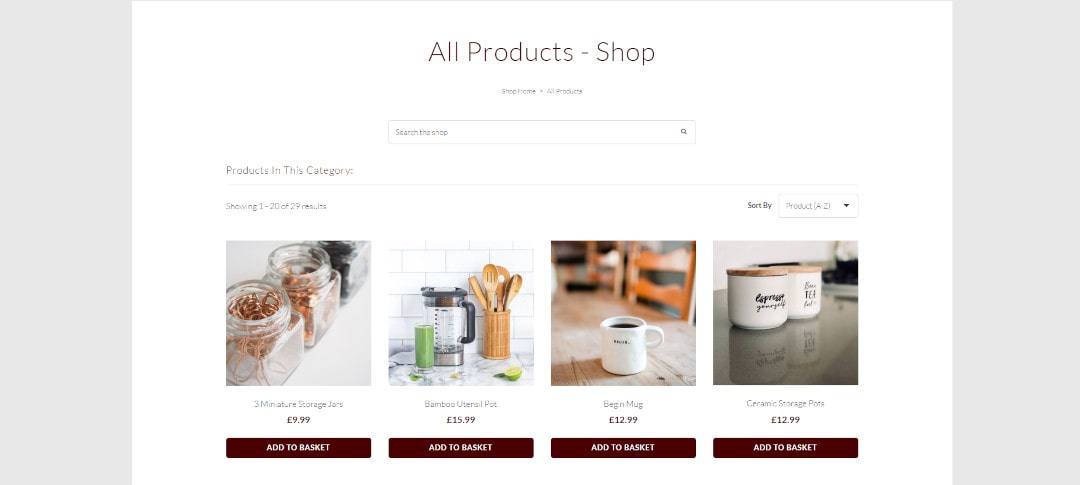
If you’re building an online shop, adding your first product is easy. You can also build Categories to very simply and efficiently organise your products within them.
Here’s how to do so:
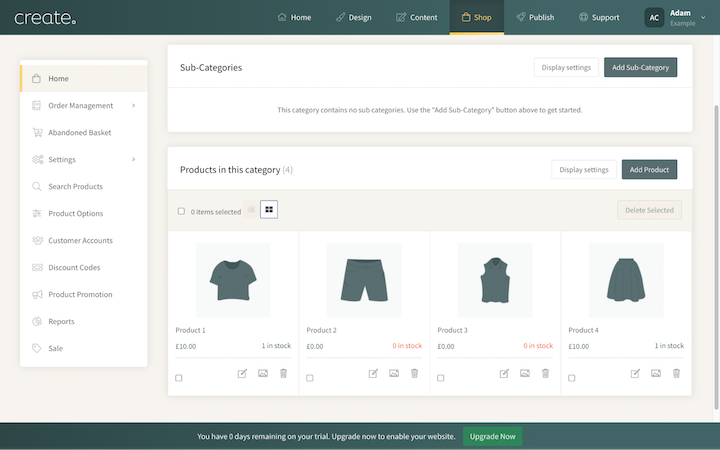
#1 Select Shop from the top menu and then scroll down to the Products in this category section at the bottom. Click the Add Product button.
#2 Enter a name for the product, along with a short and long product description
#3 Set a price for the product
#4 Set the other product specifics as needed on this page and using the tabs at the top
#5 Complete the details and click Save Product.
You can now upload your Product Images. Click Add Product Image to open your device's file browser and select the images you wish to use. You can upload multiple images at a time. Clicking Done will confirm the images and the product will be added to your shop.
You can also add product categories to organise your shop and make the browsing experience more enjoyable for your website visitors. You can find more information about setting up your online shop in our Help Centre.
Step #6 Creating Quality Content
Now we’ve looked at HOW to add content - WHAT is the content going to be?
A brilliant website needs high-quality images and tight written content. This is where you can get creative and really make your site your own.
The challenge of producing your own original content can seem daunting, and outsourcing to content writers and photographers is an expensive option, especially if this is your first website.
At Create, we believe anyone can produce quality content, and that starting a website shouldn’t cost the earth.
Adding Stunning images
The human eye is naturally drawn to images over text. Your website needs and deserves high-quality, professional-looking images, but you don’t need to break the bank or have a degree in photography to get the pictures you need.

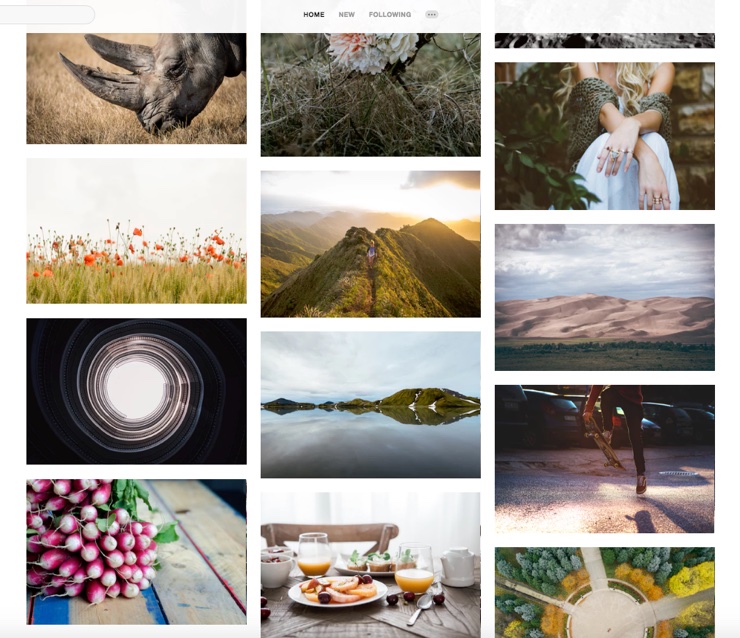
Stock Images
This photography may seem out of reach for your first website… but what if we told you they’re all completely free stock images that anyone can use?
We’ve already mentioned that you can import free stock images directly from Unsplash in Create. There are also lots of other places to get amazing free image content.
Choose from evocative landscape photos to artistic food pics, - there’s a huge range of categories and genres to suit the needs of any website ... and without the expense of paying professionals.
Do It Yourself
Don’t be afraid to take your own photographs. If you’re selling unique, physical products, it’s unavoidable that you will need your own images.
If done well a decent phone camera can be all you need, and you can also invest in a studio lighting setup (you can get a good one for around £50) for professional-level shots.
This may seem like a superfluous cost initially, but it’s a one-off purchase that you can use over and over again. Try it yourself and you’ll see just how self-sufficient you can be.
Written Content
Beautiful images are very effective for catching the eye of a potential customer, but quality written content adds credibility to your site.
Outsourcing written content to professionals can cost up to £2000 and may not always be as helpful or time-saving as you’d like. You’re the expert, and you’ll know what content your website will need.
Do It Yourself
You don’t have to be an acclaimed author to be able to write good content. If you’re talking about your passion, the writing will flow.
Before you start writing, have a think about what sort of language and tone best fits your brand concept.
If you’re selling health and beauty products, a suitable tone would be that of a helpful expert; if you’re selling children’s toys, a playful and lighthearted tone would be appropriate. Having an idea of your brand’s ethos will help dictate the direction of your content.
A great ‘About Us’ section goes a long way, and clear and concise product descriptions can increase sales and answer your customers' questions for you.
It goes without saying, but check and double-check your spelling and grammar, and if you have a friend with some spare time, ask them to read through your content too. We often don’t see our own mistakes.
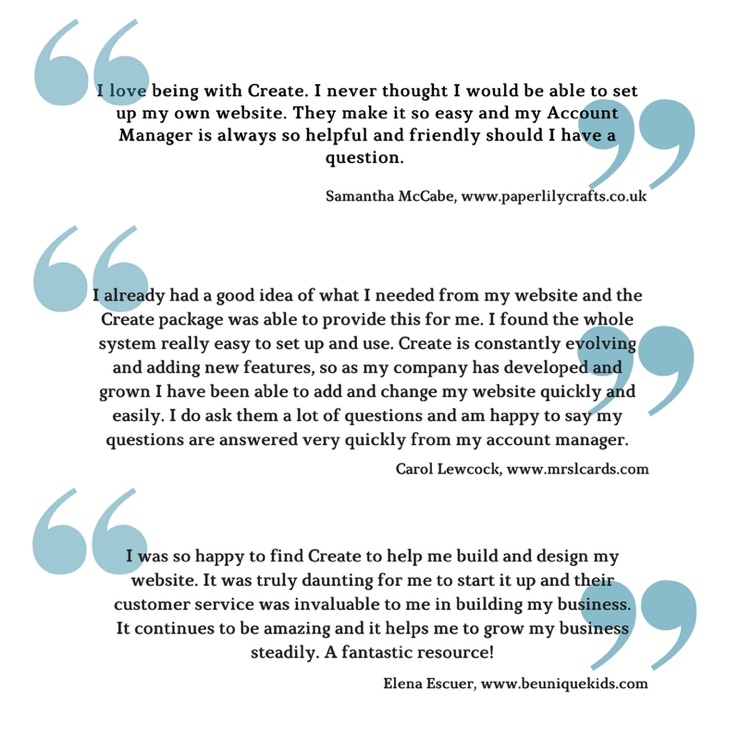
If you’re building your website with Create, you can also ask for feedback from other small business owners who have built their own websites in our Facebook Community. It’s a great place to come for a little bit of extra support and ideas!
Congratulations - It’s Time To Launch Your Website!
If you’ve followed this guide, you’ll now know everything you need to get started with your own Create website.
Your free trial with Create gives you the chance to play around with design features, add content and build momentum for your site before you launch it - without spending a penny!
Want Your Own Website?
Start Building Today!
No credit card needed. By submitting this form you agree to our T&Cs and Privacy Policy.
Create takes care of the technical side of making a website so you can focus on making your site look as good as it can be. You can be up and running quickly and can tweak / add as much extra content as you want, whenever you feel like it.
We wish you all the best with getting started and remember, we’re on hand to help answer any questions you may have along the way.
Want more tips and ideas on how to start and grow your website? You can make sure you never miss a trick by getting our email updates. We share the latest news from our blog along with tips and ideas you can utilise to grow your business online.