Help Centre
The Facebook Pixel can help you to effectively track the important actions that are taking place on your website. Whether that’s how many people are clicking a call-to-action, how many visitors are abandoning their carts, how many times a lead form is used... There are so many different options as to how you can track activity with the Pixel that the examples above really only scratch the surface.
While this is an exciting prospect in and of itself, the most powerful feature of the Pixel by far is what it learns about the people who take these actions. This is information that you can use later on to create highly targeted advertisements that you can continue to optimise for more sales at lower costs.
Before you get started with your advertising campaigns, you’ll need to set up the Standard Events that you would like to track. If you’re using the Pixel with Create, some of the key Events Facebook offers will have already been set up for you:
- When someone views your content
- When someone adds an item to their cart
- When someone enters the checkout process
- When someone completes a purchase on your website
With the Events Tool in Facebook Business Manager, you can define other Standard Events for the Pixel to track. This guide will walk you through how you can get started with the Pixel Event Setup Tool.
Note: The above video is not reflective of the Facebook Business Suite updates.
How to Open the Event Setup Tool
You don’t need to add any code to your website in order to start tracking Events. Facebook provides the Event Setup Tool which will allow you to specify the actions you would like to track by picking them off your website page.
To open this tool:
1. Load up Facebook Business Suite.
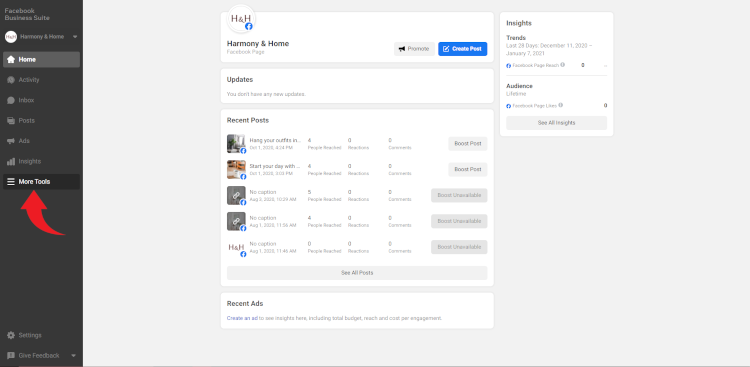
2. Select More Tools from the left-hand menu
3. Click Events Manager
4. Go to the Settings tab for your Pixel
![]()
5. Scroll down to Event Setup and click Open Event Setup Tool
![]()
Note: Please do not switch on the option to Track Events Automatically Without Code. The code has already been set up on your website to a much higher degree of accuracy by us. Switching this option on could interfere with the Create setup and corrupt your tracking.
5. Enter your URL in the field provided and click Open Website
You will now be taken to your website. Facebook will open with a brief introduction that you can either read through or exit and then you’ll be able to move on to marking actions on your website.
Understanding the Event Setup Tool
![]()
A window will open in the top-left of your website. This is Facebook’s Event Setup Tool that will help you to create the Events you would like to track. You can navigate to any page on your website and this window will stay open.
There are two options that you can use to track:
Track New Button - This allows you to select any button on the page and turn it into an Event. For example, if someone were to click “Send” on an enquiry form, you could track this in your Pixel Dashboard.
Track a URL - This allows you to assign an Event to someone landing on a page. For example, if someone were to land on one of your category pages, you could assign an event to this so that you can advertise products from this category to those visitors later on. However, most of the events where you would need to use this option have already been set up for you by Create.
When you select either of these options, you will be asked what Event you would like to track. As mentioned before, some of these have already been set up for you so you don’t need to create any more Events for them. The Events already set up are:
- Add to Cart
- Initiate Checkout
- Purchase
- View Content
If you run an ecommerce store, you will not need to create any more Events around any stage of the checkout as these are all set up for you. Duplicating existing events could lead to inaccurate and inflated tracking. Facebook will provide you with a drop down list of other Events that you are able to track in addition to the preset ones.
Here are a couple of examples:
Tracking Leads with the Facebook Pixel
For any service-based business, an enquiry is usually the first step towards a visitor becoming a client. It’s a crucial part of your sales process and therefore, tracking this is essential for optimising your sales process and acquiring new, similar prospects. With the Pixel, you can remarket to those who have used your form and target more people that are likely to enquire as well.
Here’s how to set this up:
1. Head to your Contact page or wherever your enquiry form is placed.
2. Select Track New Button on the Event Setup Tool
![]()
3, Click the Send Message button on your contact form
![]()
4. Use the drop-down box to select the Event you would like to track. In this instance, we will be using the Contact Event but you could also use Lead.
![]()
5. Click Confirm to create your Event
![]()
This Event has now been set up and you will start collecting data after you click Finish Setup in the top-right of the Event Setup Tool. You can also Delete, Edit and view more details about your Event under the Events on This Page tab.
Track Your Email Subscribers
The visitors that sign up to receive your emails have demonstrated that they would like to hear what you have to say. You can use the Pixel to track these users. This will then allow you to remarket to these people with specific messaging at a later date or allow you to optimise an advertising campaign in order to help you acquire more email subscribers.
![]()
Whichever sign up form you have on your website, you should track the button used to submit an email address in order for this Event to work. For example, if you are using Create’s Footer Signup Form, you should track the + button using the Event Setup Tool. Select the Subscribe Event to track this. This will record your subscribe button across every page of your website.
Tracking Your Advocates
Word of mouth is one of the most powerful ways of reaching new customers. If you have people out there that are already talking about your brand, wouldn’t it be great to know who they are and keep encouraging them back to your store as much as you can? We can do this by tracking the Recommend this to a friend + button on your Product pages.
![]()
To do this, we would click the Recommend to a friend + button and track the button at the bottom of the form. This would be done in exactly the same way as before. When you finish the setup, your Pixel will then be tracking anyone who has gone out of their way to recommend one of your products to a friend. You can then target them with special offers or encourage them to join your mailing list in order to entice them back to your store time and time again.
There are hundreds of other setups that you can use to monitor your website activity through the Pixel. It’s worthwhile taking the time to think about all the different resources you have available on your website, how they would lead to a sale and then experimenting with some of these events to act on these ideas.
Testing Your Events
![]()
Once you’ve set up your Events, you can test them to make sure they are working properly through your Facebook Business Manager. You can check your Events at any time by going to the Test Events tab for your Pixel.
Once on the Test Events screen, enter your website URL in the field under Test Browser Events and click Open Website. Your website will open in a new tab so that you can carry out the Events that you have set up. Every time you complete one of your Events, it will be recorded on your Facebook Business Manager tab.
![]()
You’ll be able to easily identify which events are yours by checking the Setup Method. Any that you have created will be marked as Event Setup Tool. You can expand any of these events to find out more about how they were triggered specifically.
Next Steps
Now that you know how to set up Events with the Facebook Pixel, be sure to check out Custom Conversions to learn how to get more from your Events. Custom conversions allow you to get more specific about the actions happening on your website and allow you to assign monetary values to the actions you’re tracking for even more powerful tracking and optimisation possibilities.
How to Setup Custom Conversions with the Facebook Pixel >>
FAQ
Does it matter what Event Type I select?
It doesn’t matter what Event Type you assign to an action. For example, for lead submission forms you would be inclined to use the Lead Event, but selecting any of the other Event Types does not change the way that the Event works. Please be aware though that any Events that you use to record separate actions will be tracked in aggregate and may inflate your data. For this reason we recommend not using the Add To Cart, Initiate Checkout, View Content and Purchase Events.
Does it matter if I use the same Event Type for different actions?
You can use the same Event Type for different actions on your website. However, when you come to view your data, the two separate actions will both have been recorded as the same Event. You can separate these actions by using Custom Conversions so long as they are on different pages. For this reason, we do not recommend using one Event Type for two different actions on the same page.
Where can I make changes to or delete my Events?
Your Events can be updated by opening up the Event Setup Tool on your website. Simply click the All Events tab and expand the Event you’d like to make changes to. This is where you can delete your Events.
For one action across multiple pages, do I have to create the same Event on each page?
Where you have an action that occurs on multiple pages that you want to track, you should only need to set this up once. For example, where we tracked the Recommend to a Friend action above, we only needed to set this up on one page. Facebook uses AI to detect instances where the same button occurs on different pages. However, you may want to confirm this using Facebook’s Test Events tab to make sure they are tracking this correctly.
Related Articles
Related Articles


More Questions?
If you have any further questions, please get in touch and we will be happy to help.
Get in Touch