Help Centre
What is Facebook Pixel?
The Facebook Pixel gives you the ability to analyse how users interact with your website by tracking specific events on your website. This is important for measuring conversions and the success of your marketing; particularly if you are advertising on the Facebook platform.
To set up Facebook pixel you will need to get the pixel ID from your Facebook account and then insert this into your Create account under Site Information in your Content tab.
Note: This feature is available on our Business package. If you'd like to try this feature out for yourself, get in touch with your Account Manager who would be happy to help.
Note: The above video is not reflective of the Facebook Business Suite updates.
How to Find Your Facebook Pixel ID
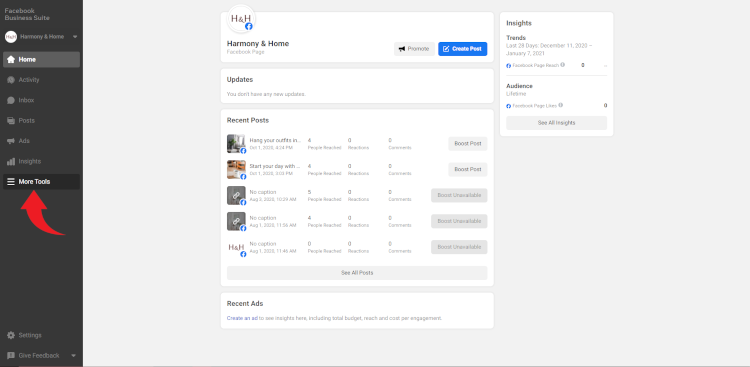
1. Load up Facebook Business Suite.
2. Select More Tools from the left-hand menu
3. Click Events Manager
4. Click Connect Data Sources in the left-hand menu
![]()
5. Select the Web option and click Get Started
6. Select Facebook Pixel and click Connect
7. Enter a name for your Facebook Pixel. You do not need to enter anything in the Check your website for easy set up options field
![]()
8. Click Email Instructions in the bottom right of the next modal that appears
![]()
9. Copy your unique Pixel ID to your clipboard. You will now need to add this to your Create account
![]()
How to Add the Facebook Pixel to Your Website
1. Log in to your Create account
2. Click on Content on the top menu
3. Click on Tracking & Analytics in the left menu
4. Click the tab Facebook Pixel
![]()
5. Enter your Facebook Pixel ID in the box and then press Save Changes.
You’ll need to publish your website for the change to take effect.
Next Steps
With the Pixel setup on your website, you'll now be tracking the following important actions by default on your website:
- When someone views your content
- When someone adds an item to their cart
- When someone initiates the checkout
- When someone completes a purchase
But what about other actions that are happening on your website that are also important to you? Such as when someone subscribes to your email list or when someone completes a lead form on your website?
You can also set up tracking on these actions using Standard Events. These are easily configured without the need for any additional code. Setting these up for other important actions will help you to retarget the people that took this action and find new people just like them as part of your campaign targeting.
Find out how to set up Standard Events for the Facebook Pixel >>
Related Articles


More Questions?
If you have any further questions, please get in touch and we will be happy to help.
Get in Touch