Help Centre
Support > Promoting Your Website > Social Media
How to Set Up Instagram Shopping
Jump to Section:
- Instagram Shopping Requirements
- How To Set Up Instagram Shopping
- How To Create Product Collections
- How To Customise Your Instagram Shop
- How to Tag Products When Posting to Instagram
- How to Tag Products in Existing Posts
- How to Tag Products in Instagram Stories
- FAQ
One of the biggest challenges small businesses face marketing on Instagram is how they connect their audience to their products. With so little scope on most accounts to link between a profile and a website, it can be a frustrating process trying to encourage click-throughs. The Instagram Shopping feature is the best way to overcome this.
Instagram has always been strict on the number of links they allow on their platform and so they restrict an average user to just one link in their bio. You can utilise this link in your bio reasonably well by creating an Instagram Landing Page - Allowing you to reference your bio link in posts and creating a library of links to more effectively direct your audience to the relevant parts of your website…
But we all know - It would be much easier to have the link right there on the post or story.
If you have a business selling physical products, Instagram Shopping allows you to do so. This feature of their platform allows you to add tags to your posts and stories that will link your audience through to your website. This helps them to find and purchase your products more effectively so you can start converting more of your Instagram audience into customers.
What’s more, is that with Create’s Facebook Catalogue Tool, you can link all of your social platforms up and not have to worry about your product details and stock levels being misrepresented across Facebook or Instagram as everything is managed for you and kept up-to-date.
Find out how to get started below.
You will need to have set up your Facebook Catalogue in order to manage your products across these platforms.
You can set up your Facebook Shop at the same time by following the steps in this guide.
Instagram Shopping Requirements
In order to use Instagram’s Shopping features, your profile must first be approved by them. This can take a few days to happen so to save time, be sure to check your profile meets their criteria before applying:
-
Your profile must be a Business Account - Setting up as a business account is easy. Here are the steps to do so.
-
Your profile must be connected to a Facebook Business Profile - You will also need to set up a Facebook Catalogue for this page in order to link to your products.
-
You must be primarily selling physical goods - Although Instagram is looking to expand availability to accounts with other types of products and services in the future
You must also agree and comply with Instagram’s Merchant Agreement and Commerce Policies. You will be prompted to do so as part of the setup process.
How to Set Up Instagram Shopping
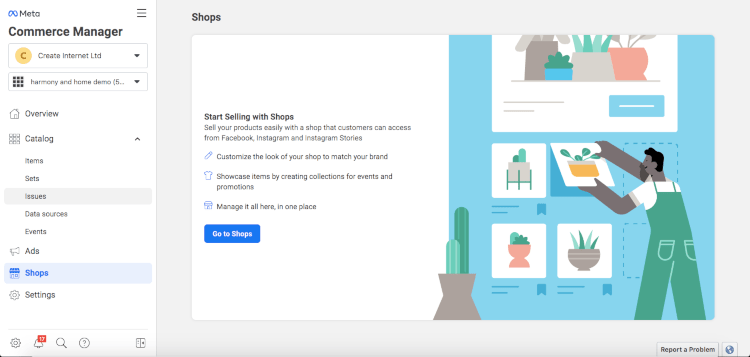
1. Go to Commerce in the left-hand menu of Meta Business Suite
2. Select Shops from the left-hand menu and click Go to Shops
3. Skip the next screen by clicking Next
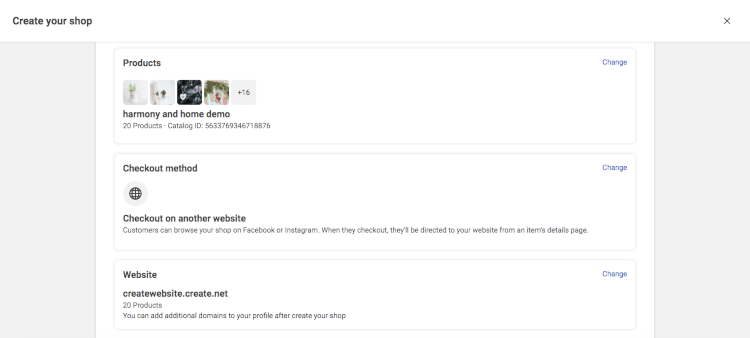
4. You will be presented with a Shop Overview page. You will need to double check all these details are correct. Note that the Checkout Method should remain as Checkout on another website
5. On the next page, you need to specify the locations you will ship to and agree to the Seller Agreement.
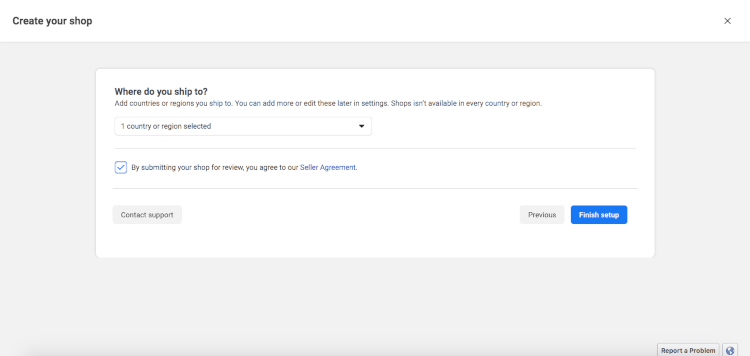
6. Once you’re happy with everything, press Finish setup.
Your profiles will be reviewed by Meta and you will be notified of the status of your application to their shopping features. This can take up to 4 weeks. In the meantime, it’s recommended to continue posting to show that your profiles are active to support your applications.
How To Create Product Collections
While you’re waiting for your Shop to be approved, you can get started with organising your products into categories; or Collections / Sets as Meta refers to them. This will be helpful later on for grouping products together in your shop and helping people navigate to the products they’d like to browse.
These Collections will be available to use in both your Instagram and Facebook Shops.
To get started. Head to Commerce Manager >> Catalog >> Sets and click Create Set in the top-right.
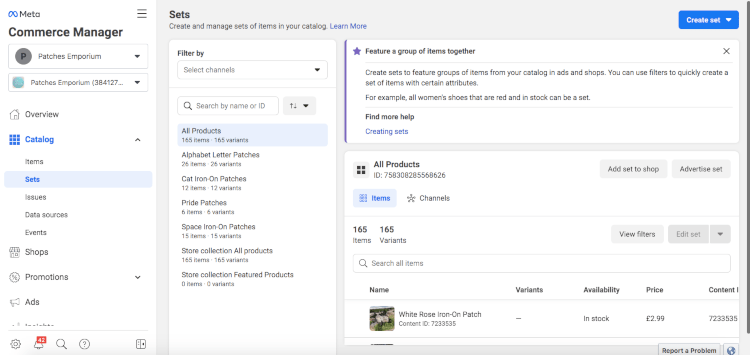
You can choose to either select the products you’d like to use in your category by using filters, or selecting them manually.
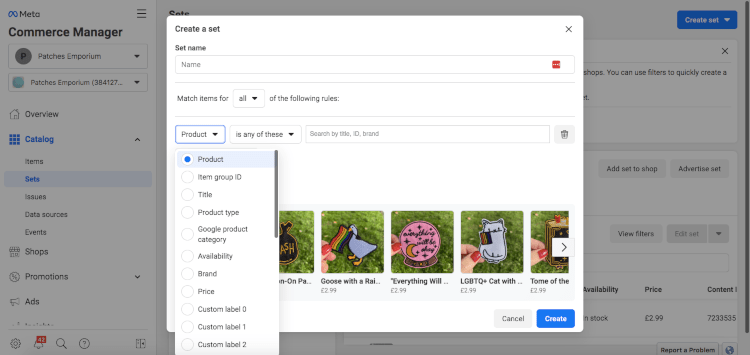
Using filters, you can combine rules to find the selection of products that you want. Simply choose a name for your category (or Set) in the field at the top. Then use the fields below to reduce the selection of products in your category down to just the ones you want.
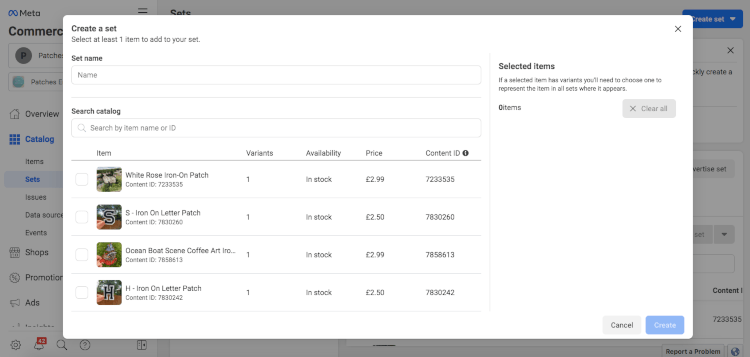
Using the manual selection, again you’ll need to name your Set at the top, then you can search for the products you’d like toadd. Simply check the tickbox to the left of the item and they’ll appear on the right. Once you have them all selected, click Create to confirm your Set.
How To Customise Your Instagram Shop
Once you have submitted your shop for approval, you can also start customising how your shop appears on Instagram and Facebook right away; even prior to approval.
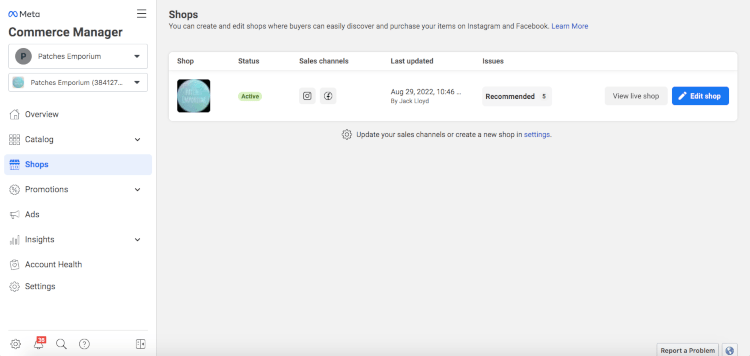
To do so, head to Commerce Manager >> Shops and click Edit Shop:
You will be presented with a screen similar to the one below that will allow you to customise different aspects of your shop.
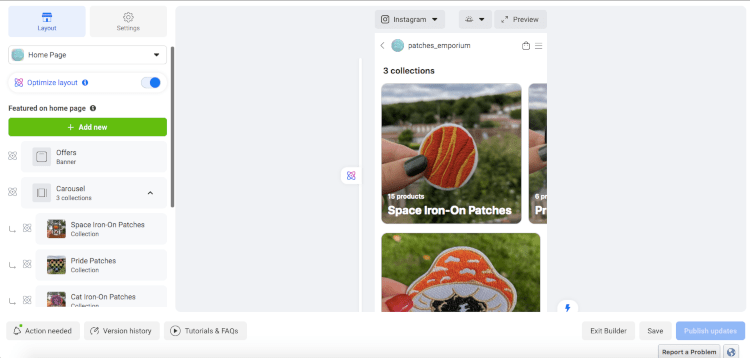
This page is divided into Layout and Settings. On the Layout tab, the first drop down option allows you to choose which page is customised. If you have created Collections in the previous section, you will see the different categories you’ve created and you can customise how each of these appear; as well as your home page.
The next option is Optimize layout. Switching this option on will allow Instagram to use the data they have about their users shopping activity to customise their experience.
Using this setting, Instagram will optimise your shop’s layout to offer the best chance of any individual user purchasing a product based on their previous shopping experience. This may mean that your shop layout will change depending on who is viewing it at the time.
This option is recommended as Instagram has enough data to make an informed choice as to what layout will work best for you. However, if you want complete control over how your shop appears, you can switch this off and build your shop manually using the settings below.
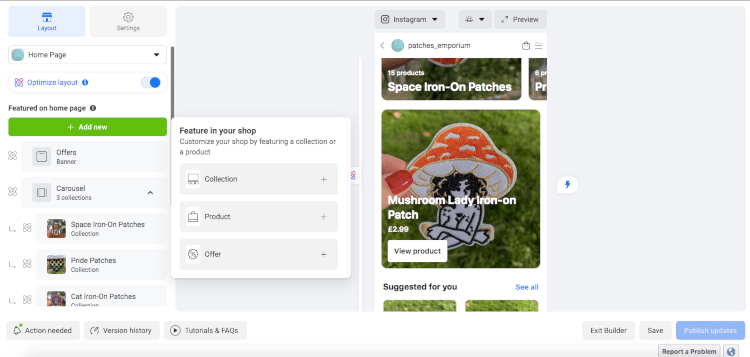
You can build upon the shop format that Meta has created for you using the rest of the options on the Layout tab.
Clicking + Add new will allow you to add a new section to the shop. You can choose to add a new Collection, Featured Products, or a special offer. For any you click, you will be presented with options and steps to create each new section.
Any of the sections that are already added can be seen underneath the + Add new button. You can customise or delete any of these by clicking on them, or rearrange the order in which they appear by dragging sections into the order you want them in.
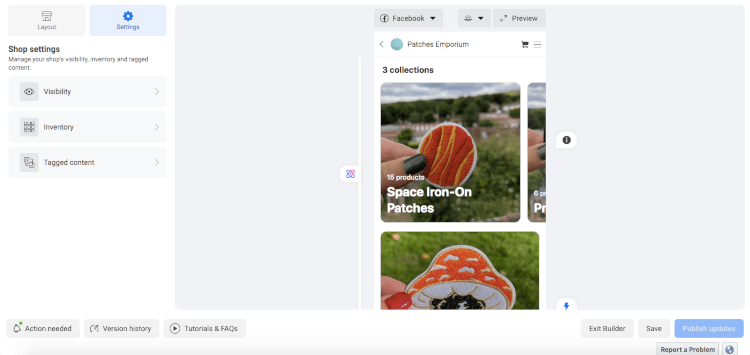
Within the Settings tab, you can customise what is displayed within your Shop from your Catalogue.
The Visibility setting will allow you to choose whether your shop is visible on Facebook, Instagram or both / neither.
The Inventory setting provides you with the option to review which items from your catalogue are displayed within your shops.
Tagged content will allow you to display tagged posts you’ve published on your page within your shop. This is a useful way to display your products in use or within a specific context.
Once you’ve finished customising your Shop, simply hit Publish updates in the bottom right to confirm your edits. Alternatively, you can press Save to retain your changes to come back to later.
When you’ve hit Publish updates, your shop will take on the customisations you’ve created. If you’re still waiting for approval, your updates won’t be live but they will be saved for when you do have approval and go live.
How to Tag Products When Posting to Instagram
Tagging new uploads to Instagram is easy. You can tag up to 5 products in a single image or video post. Alternatively, you can post up to 20 products in a multi-image post.
The process is still the same: you pick your photo, edit where necessary and add your caption. Now you’ve set up Instagram Shopping there will be a new option available to you called “Tag Products”. You’ll see this once you’ve been approved by Instagram.
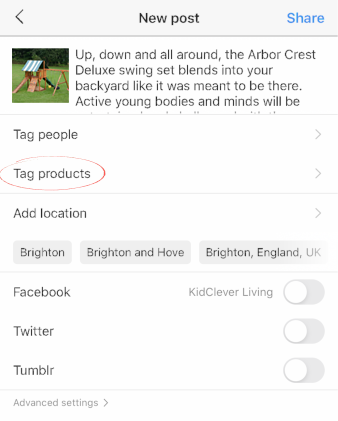
Tagging a product is very similar to tagging people in your images. Simply tap where you would like your tag to appear (this can be repositioned later), select the product from your catalogue that you are tagging and click done once you’re finished. When you publish your post, this tag will now be visible to people who tap your image and in your Instagram Shopping Tab. You can tag more than one product in a photo too.
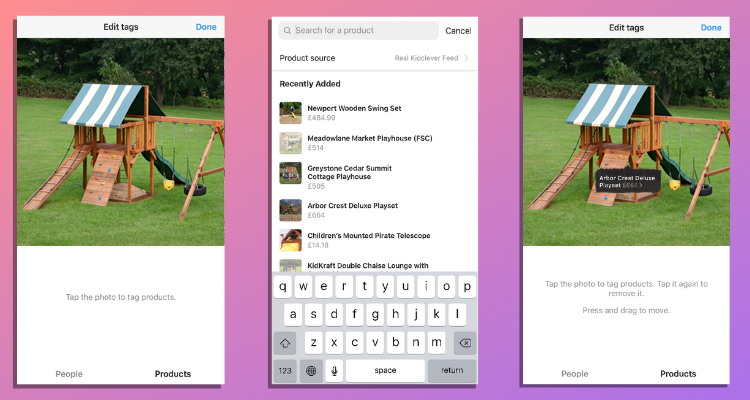
How to Tag Products in Existing Posts
You can also tag any images that you already have on your Instagram feed provided they are in your Facebook Product Catalogue. To do so:
-
On your phone, go to the post you would like to tag with a product
-
Tap the Ellipsis in the top-right corner
-
Select Edit
-
Click + Tag in the bottom-left corner of the image
-
Select Tag Products
-
Tap the image where you would like the tag to appear. (You can drag and reposition this later)
-
Select the product from your catalogue
Your followers will now be able to see this and follow the link in your Instagram Shopping tab when they tap your photo.
How to Tag Products in Instagram Stories
Instagram Stories are a great way to create engaging posts for your audience without bombarding their feeds with your posts. They only last for 24 hours but this time limit also allows you some creative freedom without posts cluttering up your profile.
Stories come with a lot of engagement features and creative flairs. You can draw on your posts, create text and add stickers to your Story. Some of these stickers allow for your audience to engage. For example, you could have a poll, host a Q&A or encourage people to click through to your products for sale.
To create Instagram Shopping Stories:
-
Go to your Instagram Profile on your phone and tap your profile picture to create a new story. (If you already have a story post, tap your logo in the top-left to add another post to your story)
-
Take a picture using your camera or select an image from your library from the bottom-left of the screen
-
Tap the Stickers icon from the top of the screen
-
Select the PRODUCT sticker
BONUS: you can also select the SUPPORT SMALL BUSINESS sticker to showcase your latest posts or those of any small business that you love to encourage people to click through to that profile!

-
Select your product from your catalogue
-
Edit the product name if required and position the sticker where you would like it to appear on your story.
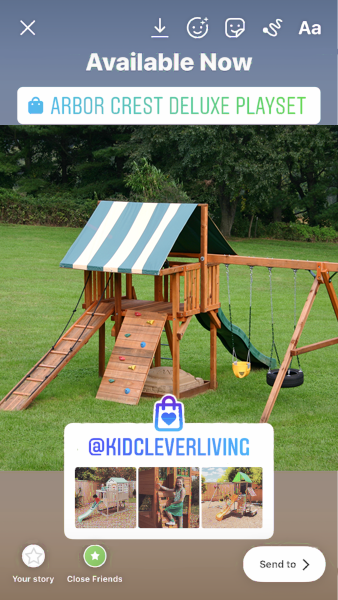
Your Shoppable Instagram Story will now be live. You can view it by tapping your profile picture.
FAQ
How long does it take to be approved for Instagram Shopping?
In some cases, being approved could take just a matter of hours. In other situations it could take a few days or even up to a couple of weeks. If you haven’t been approved in this time, you should open a ticket with Facebook to find out what’s happening.
I haven’t been approved by Instagram, what can I do?
This will be because Facebook consider your account likely to be in violation of one of Instagram’s Commerce Policies. You will need to review these Commerce Policies to see where your account may be in violation, make any changes and then wait until you are able to resubmit your application to use the feature. If you think you meet the criteria, open a ticket with Facebook to discuss this with them.
Why are there no products showing in my Instagram Shopping tab on my profile?
When you are accepted to use the feature, your Instagram Shopping tab will be empty until you start tagging your posts. The Instagram Shopping Tab will not import all your products from the Facebook Catalogue. Instead they will build up the products in your Instagram Shopping tab as you tag products on your Instagram posts.
Why are products I’ve tagged showing as pending?
It’s likely that your product goes against Instagram’s Broad Level Policy and will be subject to review. Check to see whether your product fits with Instagram’s Commerce Policy. If your product isn’t accepted but you feel it meets all the criteria, you can reach out to Facebook to find out more and try to correct this.
Why can’t I sell directly on Instagram?
Instagram Checkout from Facebook is currently in BETA testing and is only available in some parts of the United States. They plan to roll this feature out to more countries in the future.
Does adding a product to my Instagram Story add it to my Shopping Tab?
No, only products that have been tagged in your posts will then appear in your Shopping Tab. However, you can save your Stories as Highlights so that they will always remain on your profile. This would be a great way to sort your stories into categories for shopping.
Related Articles
Related Articles


More Questions?
If you have any further questions, please get in touch and we will be happy to help.
Get in Touch