Help Centre
Support > Promoting Your Website > General Marketing
How To Create A Facebook Catalogue
Updated August 2022
Setting up a Facebook Catalogue enables you to create a Facebook Shop and also begin making Shoppable Instagram Posts. You can also use it to set up individual product adverts on Facebook so you can retarget customers who have visited your store but not purchased the products they looked at.
You can automatically send all the products in your Create store through to a Facebook Catalogue by following the instructions below to set up your product feed.
Once this is set up Facebook will regularly check the feed and update any information including your stock levels, price or product descriptions which you may be changing on your website products. This will keep your Facebook shop automatically updated on your Facebook page.
Facebook Catalogue Product Requirements
Before you get started, the following information is required for Facebook to successfully display a product. You will need to ensure you have entered all the relevant information in the products listed in your Create store as outlined below:
On the Product Information tab
Title - Enter the name of your product
Short Description - Include a short description for your product. If this is left blank Facebook will use the first part of your long description.
Long Description - Include the content for your product
Product Condition - Ensure the condition of your product is set to New, Used, or Refurbished. You can also set a default for all your products in the Shop Settings area
Price - Enter the sale price of your product
On the Product Identifiers tab
Brand - Specify the brand of your product. This is a required field so we recommend entering your company name if the product does not have a brand (if they are handmade, for example). Set a Default Brand.
Google Category - Choose the category which is most relevant to your product as Facebook will use this for understanding the type of products in your shop. Set a Default Google Category.
On the Product Image Upload
Main Product Photo - Ensure you have a good quality high-resolution photo which is at least 600 x 600 pixels in size.
How to Create a Facebook Product Catalogue
Please ensure you have added all of the required product identifiers to all of your products, as mentioned in the start of this guide, before proceeding.
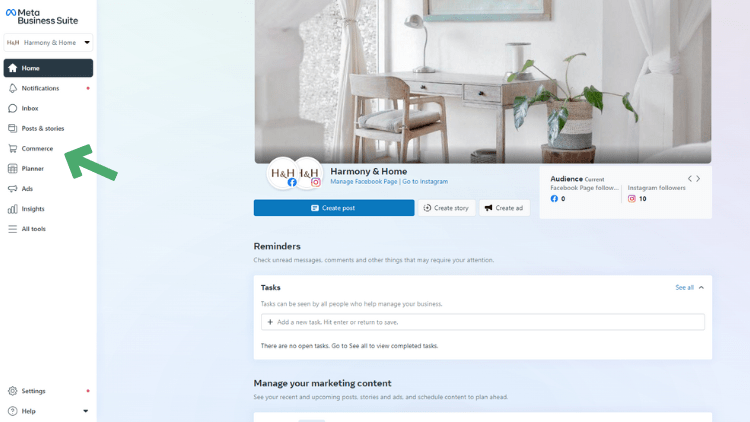
1. Go to Meta Business Suite
2. Select Commerce from the left-hand menu
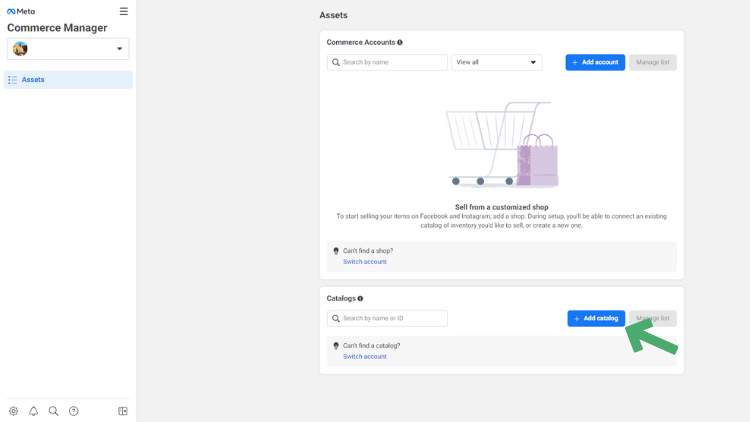
3. Click + Add Catalog at the bottom of the page
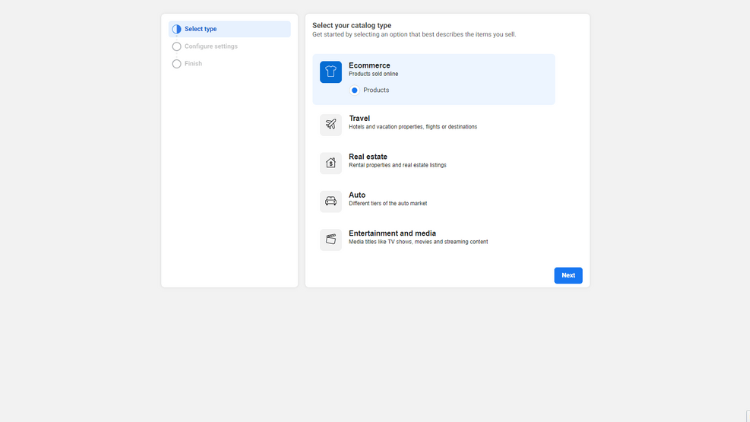
4. Select Ecommerce and click Next
5. Leave Upload Product Info selected
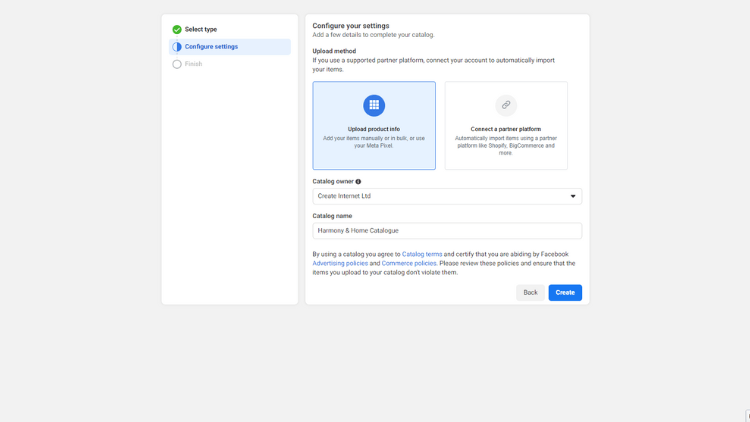
6. If you manage multiple business pages you’ll need to select the catalogue owner from the drop-down list
7. Give your catalogue a recognisable name
8. Click the Create button to complete the setup and on the next page press the View Catalogue button
How to Set Up Your Facebook Product Catalogue Feeds
To create a Facebook Catalogue, you will need to set up two feeds: The Replace Feed Details Feed and the Update Feed Details Feed. This is done by copying the Feed URLs from Create into Facebook.
The Replace Feed Details URL is used to keep your Facebook Product Catalogue and your Create stock perfectly in sync each day. It will also remove any deleted products on your Create Shop from your Facebook Catalogue. This only needs to be done daily to keep your Facebook Catalogue working as it should. However, if you need to, you can request a manual refresh at any time from your Facebook Commerce Manager.
The Update Feed Details URL is used to manage your product details on a regular basis. This feed will update your product information such as prices, descriptions and stock regularly throughout the day so that everything in your Facebook Catalogue stays current.
To find the feed URLs in your Create account:
1. Log in to your Create account
2. Click on Shop on the top menu
3. Click on Sales Channels in the left menu
4. Click on the tab Facebook/Instagram Shopping
The Replace Feed Details is the one you’ll need for the initial setup of your products in the next steps. Copy this to your clipboard.
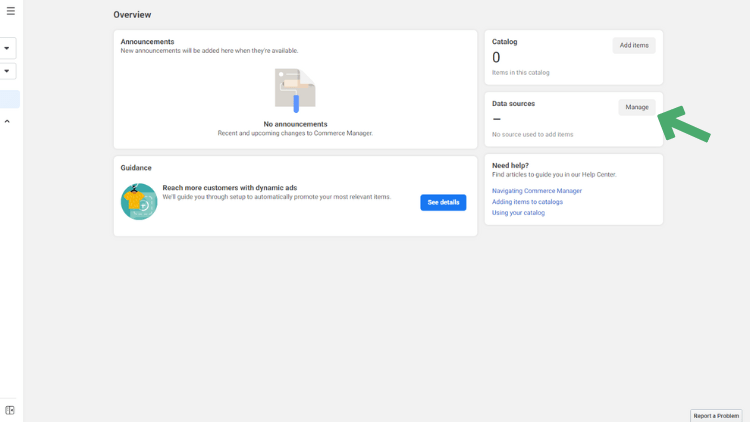
5. In the Commerce Manager, click Manage from the right-hand side in the Data Sources box
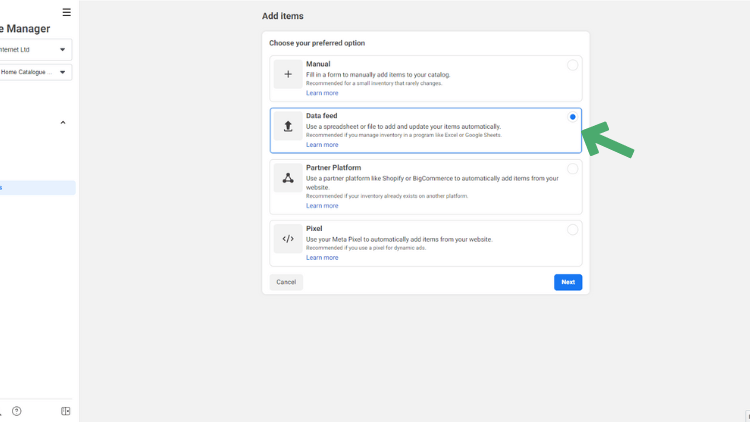
6. Choose the Data Feed option and press the Next button
7. When prompted "Are you ready to upload your spreadsheet or file?", select Yes and then click Next.
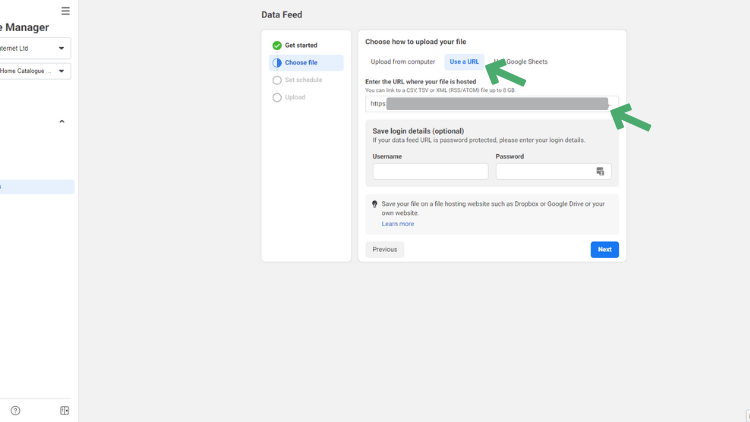
8. Select the Use a URL tab, enter the Replace Feed Details found in your Create account in the box labeled Enter URL and press the Next button
9. Select Daily in the update schedule on the next screen, choose the time you’d like the feed to be collected each day by Facebook. Press the Next button to continue.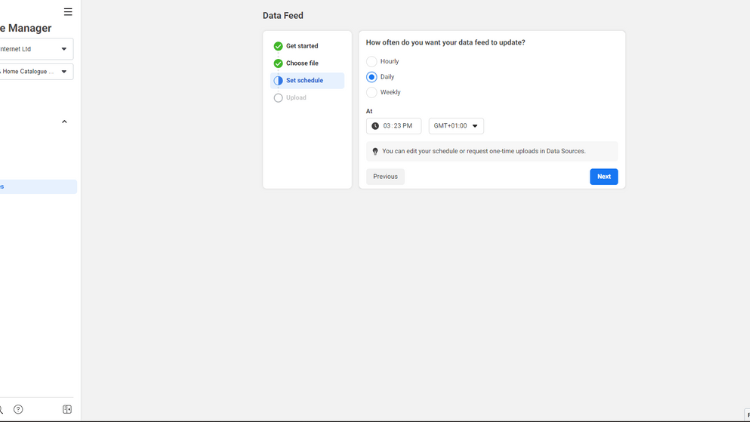
N.B If you make a lot of changes to your products and want Facebook to update and not wait for your daily scheduled time you can request an immediate catalogue refresh in the Product Data Sources area.
10. Review your selections, you may also need to change your default currency here.
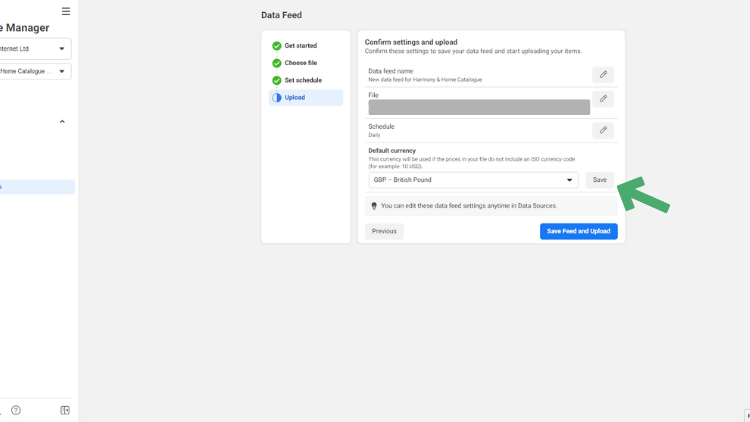
11. Press the Save Feed & Upload button.
N.B. Your products will now be uploaded to Facebook. Please be aware that you may see warnings relating to HTML in your Long Product Description. This is where Facebook is stripping back any formatting from your website to fit the format of their platform. This will not affect the performance of your catalogue and can be ignored.
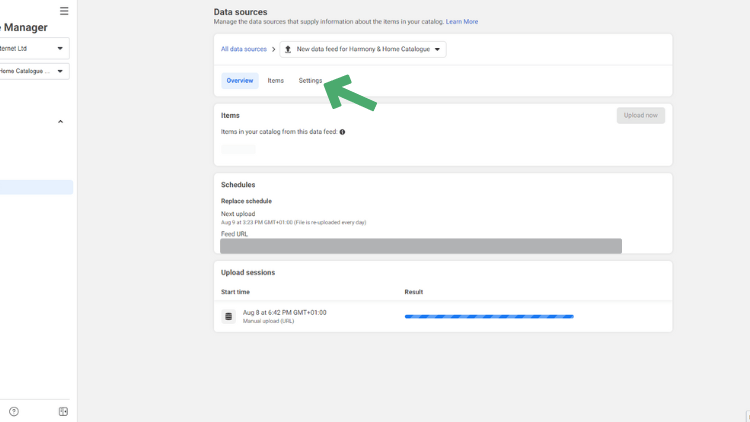
Once completed you’ll need to set your Update feed from which Facebook will get any product changes and stock levels on an hourly basis.
12. Open the Settings tab on the Data Sources screen
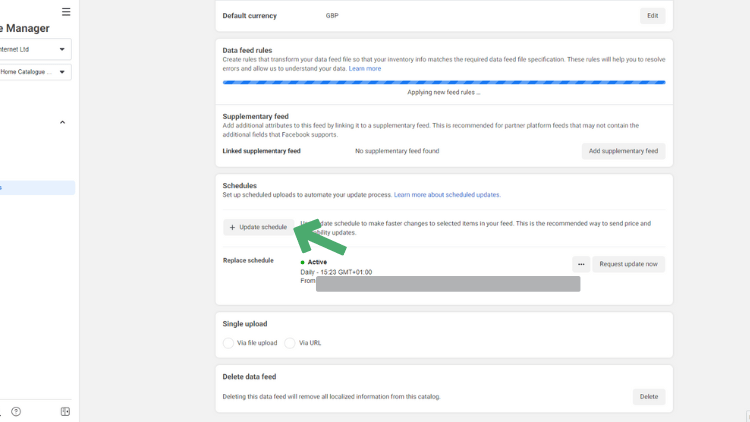
13. Scroll down and click the button labelled + Update Schedule
14. Select Hourly for the frequency
15. Switch OFF Automatic Updates. This is taken care of by your feed.
16. Head back to Create and copy the Update Feed Details URL to your clipboard
17. Go back to Commerce Manager and paste your URL into the highlighted field
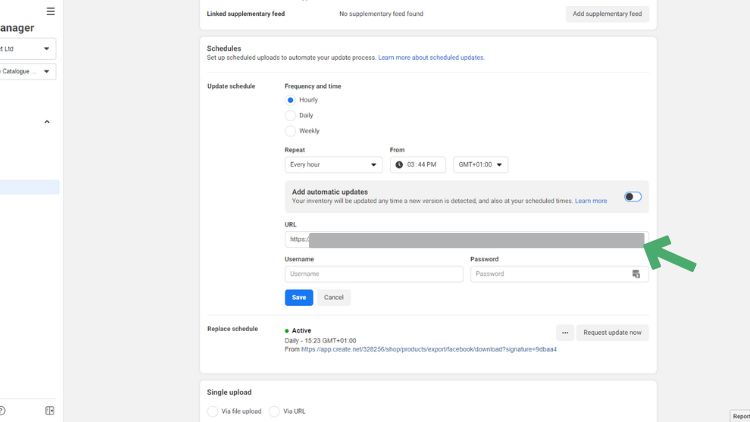
18. Click the Save button to store this information
Facebook will now process your upload, you’ll receive an email once this is complete and you’ll be able to look at the status of your product. Once your products have been successfully added to the Facebook catalogue you can use this to build a Facebook Shop, create Instagram Shopping pins or start advertising your products on Facebook.
Want to see the Facebook Catalogue working in action? Check out how we set it up on one of our demo sites and the results we got on our blog:
How Sales Channels Can Be a Game Changer for Your Marketing >>
Related Articles


More Questions?
If you have any further questions, please get in touch and we will be happy to help.
Get in Touch