Help Centre
Jump to section:
- Create a Facebook Shop
- How To Create Product Collections
- How To Customise Your Facebook Shop
- Tag Products in Your Facebook Posts
Shopping on social media has become more and more prevalent in the past few years to the point now where it’s a must have for any growing ecommerce store. The Facebook Shop and Instagram Shopping features are essential to any online store owner’s marketing arsenal.
Create allows you to syncronise and manage your stock across both Facebook and Instagram so you can take full advantage of all the opportunities on social media. This means that rather than having to build and update your stock and descriptions on social media each day, Create will relay all the information to Facebook for you on a regular basis.
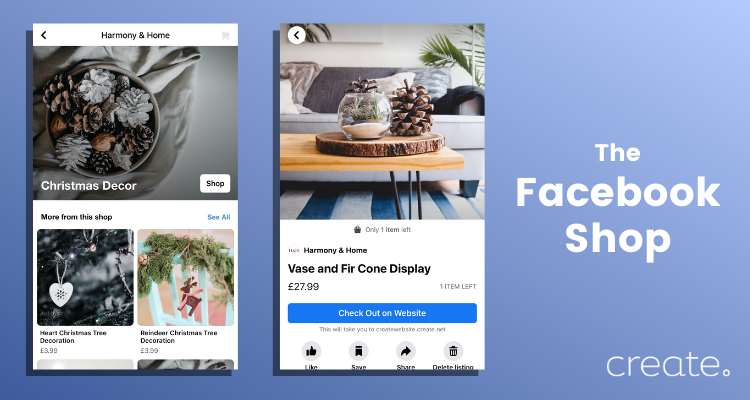
The Facebook Shop will showcase all of the products from your online store. Each listing will link directly through to where your people can make a purchase on your Create website.
Helping your customers to purchase from social media is now easier than ever and the Facebook Shop comes with a range of new marketing options and opportunities. Here’s how you can set up and get started.
You will need to have set up your Facebook Catalogue in order to manage your products across these platforms.
You can set up your Instagram Shop at the same time by following the steps in this guide.
How To Create a Facebook Shop From Your Catalogue
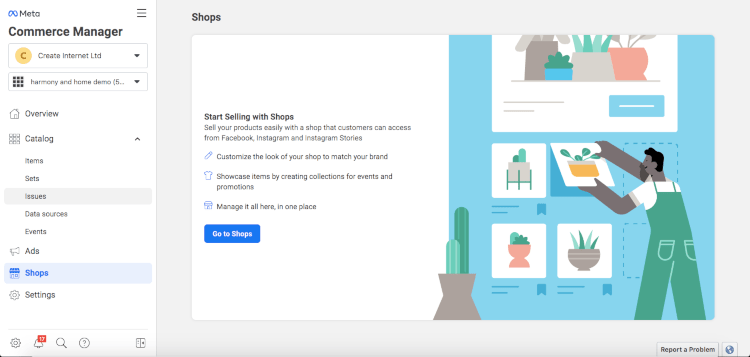
1. Go to Commerce in the left-hand menu of Meta Business Suite
2. Select Shops from the left-hand menu and click Go to Shops
3. Skip the next screen by clicking Next
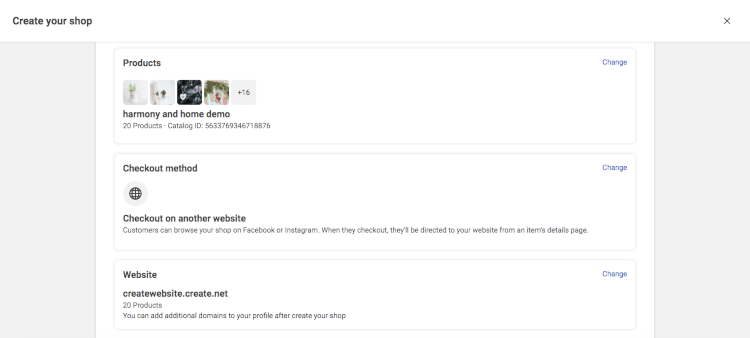
4. You will be presented with a Shop Overview page. You will need to double check all these details are correct. Note that the Checkout Method should remain as Checkout on another website
5. On the next page, you need to specify the locations you will ship to and agree to the Seller Agreement.
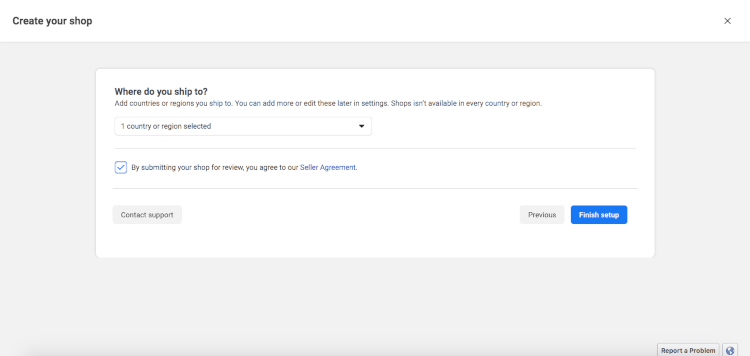
6. Once you’re happy with everything, press Finish setup.
Your profiles will be reviewed by Meta and you will be notified of the status of your application to their shopping features. This can take up to 4 weeks. In the meantime, it’s recommended to continue posting to show that your profiles are active to support your applications.
How to Create Product Collections
While you’re waiting for your Shop to be approved, you can get started with organising your products into categories; or Collections / Sets as Meta refers to them. This will be helpful later on for grouping products together in your shop and helping people navigate to the products they’d like to browse.
These Collections will be available to use in both your Facebook and Instagram Shops.
To get started. Head to Commerce Manager >> Catalog >> Sets and click Create Set in the top-right.
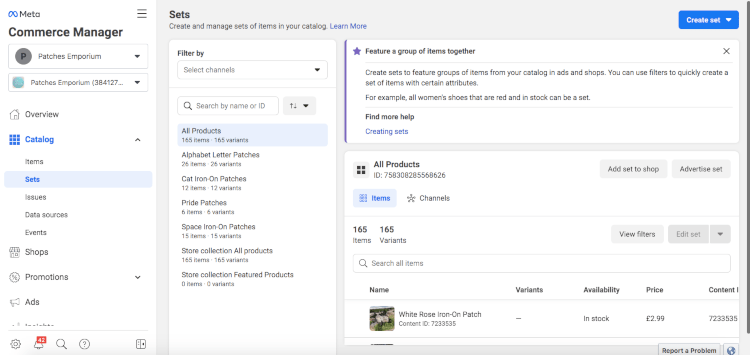
You can choose to either select the products you’d like to use in your category by using filters, or selecting them manually.
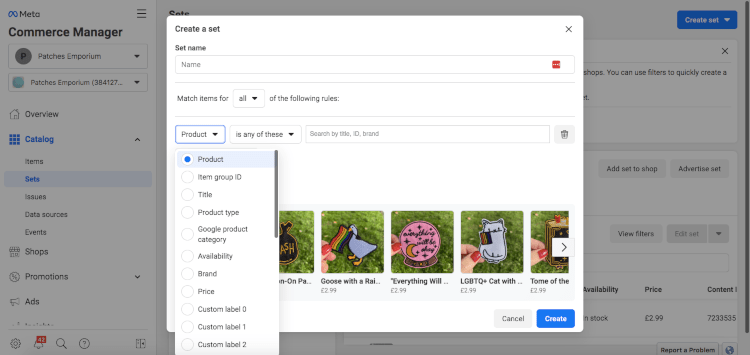
Using filters, you can combine rules to find the selection of products that you want. Simply choose a name for your category (or Set) in the field at the top. Then use the fields below to reduce the selection of products in your category down to just the ones you want.
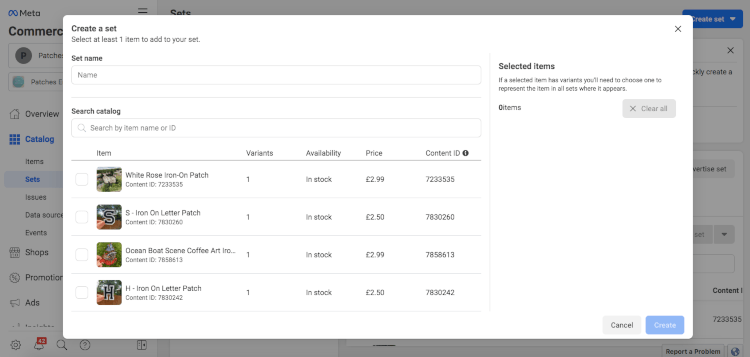
Using the manual selection, again you’ll need to name your Set at the top, then you can search for the products you’d like to add. Simply check the tickbox to the left of the item and they’ll appear on the right. Once you have them all selected, click Create to confirm your Set.
How To Customise Your Facebook Shop
Once you have submitted your shop for approval, you can also start customising how your shop appears on Facebook and Instagram right away; even prior to approval.
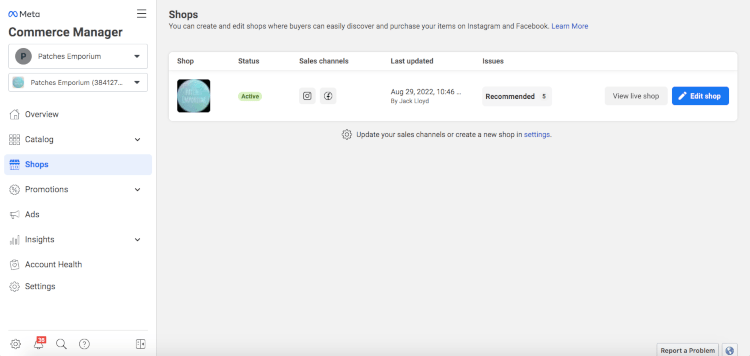
To do so, head to Commerce Manager >> Shops and click Edit Shop:
You will be presented with a screen similar to the one below that will allow you to customise different aspects of your shop.
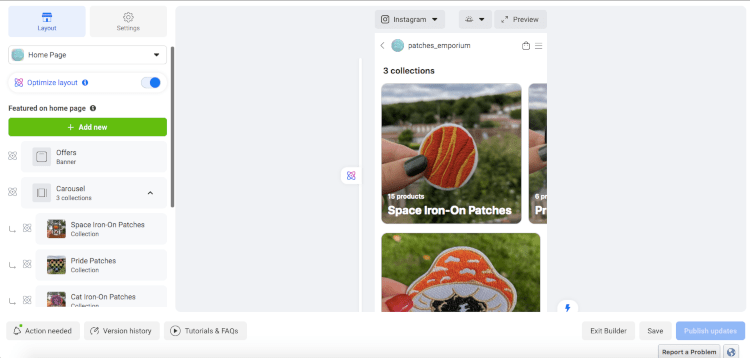
This page is divided into Layout and Settings. On the Layout tab, the first drop down option allows you to choose which page is customised. If you have created Collections in the previous section, you will see the different categories you’ve created and you can customise how each of these appear; as well as your home page.
The next option is Optimize layout. Switching this option on will allow Facebook to use the data they have about their users shopping activity to customise their experience.
Using this setting, Facebook will optimise your shop’s layout to offer the best chance of any individual user purchasing a product based on their previous shopping experience. This may mean that your shop layout will change depending on who is viewing it at the time.
This option is recommended as Facebook has enough data to make an informed choice as to what layout will work best for you. However, if you want complete control over how your shop appears, you can switch this off and build your shop manually using the settings below.
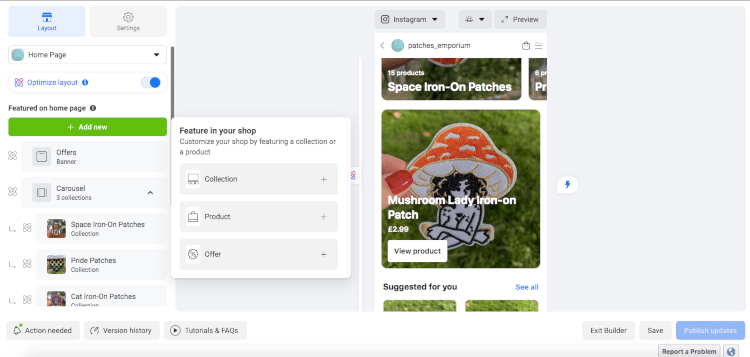
You can build upon the shop format that Meta has created for you using the rest of the options on the Layout tab.
Clicking + Add new will allow you to add a new section to the shop. You can choose to add a new Collection, Featured Products, or a special offer. For any you click, you will be presented with options and steps to create each new section.
Any of the sections that are already added can be seen underneath the + Add new button. You can customise or delete any of these by clicking on them, or rearrange the order in which they appear by dragging sections into the order you want them in.
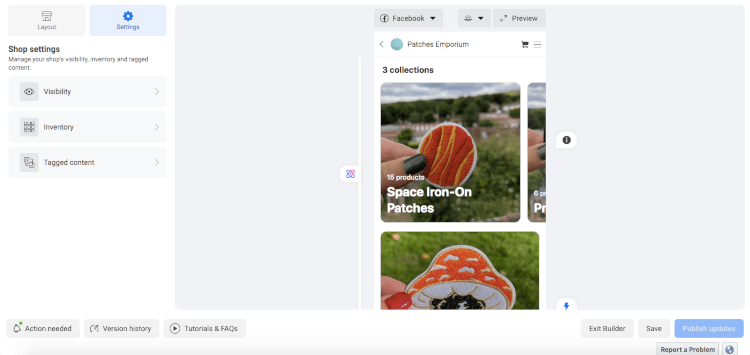
Within the Settings tab, you can customise what is displayed within your Shop from your Catalogue.
The Visibility setting will allow you to choose whether your shop is visible on Facebook, Instagram or both / neither.
The Inventory setting provides you with the option to review which items from your catalogue are displayed within your shops.
Tagged content will allow you to display tagged posts you’ve published on your page within your shop. This is a useful way to display your products in use or within a specific context.
Once you’ve finished customising your Shop, simply hit Publish updates in the bottom right to confirm your edits. Alternatively, you can press Save to retain your changes to come back to later.
When you’ve hit Publish updates, your shop will take on the customisations you’ve created. If you’re still waiting for approval, your updates won’t be live but they will be saved for when you do have approval and go live.
How to Tag Your Products in Facebook Posts
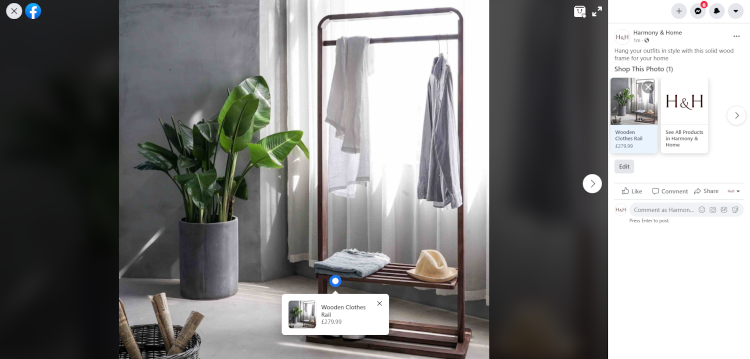
When you’re happy with your Facebook Shop setup, you can start driving your Facebook audience to take action and check out your products. One of the ways in which you can do this is by tagging your products in your posts.
This allows you to feature your products in images. If someone taps the photo you’ve posted and it includes a product tag, Facebook will show them the details of the product and link through to your Shop. This can be done on new posts or any of your existing posts.
Here’s how you can set up product tags:
How to Tag Products in a New Post
1. Start creating a post for your page as you normally would
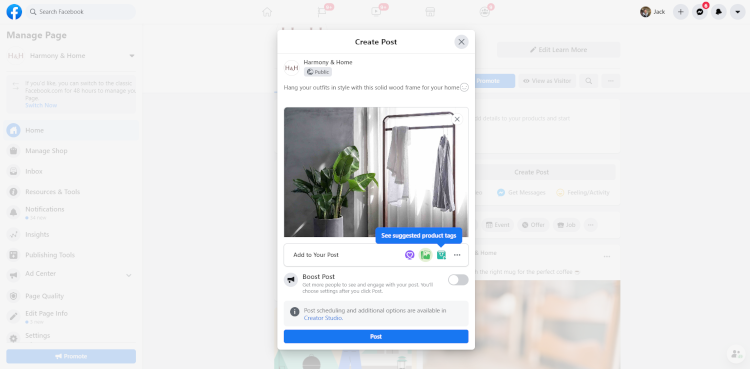
2. Once you’ve written your content and added a picture, select the cyan Tag Products icon underneath your image
3. Click on your image where you’d like your tag to appear
4. Search for your product and select it from the list
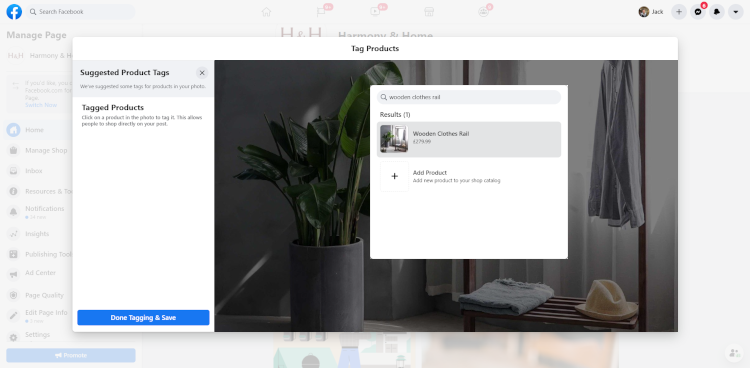
5. Click Done Tagging & Save in the bottom left
Your product will now be tagged on your post and anyone that views the post can click through to buy your product.
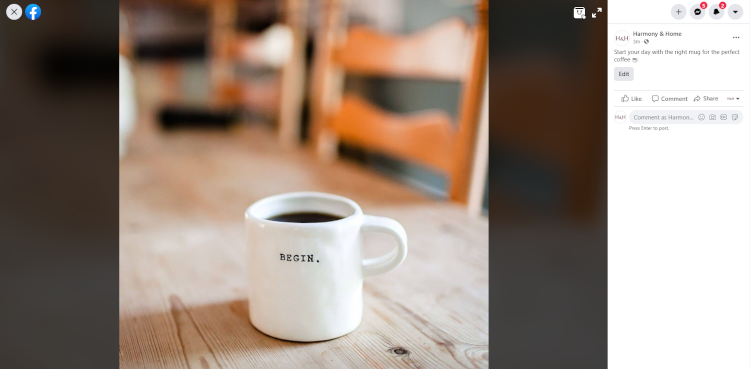
How to Tag Products in Your Existing Posts
1. Go to your Facebook page and click on a post you would like to tag a product in
2. Click the Tag Product icon in the top right of your image
3. Click on your image where you’d like the tag to appear
4. Search for your product and select it from the list
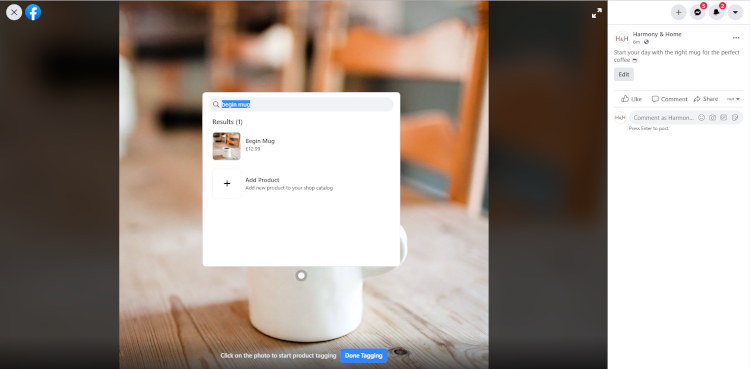
Your product will now be tagged on your post and anyone that views the post can click through to buy your product.

Related Articles


More Questions?
If you have any further questions, please get in touch and we will be happy to help.
Get in Touch