Blog > How To Make An Instagram Landing Page
Do you update your Instagram followers about new products, blog posts and other content?
It’s irritating not being able to add a link to your latest blog or product that your followers can click through in your post description. Unless you have over 10,000 followers (which most small businesses don’t) you’ll only have one clickable link on your profile.
You’ll want to maximise the way you use this link and ensure you’re providing your Instagram followers with the information they are looking for. A special landing page is the best way to do this.
The post below will explain how to build an Instagram landing page using Create’s Website Builder but you can apply the same principles to any web design tools.
Before you start building have a think about what kinds of content you currently share on Instagram and look at your last few posts there. What would be good to add to the page? What are your Instagram followers hoping to find? What do you want your followers to see?
Why not take a look at the Instagram landing page we have built for ourselves. We’ve added a mixture of blog posts, links to our website main pages and other social media.
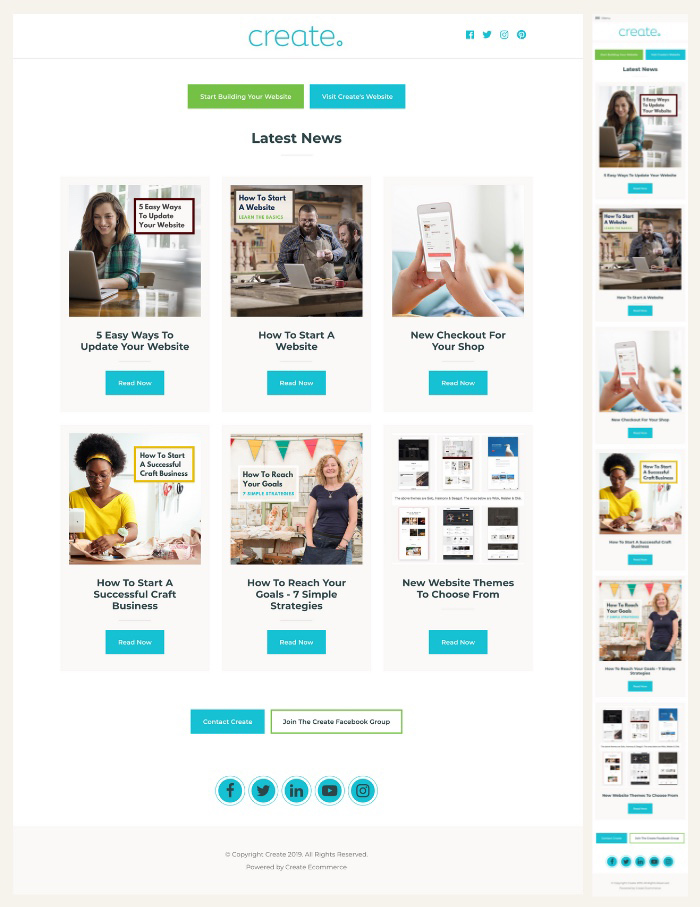
We’re always writing the links to blogs in Instagram posts, knowing that our followers will have to copy and paste them on their phone if they want to read them, so we’ve been thinking about a way to improve their experience.
Above is a screenshot of the Instagram landing page which shows you how the page displays on desktop (on the left) and on mobile (on the right). Because you’re building for Instagram visitors they will be mostly viewing your page on their mobiles so you should consider the mobile experience as a priority.
We’ve kept our landing page really simple and included a “Call To Action” block with two buttons that take visitors to our website or to sign up for a free trial. Next, we’ve added content for our latest news and blog posts and then a couple more buttons to get in touch or join the Facebook group. We’ve ended with our social icons to alert Instagrammers that we’re on other platforms. This might encourage them to follow us in more than one place.
To build your own Instagram landing page you’ll need to create a new page that is not accessible from your website. This will be a page specifically for people you direct from Instagram. To do this, follow the steps below:
-
Click on Content on the top menu
-
Click on the green button Add Page in the top right
-
Choose to build a Content Page by clicking on the box
-
Enter the name of your page in the fields “Page Title” and “Menu Title”. You could call it Insta-Links or Instagram Page
-
For the Shown on Menu option select "No" with the toggle
-
Set your “Page Filename” by entering the part of the filename before .html. For example you might want it to be "https://www.mywebsite.co.uk/insta-links.html" and should put "insta-links" in the box.
-
Click the green Save Changes button to add the page
Once you’ve set up the page you’ll be taken through to the screen to choose the design preset of the page. For this type of page choosing the “Blank Page” option is best as you won’t need to delete lots of unnecessary blocks.
Once you’ve clicked on “Blank Page” the page you’re building will load in with the block selector to the left. The block selector is where you will find all the different types of content you can add to your page.
There are lots of block options to choose from so you’ll be able to make a landing page that’s unique to you and the content you’re sharing.
In the next steps, we’ll deconstruct the landing page we have made as an example of how you could build your own page.
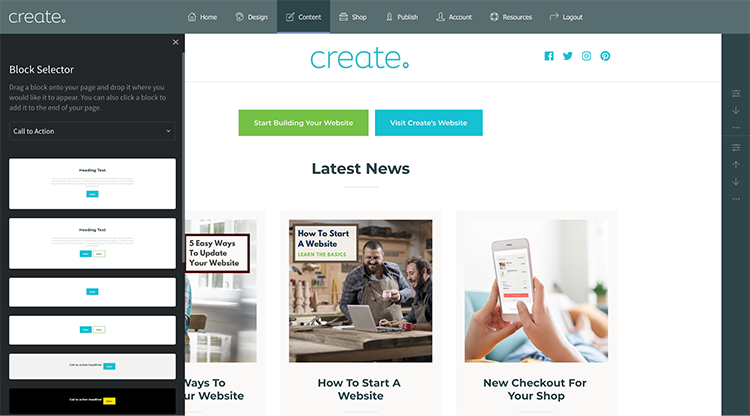
To set up a button on your website select “Call To Action” in the block selector drop down list. Then choose from the blocks available. We chose the two button option for our landing page but you might prefer a single button.
You could keep it really simple and build your whole page with a number of button blocks which take you to different places on your website. This is a super easy option for getting started and easy to update too.
To set up your button take the following steps:
-
Click into the button text and type in what you would like the button to say.
-
Hover over your button to see the settings toolbar appear on it.
-
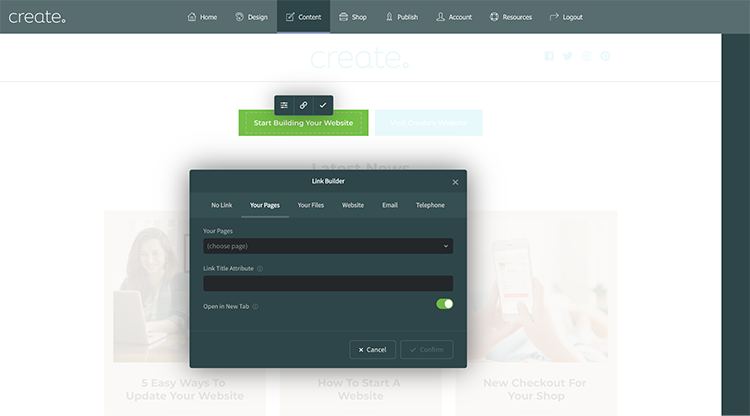
Click on the link icon on the settings toolbar and the Link Builder window will appear.
-
Select “Your Pages” and then find the page you’d like to link to in the drop down list.
-
When you’ve selected the page you’d like to link to press the continue button in the bottom corner.
We share our latest blog posts on Instagram so we wanted to include these on the page, you might want to include some of your products or “New In” shop categories. It could be a mixture of all of these.
To display these we chose one of the “Collections” block types. Choosing a collection means all the items will appear exactly the same and you can just add a new one in, drag the order around or delete one when you need to. They’ll flow in a line or appear one beneath the other for mobile meaning it does the mobile responsiveness for you.
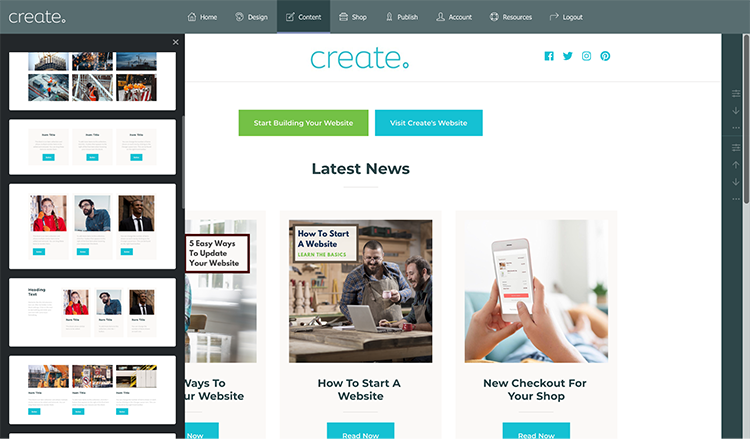
To add the “Collections” block take the following steps:
-
Click the + button in the bottom left corner to add a new block
-
Select “Collections” in the block selector drop-down list.
-
Click on the block you’d like. Don’t forget there are Variant options for how the block will display so take a look at these by clicking the “Variants” link in the corner of the block
-
You can choose a block with or without pictures depending on what content you have to make the page.
-
Once you’ve added the block to the page you should edit the text on each item to what you would like it to say. Then hover over the individual elements to see their toolbars appear. From here you can link each element through to the page you want (use the steps from adding a button above).
-
Make every element a link to ensure you are making it easy for your Instagram follower to click through on their mobile.
When you release a new product or blog post you can come back to this page and either add a new item to the collection, replace an old one or drag the order around. It’s a good idea to keep the newest content at the top too as it will be more likely your followers will be looking for this.
Finally, we’ve included icons for our other Social profiles. This is to encourage visitors to the landing page to come and join us in those other places and makes it easy for them to click through immediately or launch the relevant app if they have it on their phone.
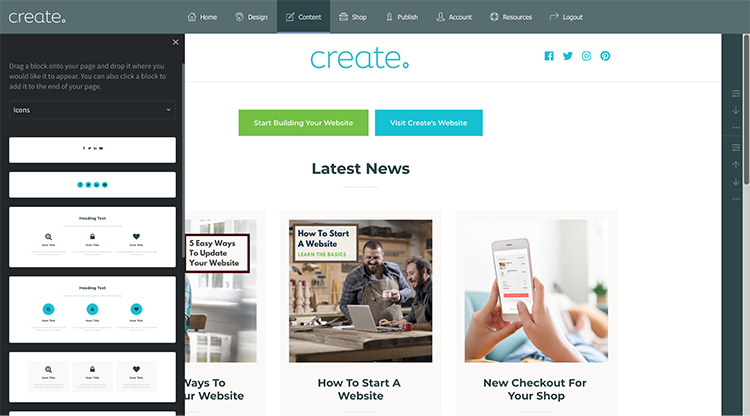
The social media icons can be easily displayed by adding an “icons” block”. To add yours you should do the following:
-
Click the + button in the bottom left corner to add a new block
-
Select “Icons” in the block selector drop-down list.
-
Click on the block you’d like. Our landing page has the second option with the larger icons.
-
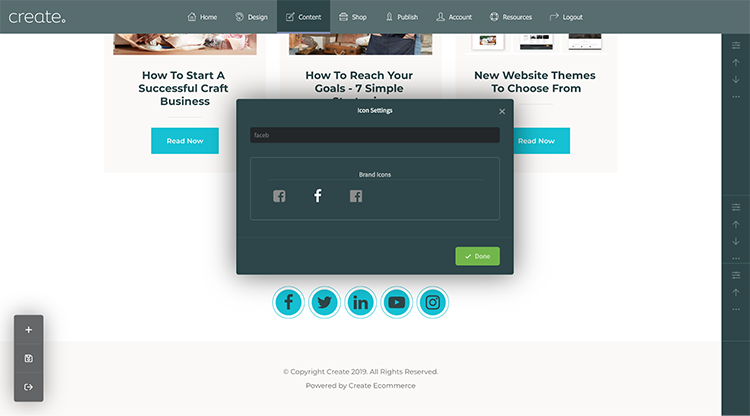
You’ll now need to set up each icon. Hover over the icons for the Icon Settings toolbar to appear and click the settings option.
-
Click the “Add Item” button to choose a new social icon, use the search to quickly find what you are looking for.
-
Once you’ve added a new social icon click the “Link” button to update it to your social profile
-
Delete any social icons you don’t need using the rubbish bin.
Once you’ve built your Instagram landing page you’ll need to publish your website. Then you can head over to your Instagram profile and update the website link in your profile.
5 steps to an effective Instagram landing page:
-
Add specially tailored content that you’ve shared on Instagram
-
Build the page with mobile first in mind as Instagram followers are more likely to be on their mobiles
-
Add an email sign up box to capture more information about your Instagram followers
-
Update regularly and put the content you’ve shared most recently at the top
-
Make it easy for your followers to contact you from the page
Now that you're driving traffic to your website through your Instagram, how do you then move your visitors towards making a purchase or enquiry? Read our 8 easy ways to improve your home page to find out how to optimise one of the most highly visited pages on your website.
Have you built your own Instagram landing page? Share it and discuss in the comments below what’s worked for you.
