Help Centre

What is Xero?
Xero is a popular automated accounting software to manage your day to day business tasks. They have offices based here in the UK and offer a range of support to small businesses to help you be successful when it comes to your finances.
The Financial Export Tool we provide as part of our Order Management system allows you to export your order data in a variety of different CSV formats. One of the options we offer is a Xero compatible CSV.
With Create, you can export a Xero formatted CSV of all your orders into one file, which you can import into your Xero account.
Please read below for further details of how.
How to export your order from Create?
1. Log in to your Create Account
2. Select Shop on the top menu.
3. Click Order Management in the left menu
4. Select Orders from the expanded menu
5. Click on Export in the top right-hand corner to open the Financial Transaction Export panel
6. Select Xero from the Format drop-down list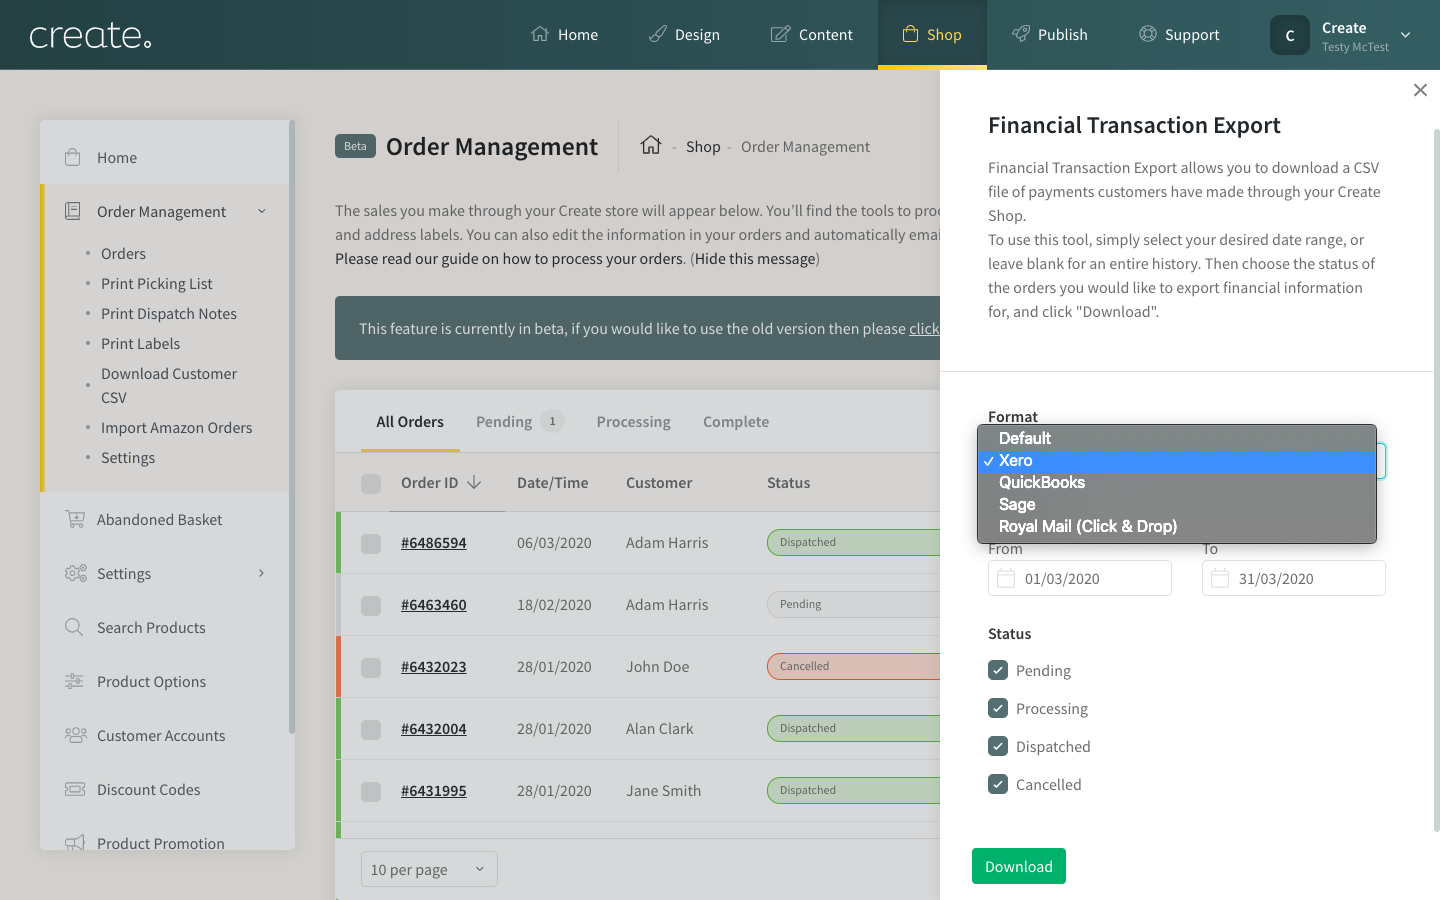
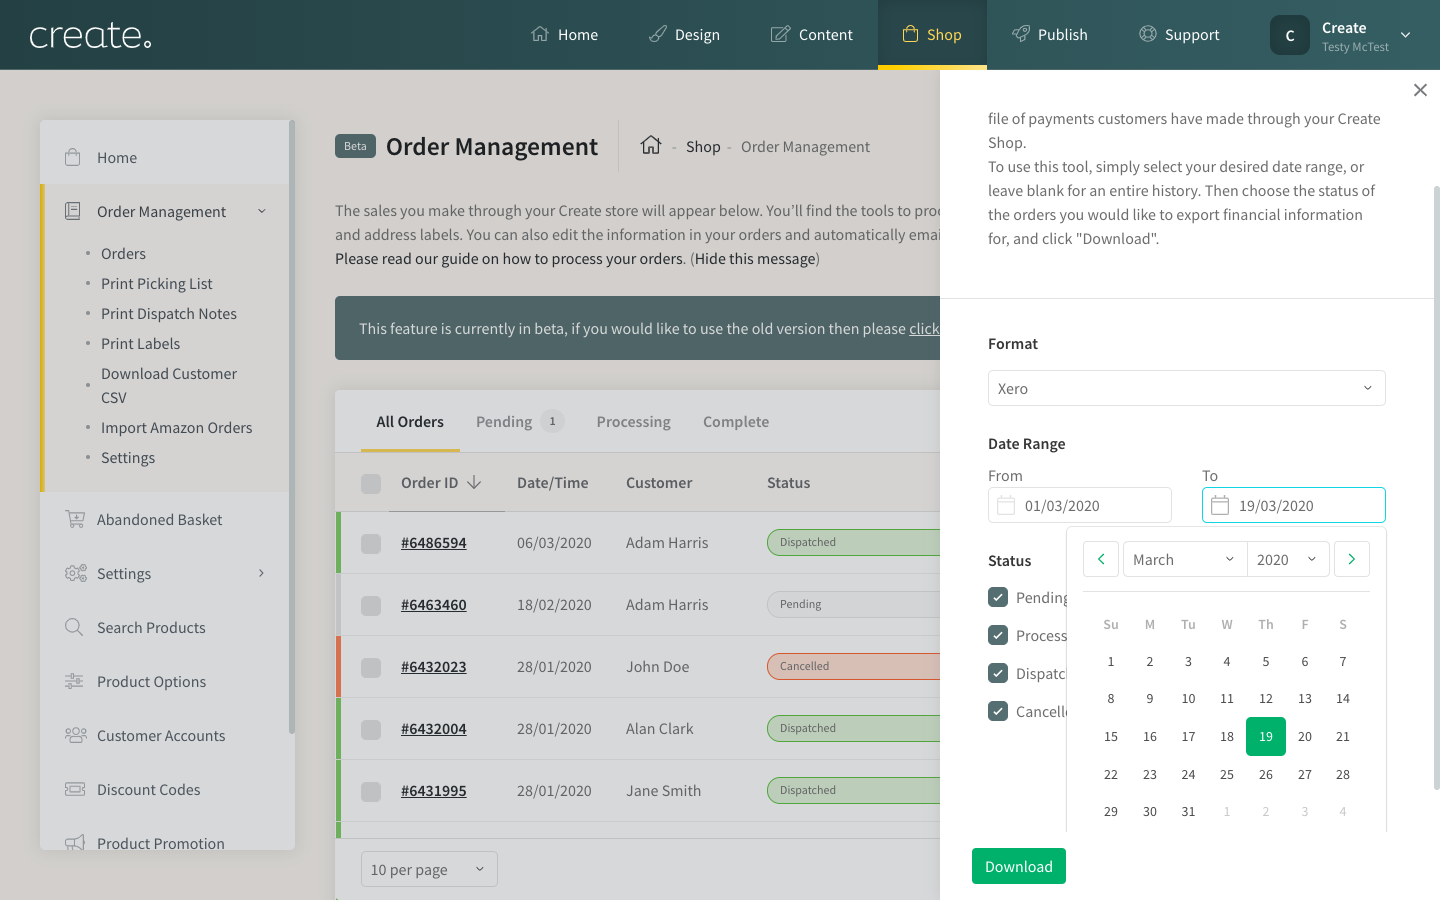
7. Use the Date Selector boxes to choose the order dates you’d like to include
8. Select the order status(s) you’d like to be included by ticking the boxes.
9. Click the green Download button to start the file download process.
*Please note that Create will always export the Orders as Tax Exclusive, regardless of the Tax settings in your Create account.
**For any orders where a Discount Code was used, the discount value will always be listed as a percentage of the order total. This will mean that the discount displayed in the CSV will differ to your setting in Create, but the value of the discount remains the same.
How to Import Your Orders Into Xero Accounting Software
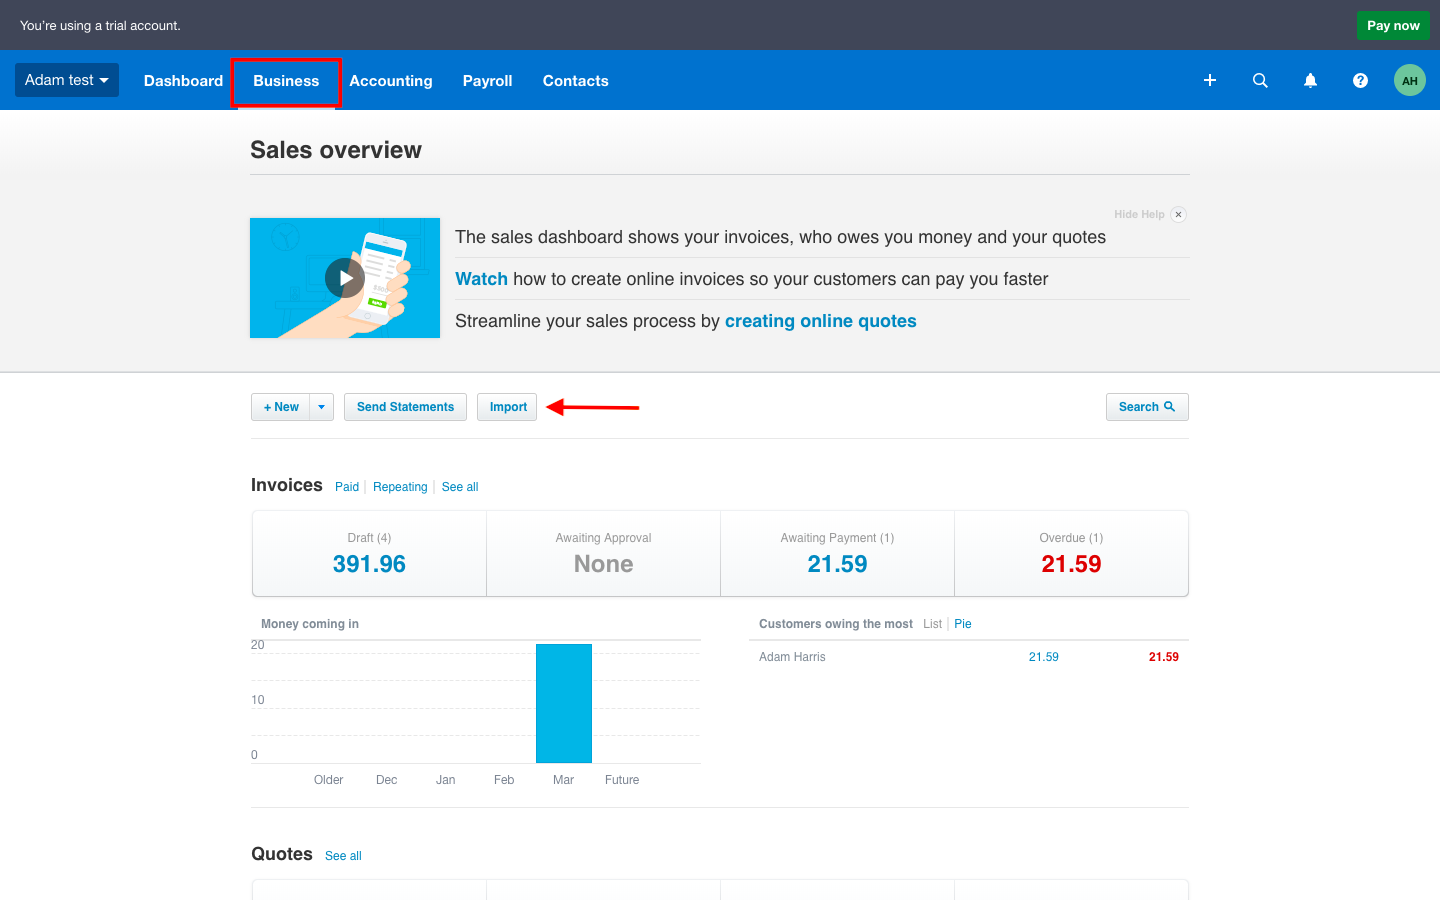
2. Click on Business in the top menu
3. Select Sales Overview
4. Click Import
5. The import screen will display, click Browse to locate your Xero CSV
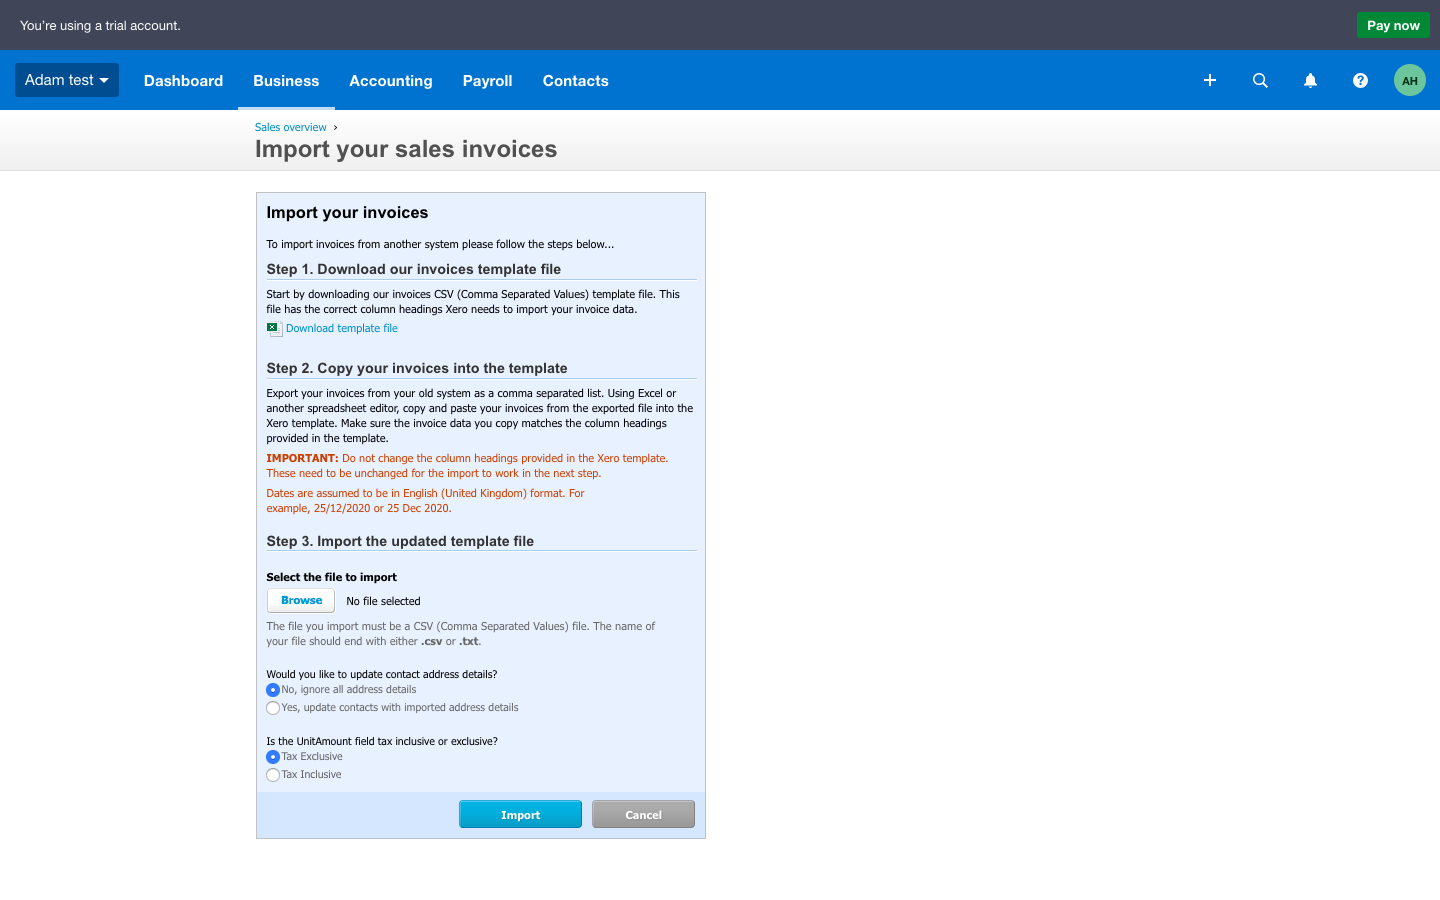
6. Click Import*
*Please note that Create will always export the Orders as Tax Exclusive, regardless of the Tax settings in your Create account.
7. Imported orders will then be located in the Draft section of your Invoices.
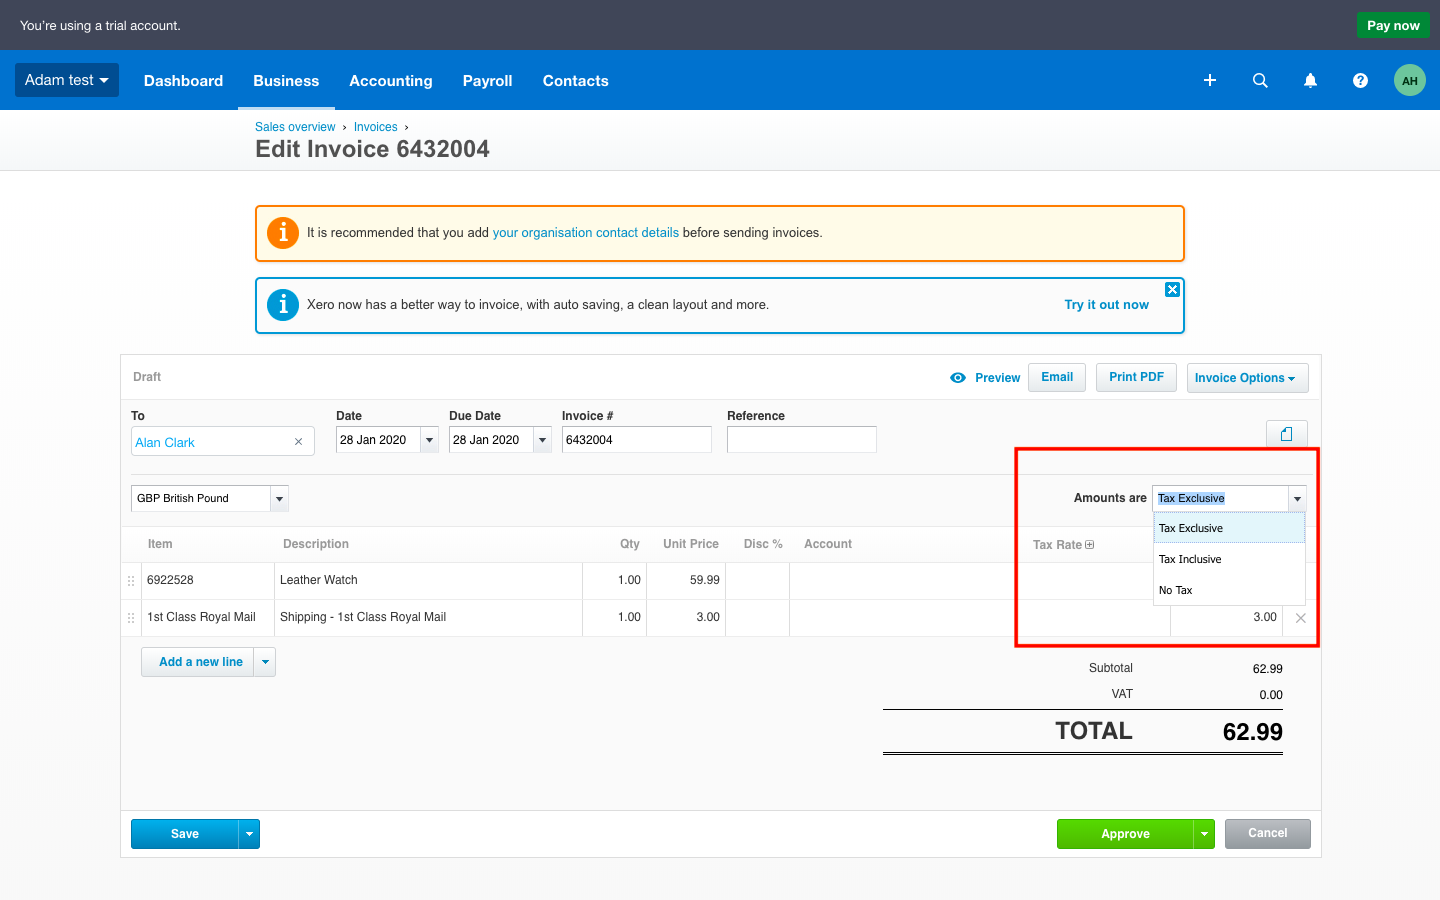
How to Edit An Invoice
Once you have imported the invoices into Xero, you will need to edit each invoice to fully complete it. There are 3 key areas you need to specify on the invoice.
1. Set if your amounts are Tax Inclusive, Tax Exclusive or No Tax charged - click the Amounts drop-down to select this.
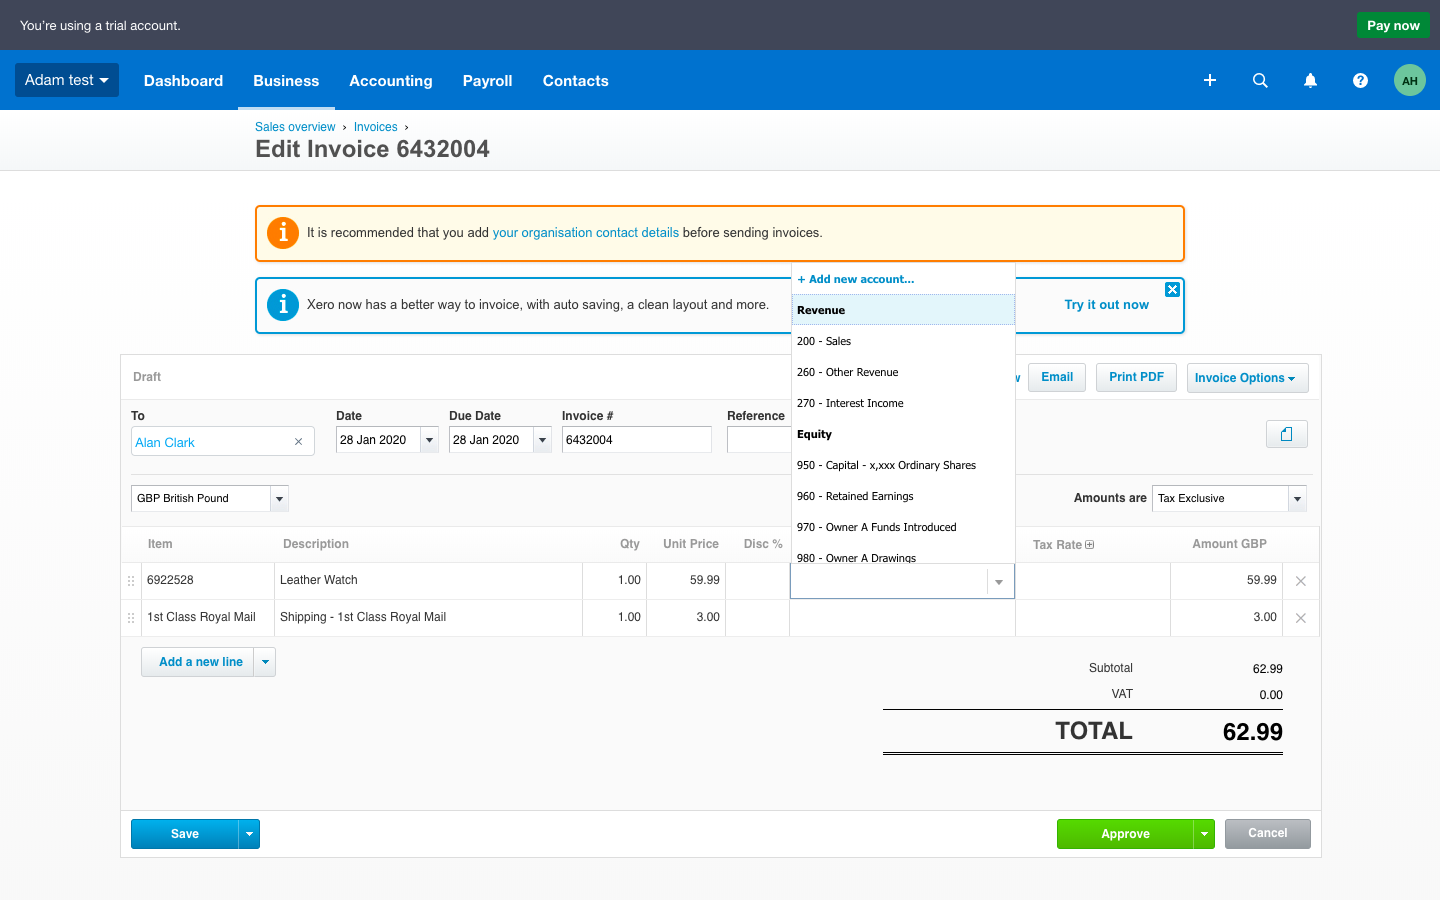
2. Assign an account for the item line to be assigned to - click the drop-down menu and select the account.*
*Please note, that it is possible to have the Account type already set in the CSV before importing into Xero, you will need to amend the CSV manually after exporting it from Create, as per Xero’s instructions to achieve this.
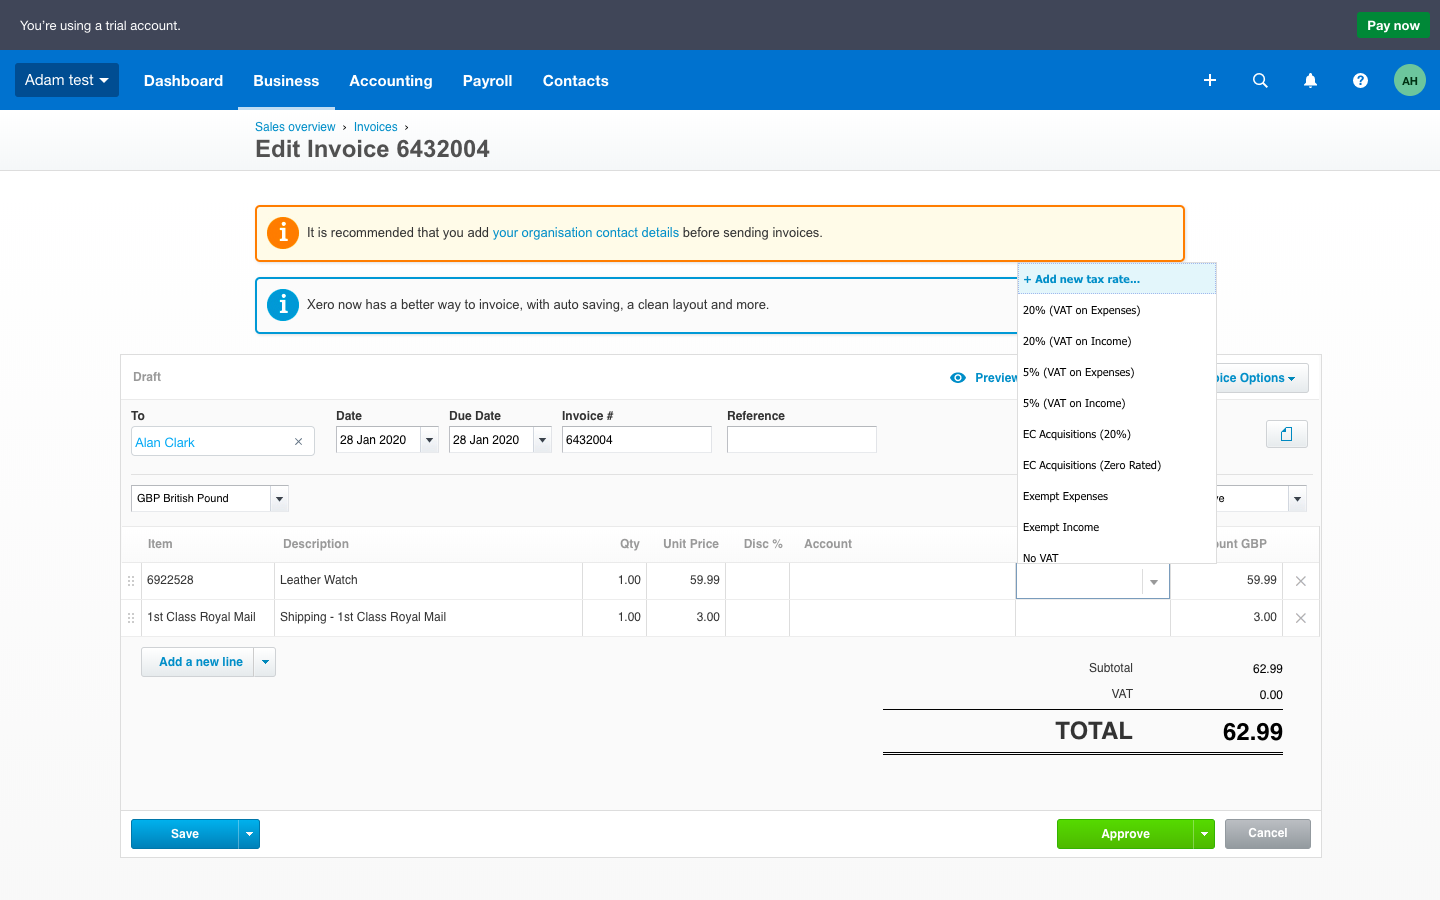
3. Select a Tax rate for the product prices - click the drop-down menu and select the Tax rate
Once you have selected the required fields, you then need to approve the Invoice, by clicking Approve
Please note, that it is possible to have the Account type already set in the CSV before importing into Xero, you will need to amend the CSV as per Xero’s instructions to achieve this.
Be aware that whilst Create provides the data to be imported into Xero, we take no responsibility for the Xero import process itself and any mistakes made with it, so please ensure the data is correct before importing to Xero.
If you would like to know more about the Xero export functionality, please contact your Account Manager who will be more than happy to answer any questions you might have.
Related Articles
Related Articles


More Questions?
If you have any further questions, please get in touch and we will be happy to help.
Get in Touch