Help Centre

This guide will talk you through the optimal way to use the tools so your dispatch process is as efficient as possible.
When you receive your first order you’ll find all the details ready and waiting in the Order Management system. From here you can view and edit the order details, print a picking list of all the products you need to dispatch, print dispatch notes and customers addresses onto labels sheets.
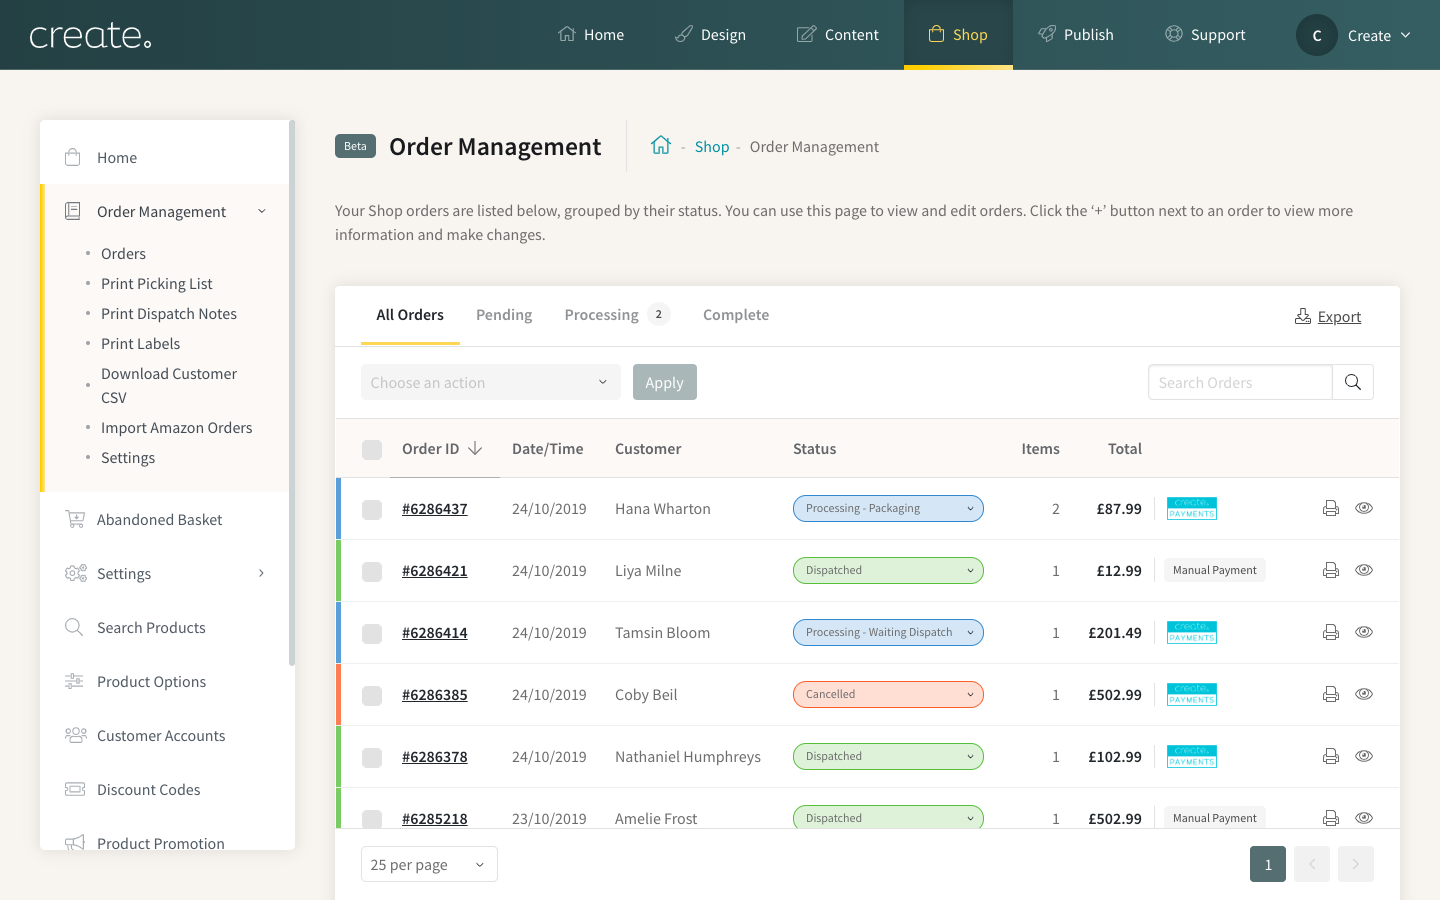
New orders will appear in the Order Management system marked as “Pending”. If your customer has used the “Manual Payment” option at the checkout and will be sending you payment separately, this will be “Pending - Waiting Payment”. This ensures you’ll know not to send their order until you have verified a payment from them.
When you’re ready to start dispatching your orders, you can adjust the order statuses to reflect where it is in your dispatch process.
Printing Your Orders
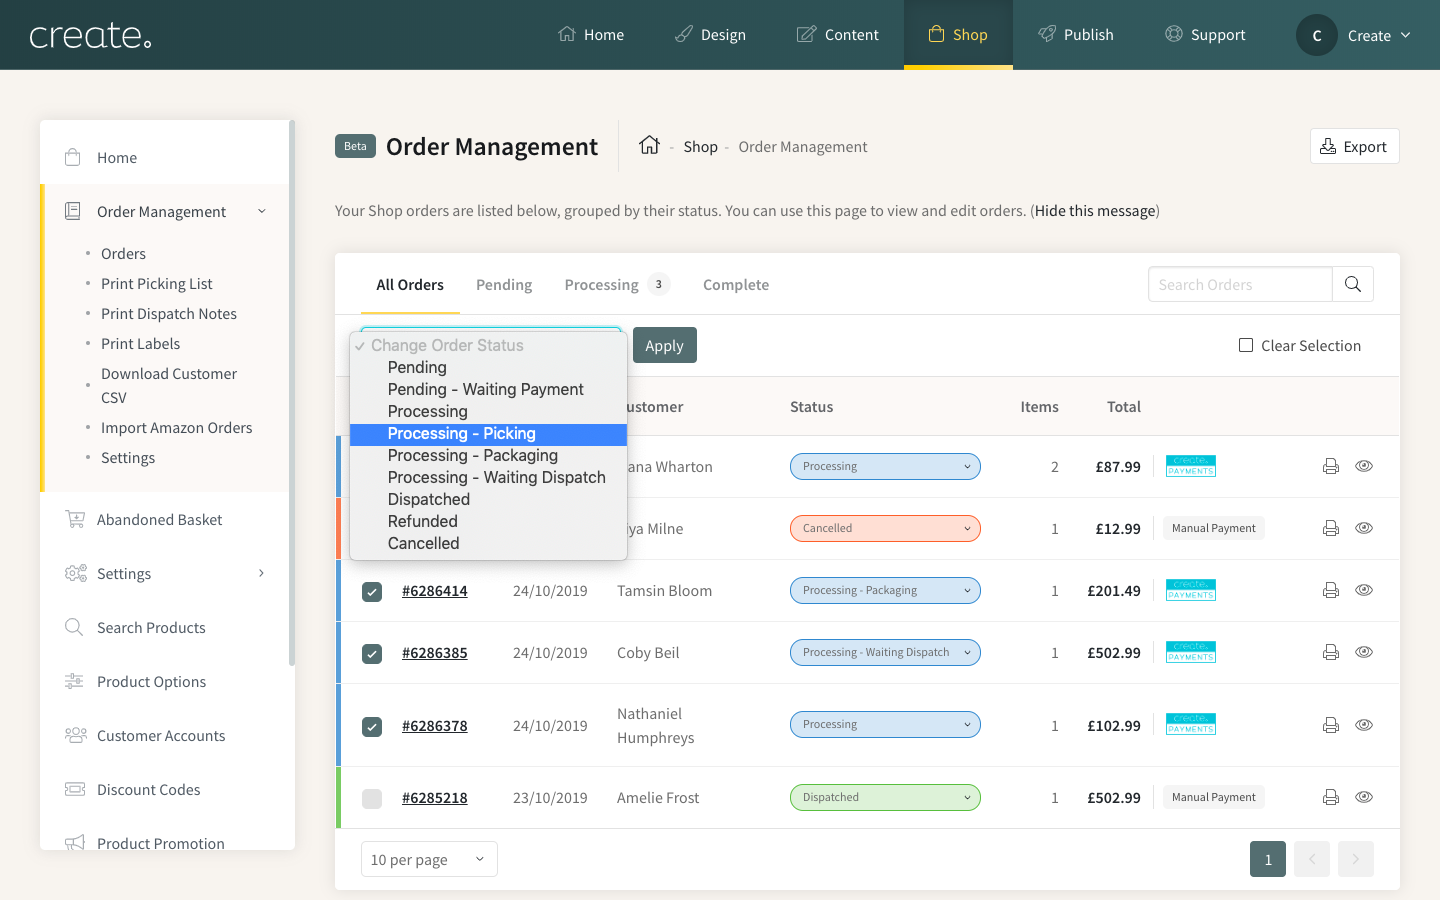
The most efficient way to process your orders is to do so in bulk, so select the orders you’re going to process and set them to “Processing - Picking”. You can select multiple orders by ticking the selection boxes on the left and use the drop down to update the status or change each order individually.
Once you’ve set them all to “Processing - Picking”, click on “Print Picking List” on the left hand menu, under Order Management and the picking list will open in a new window. Print it off ready to take to your stock area.
Next, you’ll want to print off your dispatch notes and labels so, select all the orders in your “Processing - Picking” status and change them to “Processing - Packing” using the same process as before.
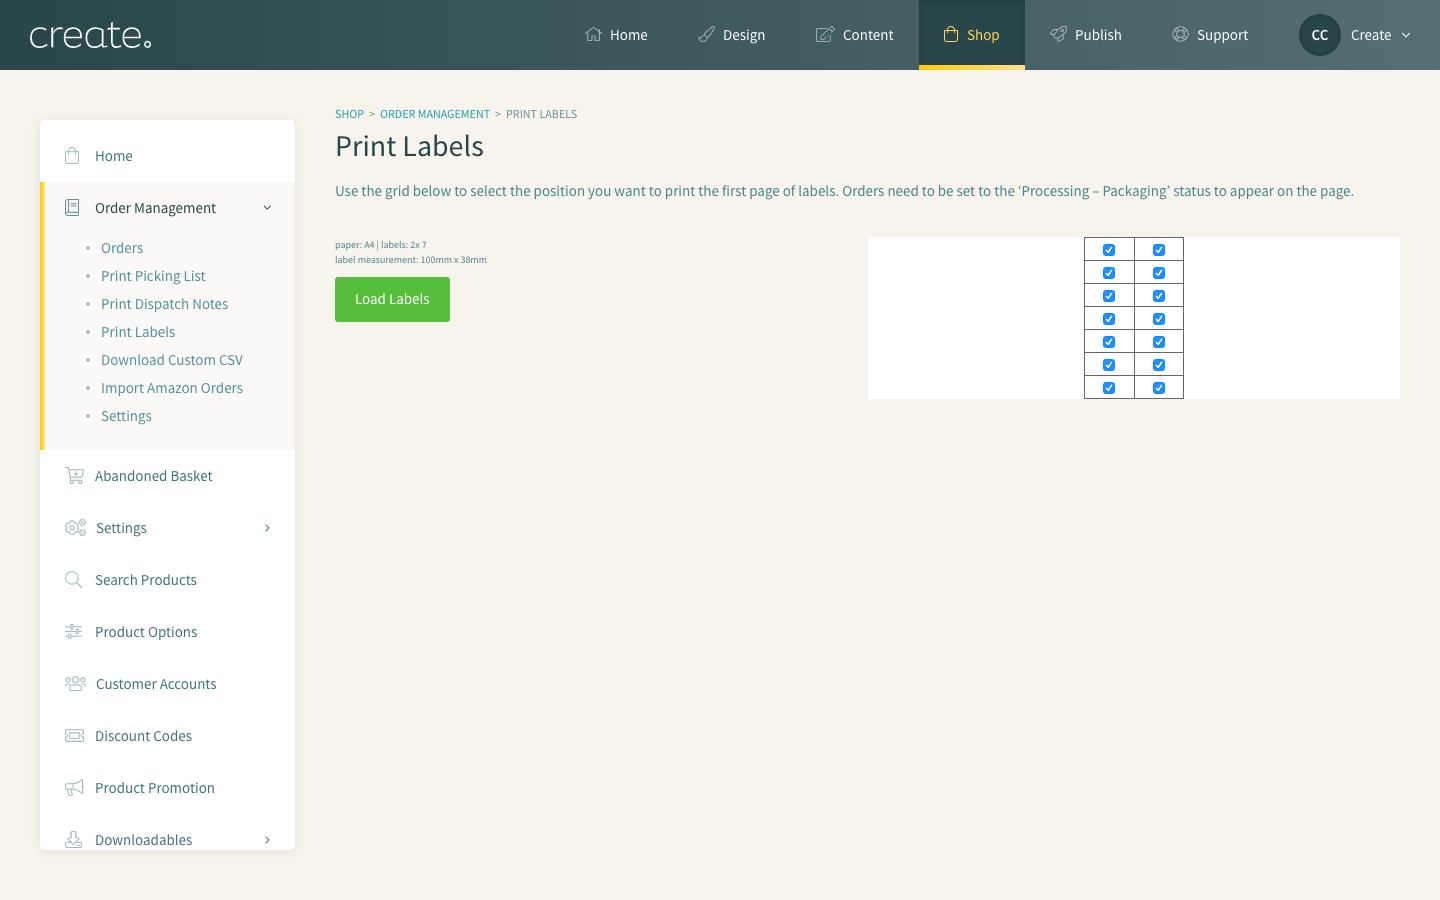
When this is done click on “Print Dispatch Notes” on the left hand menu to open the dispatch notes for you to print. Then, when your dispatch notes are printed, click on “Print Labels” on the left hand menu. Add the labels to your printer and select your print options.
Finish up by setting all orders you’re now ready to pack from “Processing - Packing” to “Processing”. This completes the preparation stage of these orders and once packed they’ll be waiting dispatch. If you decide to come back to Order Management before your post deadline to complete this process again for newly received orders everything you’ve already done will be in this separate status.
Packing Your Orders
One final point before you head off to start packing. The Create checkout provides customers with an additional information box, if they’ve used this a (!) will appear next to their name. The additional information will also appear on the dispatch note but it’s worth double checking these and ensuring you’re aware of anything they may have entered here that might affect their order.
It’s time to start packing and collect up the items you’ve sold. Take your picking list to your stock area and your dispatch notes and labels to your packing area. The picking list groups products together so you can see how many of the same item you need to fulfil the orders. There are handy tick boxes to check things off as you gather them, which you could use again as you pack them - ensuring you don’t miss anything.

Alongside your stock get all your packing materials together and get started. Add the corresponding dispatch note to each parcel and apply the address labels.
Once everything is dispatched come back to the Order Management and let your customers know. Select all the orders that have been dispatched and change their order status from “Processing” to “Dispatched”. 
You’ll be asked if you want to send an email to notify your customers or just change the status, select the option you’d like and it’s time to grab a cup of tea before checking for new orders and customer inquiries!
Related Articles


More Questions?
If you have any further questions, please get in touch and we will be happy to help.
Get in Touch