Help Centre
Support > Designing and Building Your Website > The Create Manual
The Create Manual: Part 3 - Building Your Website
To put together and build your website, you will be primarily using our block based content builder tool. This allows you to quickly build content that will provide a consistent experience across all devices and platforms.
In this section, we will also cover how to add additional pages to your site and edit your website info.
This guide will cover the following topics:
Content Pages Overview
Whilst editing a Content Page, you will be using our content building tools. Here you will be building a page by adding various content blocks onto the page. To edit a page and add content to it, click on Content in the Top Menu and then click on the pencil Edit This Page icon next to the page you want to edit.

If you have just set up a new Create account, a default homepage will already be added to your account. This page will be filled with placeholder images and text, based on the template you have chosen. For this guide, I’ve selected the ‘Foodie’ template.
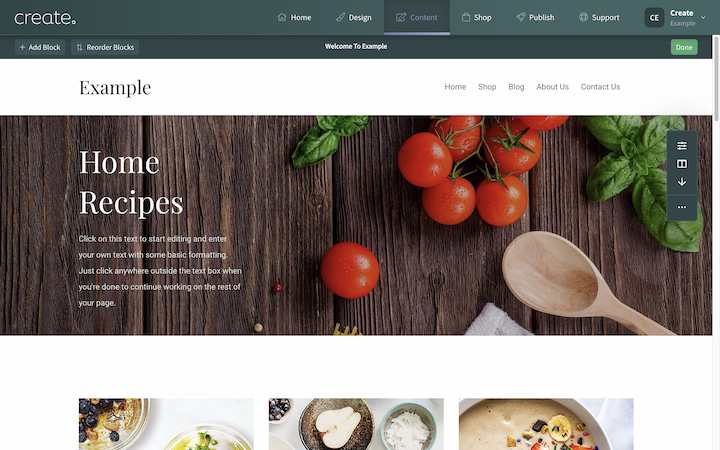
Using the existing placeholder content on the homepage, you can replace the example content with your own images and text.
Adding Your Own Images
Depending on the type of block added it will either contain a placeholder image(s) and/or text.
To replace the image with your own, place your mouse over the image and a small pop-up menu will appear, as shown below.
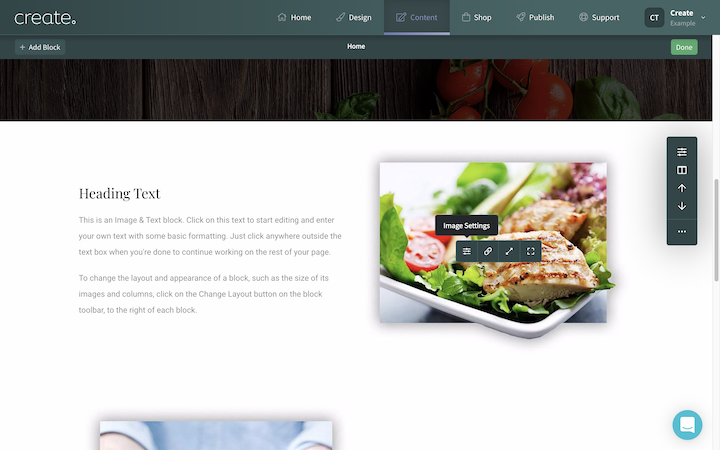
Clicking on the first icon, Image Settings will open up a new window. Clicking on the Select option for Image Selection will display all the images you have already uploaded along with the option of adding a new one.
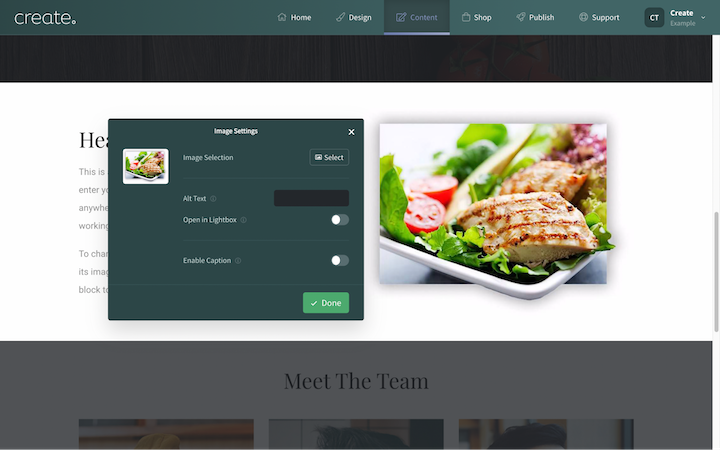
In this menu, you can either select one of the images you have already uploaded to Create (if any) or upload a new image from your computer by clicking “Upload Image” and selecting it in the file browser window that appears.
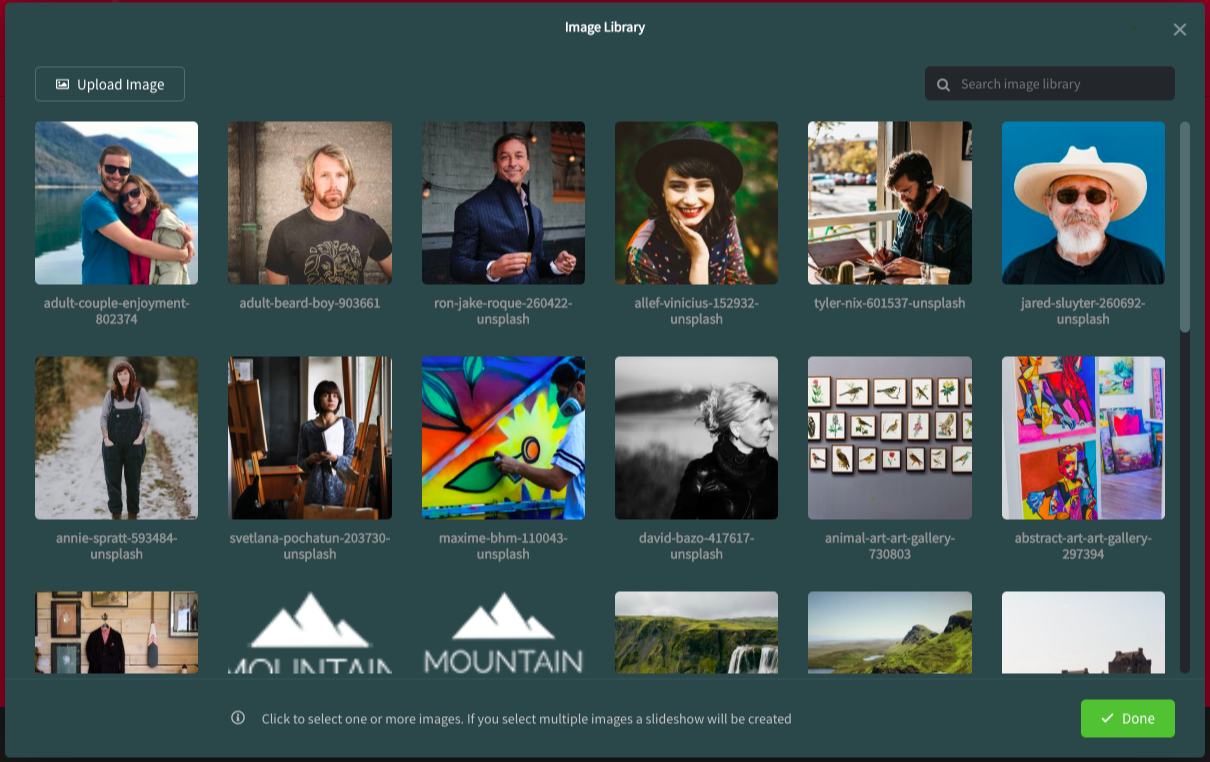
Selecting the image you wish to use will add a green surround to the image (selecting multiple images will add a slide-show) and then click ‘Done’ to switch the placeholder image with your own.
Adding Your Own Text
To change the placeholder text to your own words, move your mouse over the existing text and click. Create will highlight all of the text and a text-edit pop-up menu will appear.
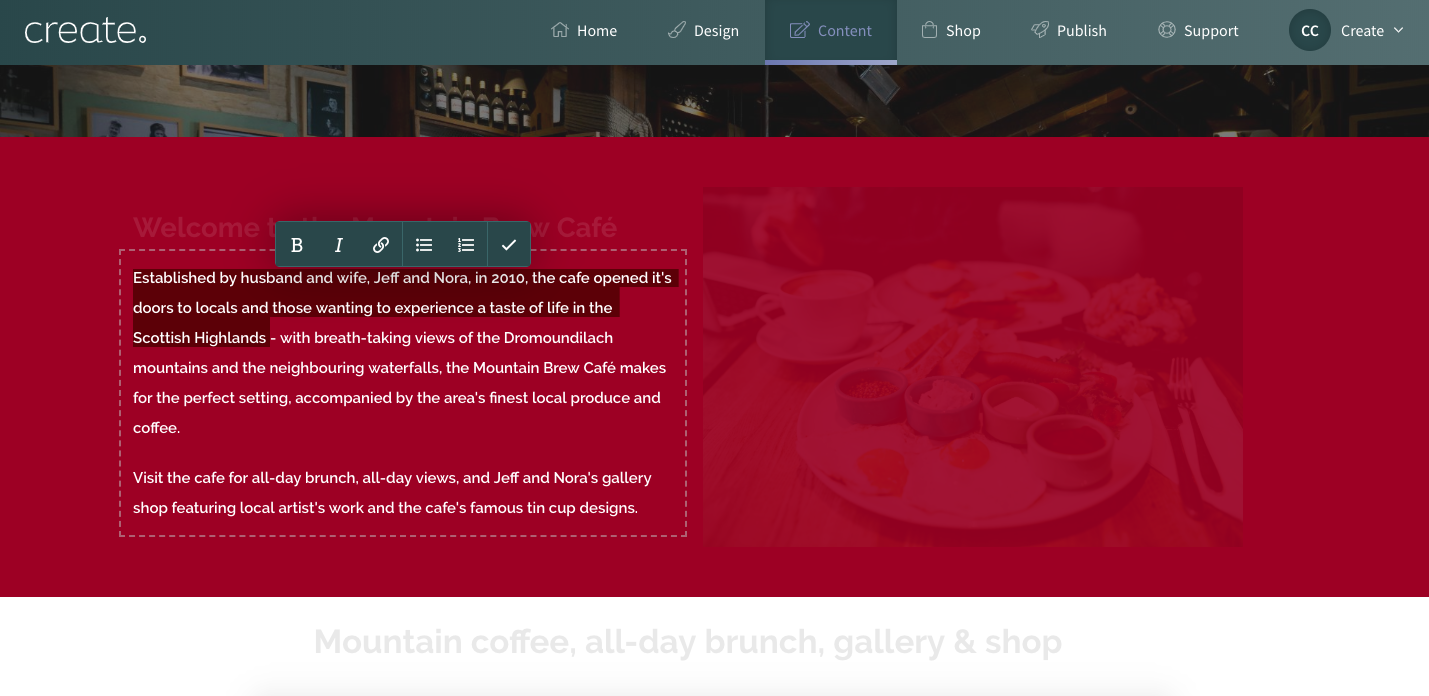
Once highlighted, the existing text will disappear when you start to type your own words. Using the pop-up menu, you can add bold, italic and bullet points to your text. When you have finished adding your own text, click the tick icon to finish.
Adding A New Content Block
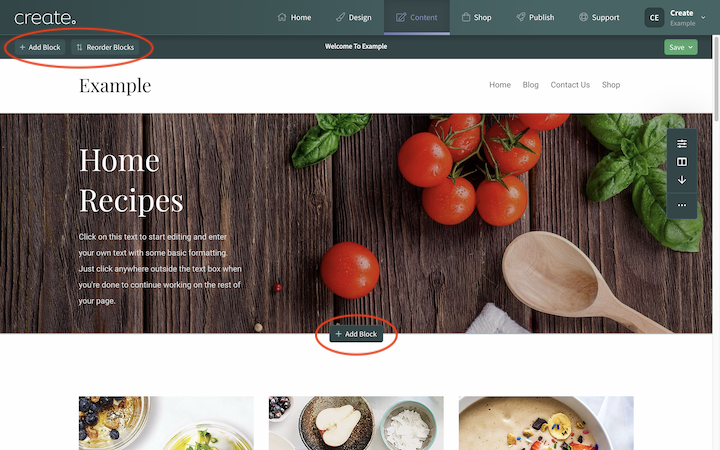
Adding additional content to a page is a quick and easy process with Create. Whilst editing one of your website pages, located in the top bar is the + Add Block button.
You will also see an inline + Add Block button appear when you hover your mouse over the top or bottom of a block. This will allow you to quickly and easily add a new block directly to that location.
The Block Selector menu will slide in from the left-hand side of the screen.
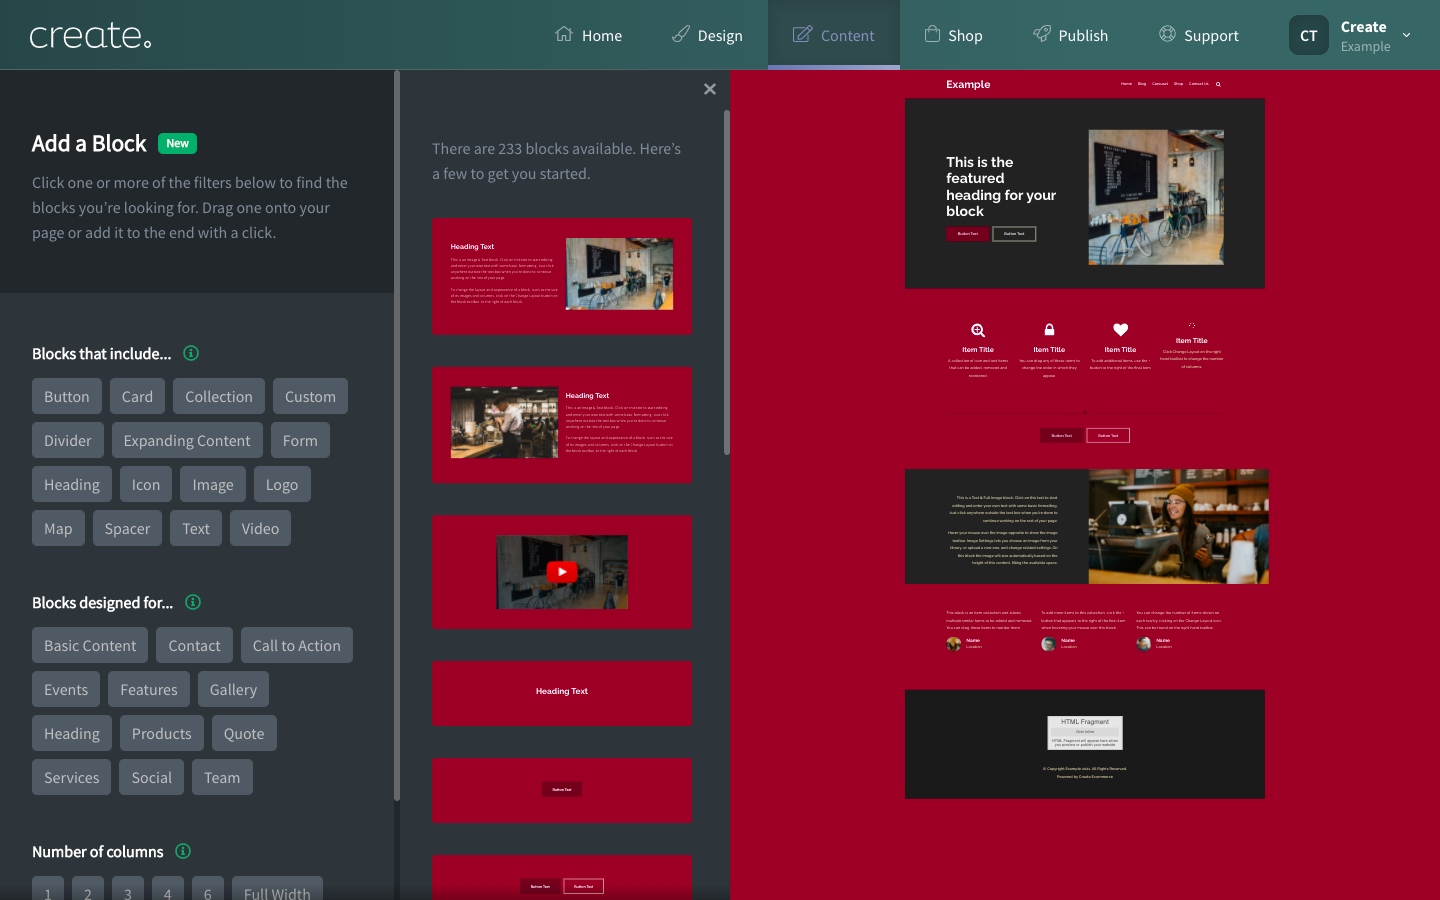
You can now easily search for a specific block you want by selecting different filters, depending on what you are looking for.
In the image below, I have selected the filters, Heading, Image, and Text. In the block column, 6 different blocks are being shown which feature all of those items selected.
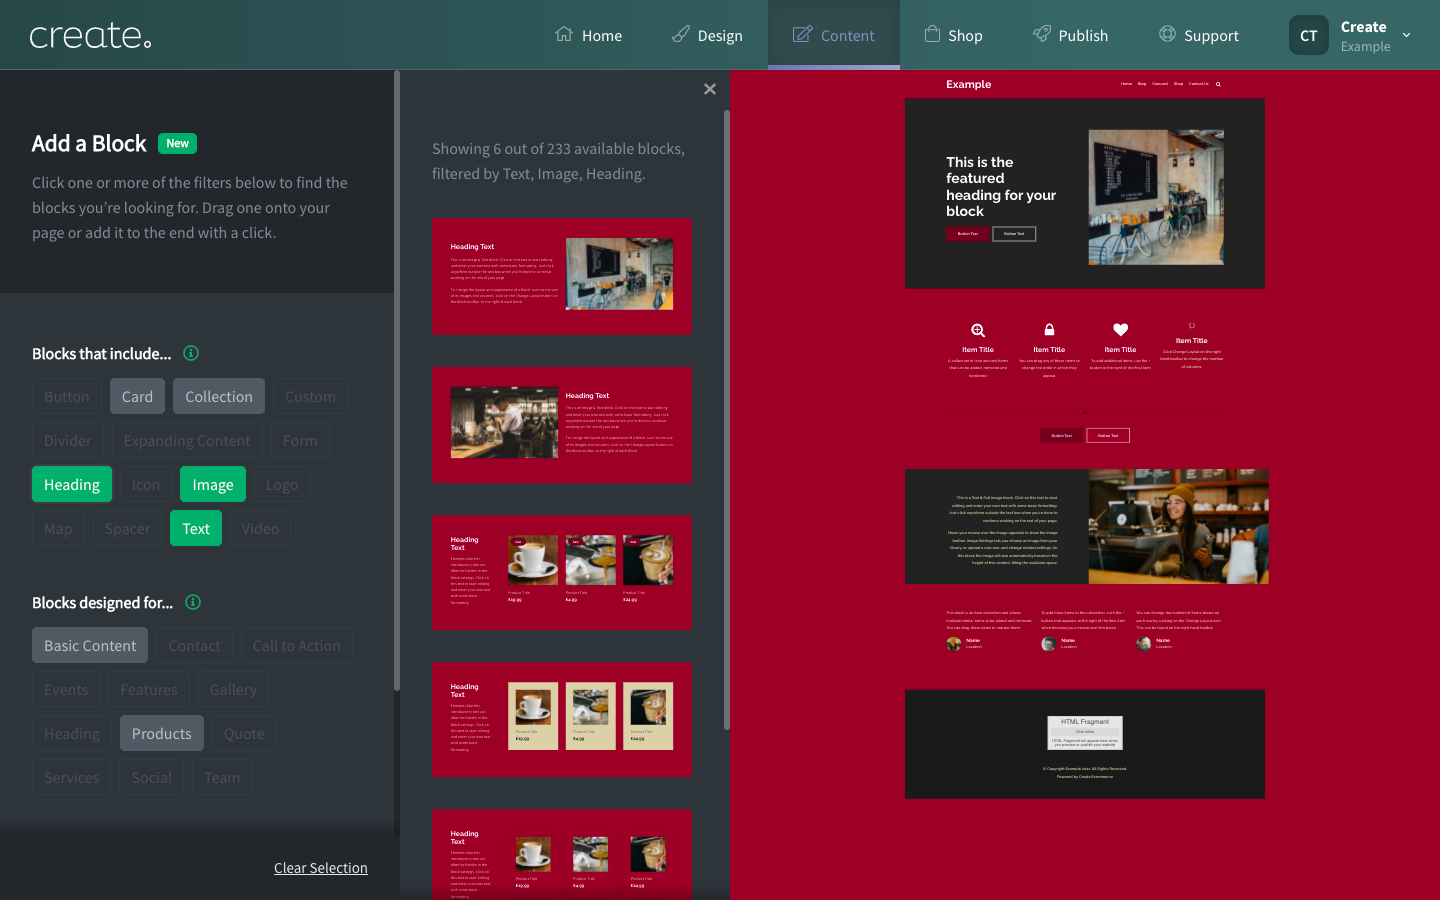
If a block has different variants available, you will see the text View Variants appear below the block, when you hover the mouse over it. If you click View Variants, variations of that block will be displayed.
To add your chosen Block, just click and drag the block from the block panel onto the main preview area.
After adding several different content blocks and replacing the images and text with your own, remember to save your progress by clicking the Save button in the top bar.
Adding A New Page
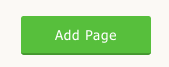
Once you have finished adding your content and text to the homepage, you may wish to add another page/section to your website. To do this, from the Content screen in your account, click on the green “Add Page” button.
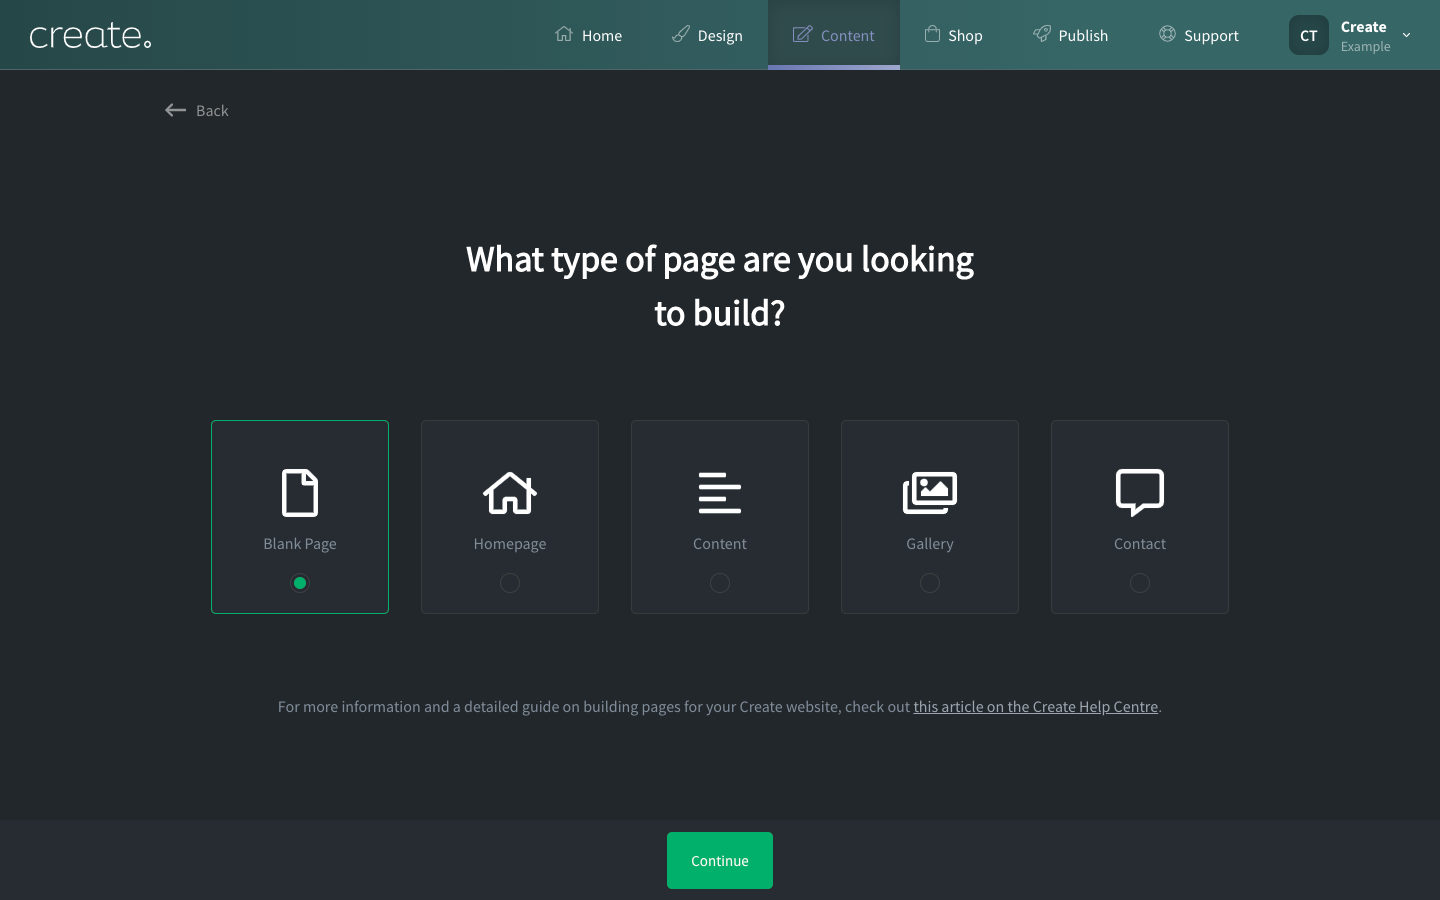
Create will ask you what type of page you wish to add, choosing from ‘Content Page’ (our default page), ‘Calendar of Events’, and ‘External Link’. Selecting the ‘Content Page’ is ideal for adding further content of your own.
Once a page type has been selected, you will need to enter the page details, such as the page and menu display name.
When ‘Content Page’ is selected, Create will then ask you to pick a Page Preset. Select one that best matches the type of page/section you are wishing to add or pick the blank template and start with nothing. If you select a Page Preset, a range of different page layouts will be offered to you to help get you started.
The Create Manual: Part 4 - Setting up your Shop (Not applicable to Website Builder Package)
Related Articles
Related Articles


More Questions?
If you have any further questions, please get in touch and we will be happy to help.
Get in Touch