Help Centre
Support > Designing and Building Your Website > Adding Your Content
Managing Your Content
Managing your site content is an important part of owning a website, which is why we’ve made adding, editing, deleting and rearranging pages as easy as possible for you. This guide explains how to do this and the different areas of the Content screen.
In the “Content” screen you will see a list of the different pages on your website.

To the far right of each page, you will notice several icons. These icons allow you to do the following actions:
![]()
Edit This Page icon. Clicking this icon will take you to the content builder screen where you can edit the page contents and appearance.
![]()
Page Settings icon. Clicking this icon will allow you to edit various options of the page. Here you can hide the page or toggle if it appears in the website menu along with other various options.
![]()
Delete This Page. Clicking this icon will delete the page from your website. Please double-check the page you are deleting as this can’t be undone.
Organising your website menu
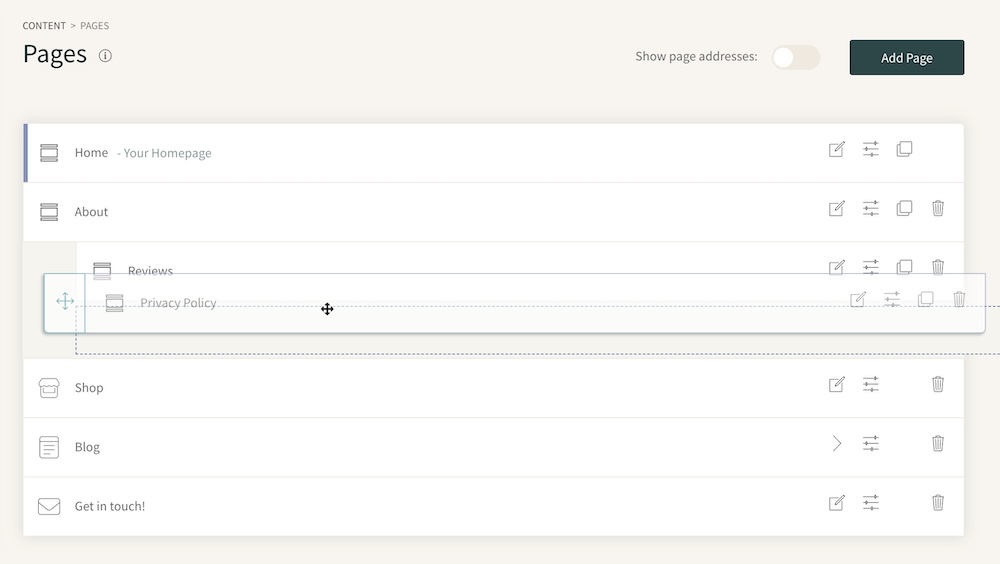
You can rearrange your pages by dragging and dropping them into place. Altering the page order here changes the order they will display on your website main menu in the website header.


To move a page, click on the page you wish to move and hold your mouse down. You can then drag your page into the grey Drop Zones and drop the page into place.

Your page order will then automatically be saved. Please note that any changes made here will not be reflected on your live website until you click publish.
When viewing your pages in the Content screen, you will notice your pages have different icon identifiers besides them. The icons are there to show you the type of page they are. Depending on the age of your Create account, you may also have some pages using our older, page types.
An example of the different pages types are shown below:

Our Content Page type icon. This is our default page type that uses our block-based system and allows for full-width pages.

You shop is indicated by this icon. Every Create account has the same shop style.

If you are using the Create blog feature, your blog will be identified by the notepad icon.

The ‘contact us’ section of your website is identified by the envelope icon. This is the default Contact Us page that comes with every Create website, but you can add additional forms to specific pages also.
The following page icons are older versions of Create pages. If you have either of the icons below as page types on your website, we recommend remaking the pages using our Content Page type to get the best out of our full-width templates. We have put together a guide that explains how to do this, please click here for more information.

This icon identifies the older Pagebuilder style pages we have previously used. This has now been superseded by Content Pages.

Our Static Page icon, our original page type.
If you do have the above page types in your account, whilst we do recommend moving your content over to our Content Page type, selecting a responsive website template will ensure your website is mobile friendly.
Related Articles
Related Articles
More Questions?
If you have any further questions, please get in touch and we will be happy to help.
Get in Touch


