Help Centre
Support > Designing and Building Your Website > Adding Your Content
How do I make an image into a link?
You can make images on your pages into links. The steps vary between the static and Content Pages type, so please ensure you follow the correct steps depending on the page type you are using. Click here to learn about links in Content Pages.
To create an image link on a static page
Firstly to add your image to a static page, please follow the steps in our "How To Use Images" help guide. Once the image has been added to the static page, please follow the steps below:
1. Go to your "Content" screen and scroll down to the page you will edit,
2. Select to "Edit"(pencil Icon) next to the page with the image on it you would like to link
3. On the page Highlight the image you wish to add a link to by clicking it once
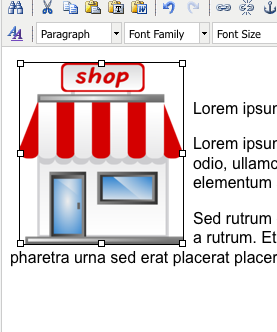
4. Click on the "Insert/Edit Link" icon which looks like a sideways eight on the top toolbar
5. This will pop up a dialogue box, select the page you would like to link to from the drop down list next to "Your Pages"
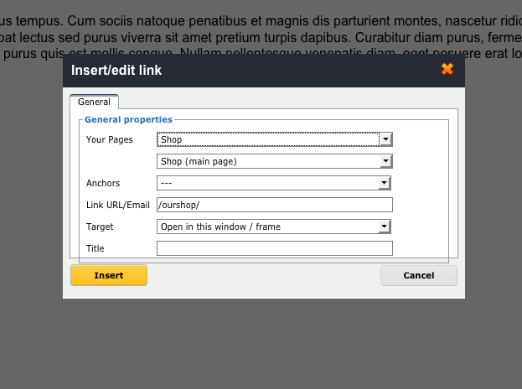
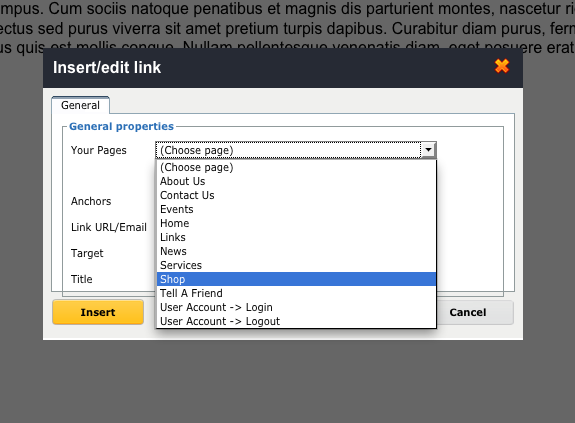
In this case the "Shop" Page has been chosen as the page to go to when the image is clicked.
(If you are adding a link to a Category in your Shop, then you will need to select "Shop" from the first drop down and then you will see a second drop down appear below where you can select the category in your Shop that you want to link to.)
5. Click insert and the image will become a link to that page
Lastly, remember to save changes to the page using the buttons at the bottom of the window.

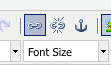
You can also unlink images using the steps above but instead choosing the unlink button at step (.4) :
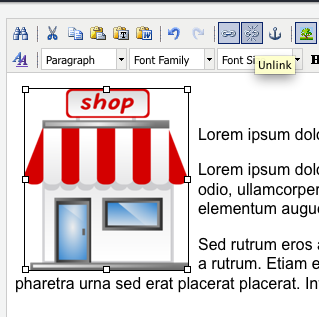
 : The Unlink button, found next to the link icon.
Your pages will now link to the URL you have set up on your live site following a website publish!
Related Articles


More Questions?
If you have any further questions, please get in touch and we will be happy to help.
Get in Touch