Help Centre
Support > Designing and Building Your Website > Adding Your Content
Adding Links with Content Pages
On a Content Page, you can set up both text and images to become a URL link. You have the choice of either linking to one of your own pages or to an external website.
The process of adding a link is very simple and is the same regardless of whether you are adding it to an image or text.
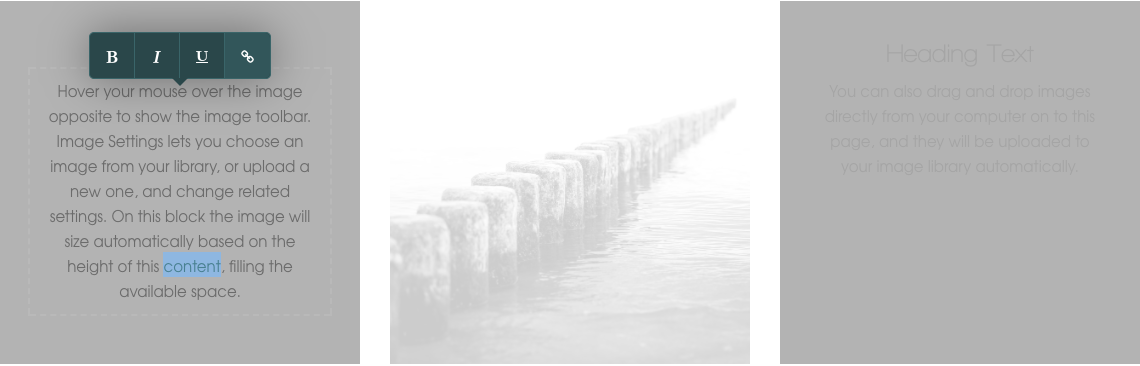
Beginning with text, select the text that you would like to become a link. The text editor toolbar will appear, as shown in the image below.
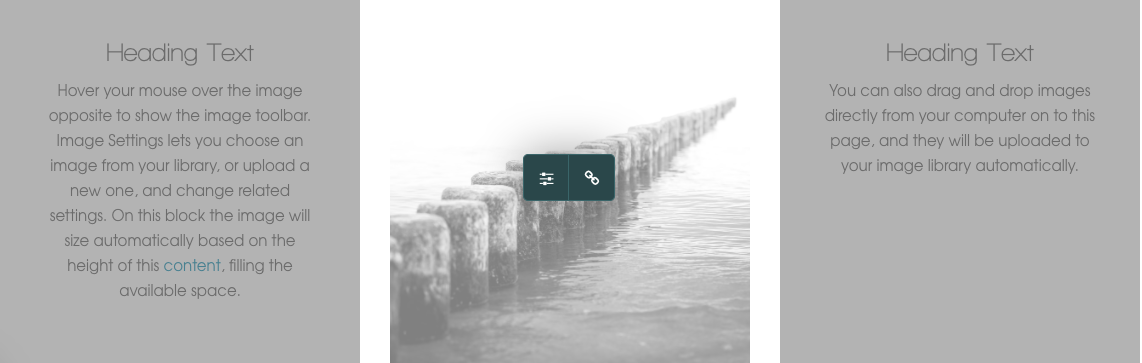
To add a link to an image, click on the image of your choice and the Editor tool will pop-up, as shown in the image below.
Clicking on the link icon in the editor toolbar for either images or text will open the Link Builder pop-up menu, shown below.
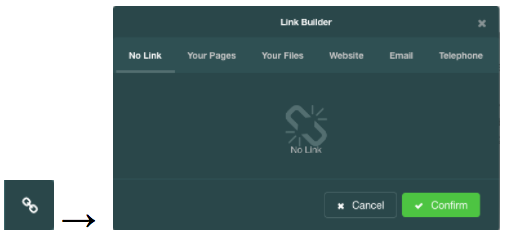
Within Link Builder, there is a series of tabs. It is here you select the type of link you would like to set up for the link you are creating. There are several options available including various sections of your website, files you have uploaded and external URLs.
Linking to Website Pages
When creating a link to a part of your website, select the “Your Pages” tab and use the drop-down menu to display the sections of your site. Any pages and shop categories you have on your website will be available to select. In the image below, I’ve selected the Contact Us page.
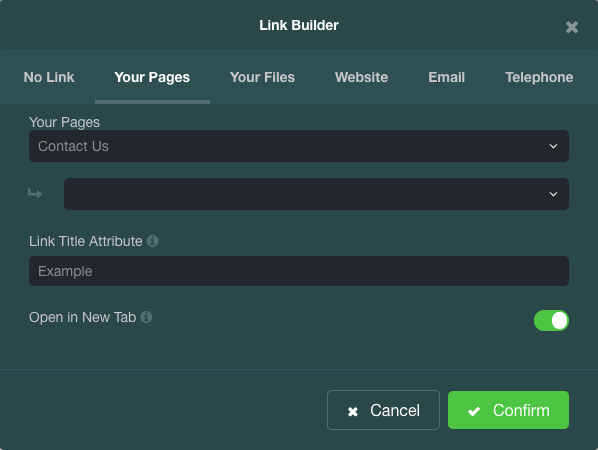
After selecting the required page, you can then give this link a title and decide if the link will open in a new tab or not. Clicking confirm will then set up the link.
Linking to Uploaded Files
If you would like to link to a pdf file, for example, Create allows you to do this. Any files you have uploaded to your account will appear in the drop-down menu of this menu. A pdf file is being used as an example if the image below.
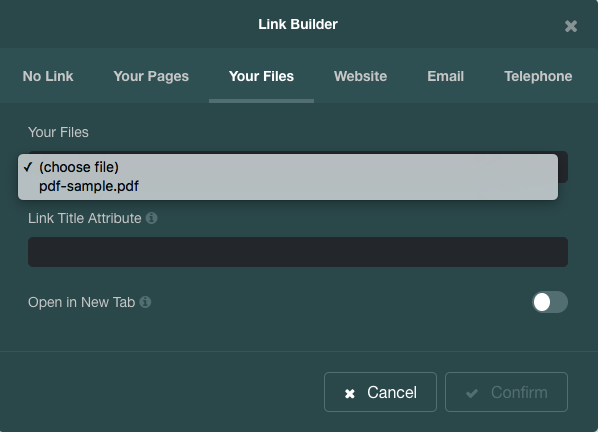
Selecting the file and clicking confirm will save the link to that file, on your website.
Linking to External Websites
Selecting the Website tab will provide options for you to enter the URL and decide how the link will open, as shown in the image below.
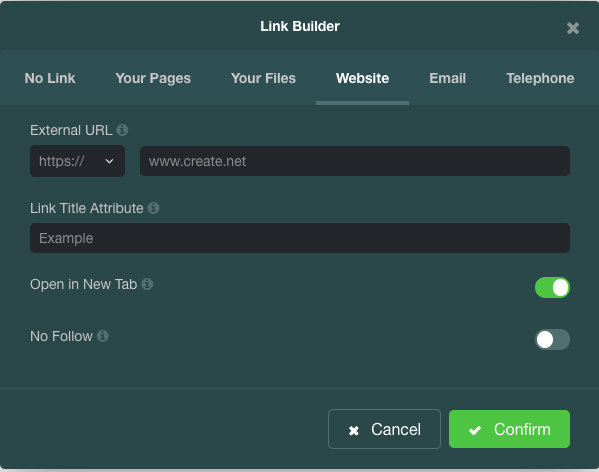
For this example, I have used the URL “www.create.net”, which is where the link will lead when clicked on. The ‘Link Title Attribute’ is what will appear when you place your mouse cursor over a link, I’ve entered “Example”.
“No follow” will prevent the link you’ve set up from being crawled by search engines. In this menu, you can also decide if the link will open in the current window or a new tab.
After entering the above details, click on Confirm and the link will be set up.
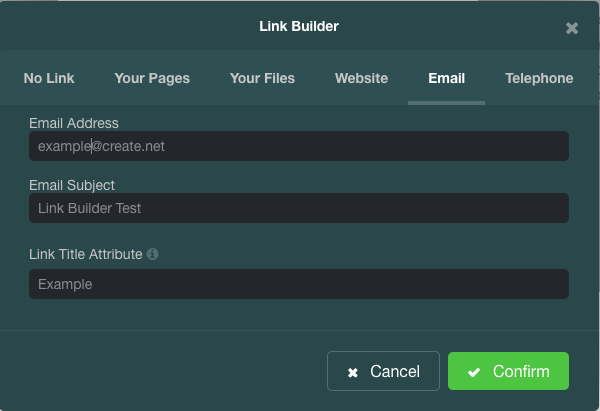
Adding an Email Link
You can also add an email link to your website by selecting the “Email” tab in Link Builder. Here you enter the email address you would like the email sent to, along with an email subject which will autofill when the email template is opened. In the image below, I’ve set the email as “example@create.net” and the Email Subject as Link Builder Test.
Adding a Click to Call Link
Finally, you can set up “click to call” links on your website. With this, you can set up a link, when this is clicked, it will allow your customers to call a phone number of your choice, directly on their phone.
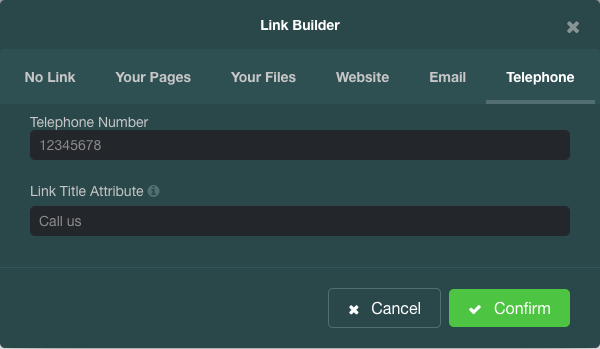
Just enter the Telephone Number you want to be dialled and a title of your choice. I used “Call Us” for this example. Clicking confirm will complete the link set up.
A visitor will now be able to click on the link to automatically call the number you have entered, on the device they are using to browse (if calling is supported).
Related Articles
Related Articles


More Questions?
If you have any further questions, please get in touch and we will be happy to help.
Get in Touch