Help Centre
Support > Designing and Building Your Website > Adding Your Content
How To Add Calendly To Your Website
If you are running events or sessions that people have to book for, it can take a lot of back-and-forth with your customers to organise a time that is convenient and book it for them. This can be avoided by adding the Calendly plugin to your website.
Want Your Own Website?
Start Building Today!
No credit card needed. By submitting this form you agree to our T&Cs and Privacy Policy.
What is Calendly?
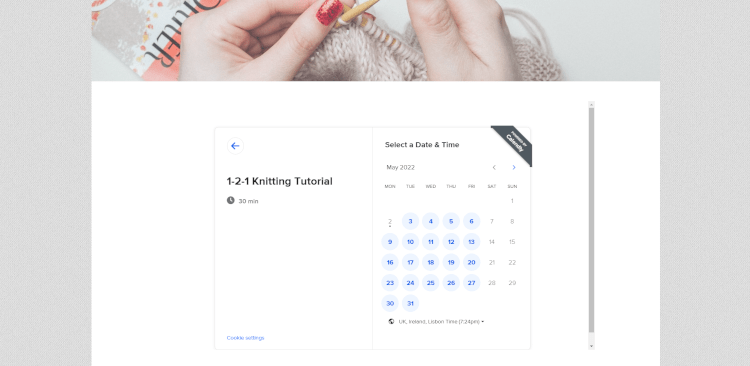
Calendly is a simple solution for automating bookings on your website. Their plugin allows your users to browse through a calendar of selected dates and see your availability across them so that they can book in at a time that is ideal for both them and you.
The plugin cleverly works with your own online schedule. If you are using an app like Google Calendar already, Calendly will assess what you have booked on any given day and make sure that no appointments made through their system collide with anything else.
Setting up the calendar is easy through Create and Calendly even has a free option available for this integration. This guide will show you how to add their plugin to your website:
How to set up a Calendly account
You will need to have set up an online calendar for scheduling your events. We recommend using Google Calendar and setting up Calendly through your business Google Account. This makes the setup much more straightforward.
-
Connect your Google account
-
Grant permission for Calendly to access your calendar
-
Create your Calendly URL. We recommend using your business name
-
Choose the days and times that you are available for bookings
-
Select your role from Calendly’s list
How to Set Up Calendly Events
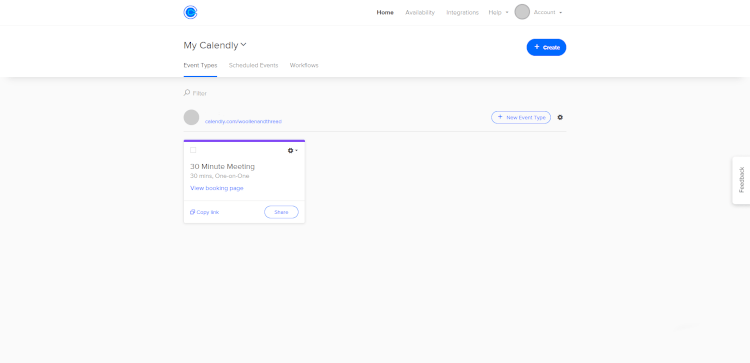
When you access your account for the first time, you will see that there is a default event for a 30-minute meeting already in your dashboard. If this format works for you, it can be edited to your preferences by clicking the cog icon in the top right of the event and selecting Edit from the drop-down list.
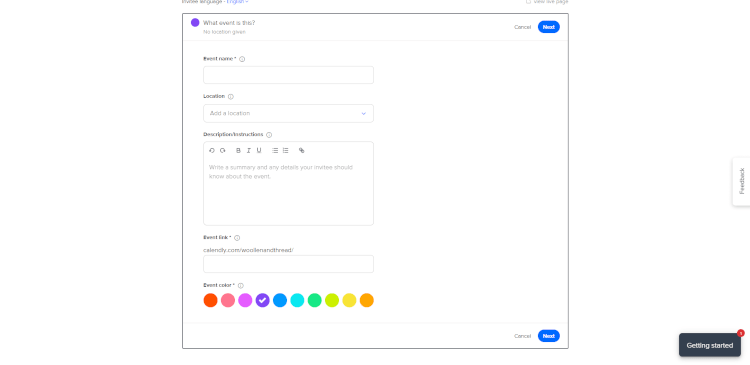
You can also create your own format by clicking the New Event Type button on the right-hand side. Simply follow the steps they provide to create your own event.
If you would like to charge for your bookings through Calendly, you can integrate either Stripe or PayPal as Payment Gateways for your calendar. To do this, click the Integrations tab from the top menu and select your preferred payment gateway from their list. You will then be guided through the setup process. Please note that this is a premium feature available on the Calendly Professional package.
Most importantly, in your event settings, you are provided with the options to add a Cancellation Policy, Reminders and a Confirmation Page. It is worthwhile personalising these sections before activating the calendar on your site so the whole process is consistent with your branding and ensures your cancellation process is clear to your customer.
How to Embed Calendly on Your Website
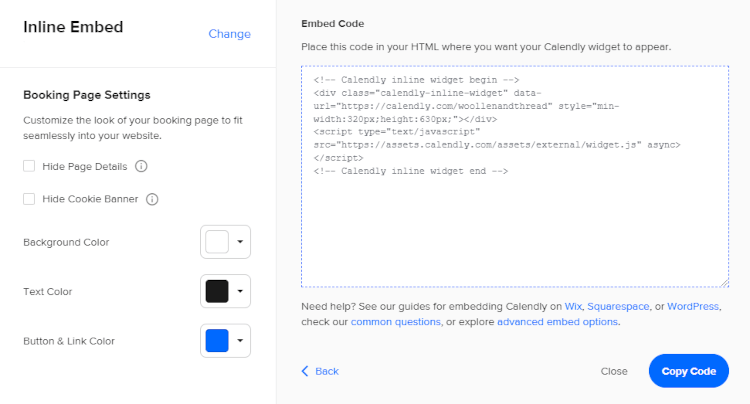
Once you have created your calendar and customised it to your preferences, you’ll need to then display it on your website so your clients can start booking through it. This is done through an embed code that you can add to your page.
-
Click the cog icon to the right of the New Event Type button
-
Select Add to Website
-
Choose the Inline Embed option and click Continue
-
Customise your colour settings to match your website’s colours
-
Click Copy Code
6. Back in your Create account, in the Content area, you'll need to select Integrations & HTML in the left-hand menu
7. You should see the Calendly Availability Calendar integration there
8. Once clicked, you'll be able to paste your embed code into the box provided. You'll also have the option to give your calendar a name for your reference
9. You can then place your Calendly calendar on one of your pages using a Custom Block.
Related Articles
Related Articles


More Questions?
If you have any further questions, please get in touch and we will be happy to help.
Get in Touch