Help Centre
Support > Promoting Your Website > Social Media
Can I have a Twitter feed on my website?
First of all, if you have not already done so, you will need to authorise your Twitter account with your Create account by adding the Twitter connection in your Create account. You can do this by following the steps below:
- Log in to your Create account.
- Click the Account icon on the top menu.
- Click "Connections" under the "Site" tab.
- Click "Add Connection".
- Select "Twitter".
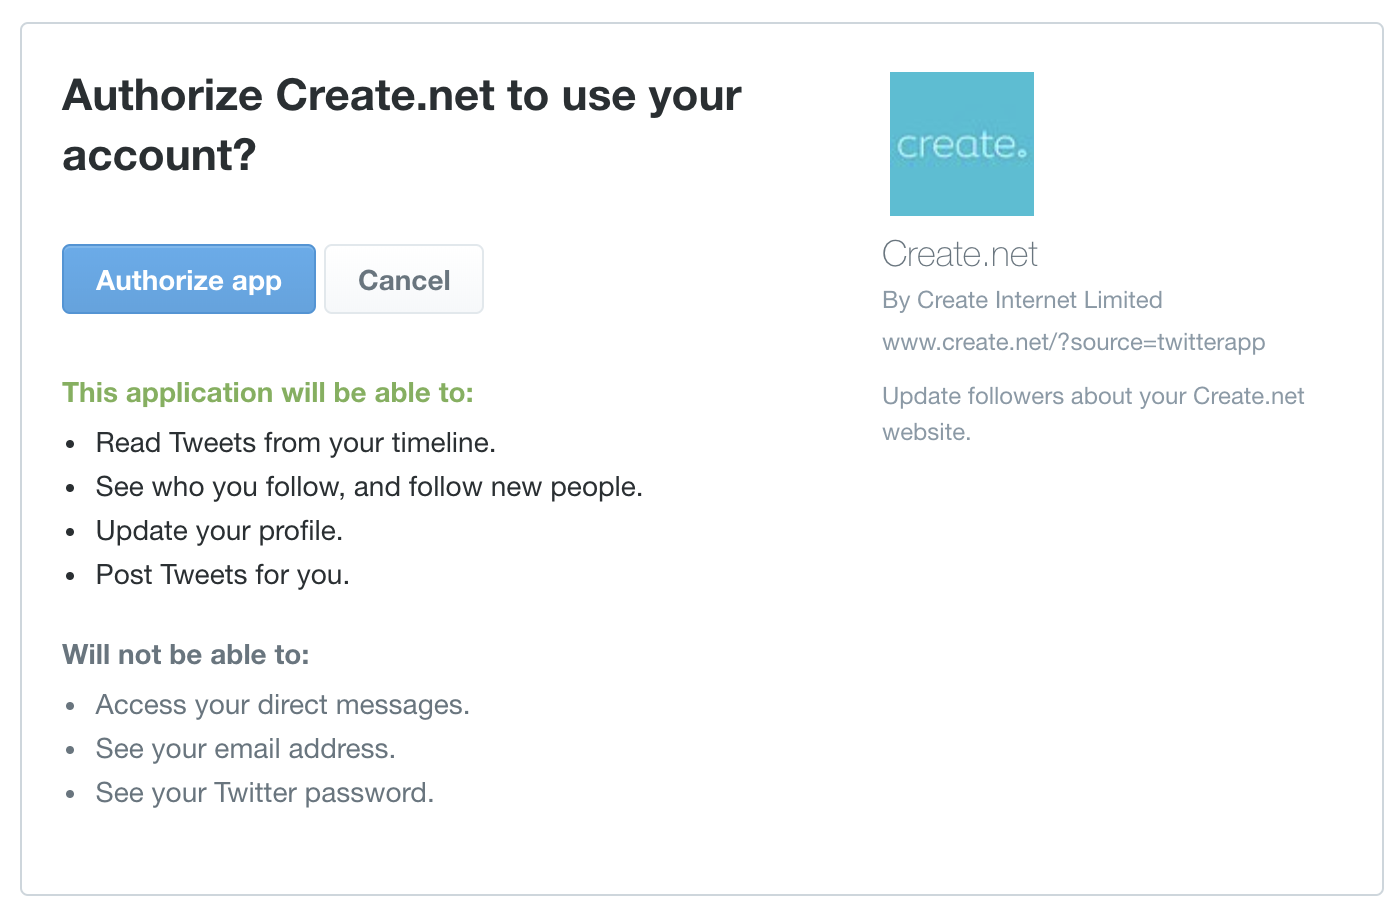
You should then be displayed an option to "Authorise App" (Shown Above), which you can then click to open up the Twitter Feed set-up area.
You'll then need to create the Twitter Feed widget using the steps below:
- Log in to your account.
- Choose "Content" from the top menu.
- Select "Widgets" from the left-hand menu.
- On the new page, click the "Add Widget" button and select "Twitter Feed".
On the next page you can set up the following:
- Widget Name - Give your widget a name, so you can identify it when searching amongst other widgets.
- Twitter Username - Your twitter username is displayed in the URL of your profile page, for example twitter.com/create
- Max Items - How many tweets you wish to display in your feed.
- Show Retweets - Whether you wish to show the tweets you retweet in your feed.
- Show Replies - Do you wish to show your tweets where you have replied to another tweet.
- Show Link to your Twitter - Show a link to your twitter account on your twitter feed.
- Twitter Link Text - The text you wish to display that will re-direct to your twitter account, for example "Click here to view my Twitter".
You will then need to give your widget a width, height, a frame border size and a colour. Once you have done this, click "Save Changes" and import the widget on to one of your pages by following the steps below:
-
Click Content on the top menu
-
Click Edit This Page (the pencil icon) next to the page you would like to edit
-
Click the +Add Block button
-
From the Add Block filters, select the Custom filter in the 'Blocks that include...' category
-
You can then drag and drop the Custom Element content block onto the desired place on the page.
Once the Custom Element block has been added to the page, you can click the + icon and use the drop-down menu to select what content you would like to add to the page.
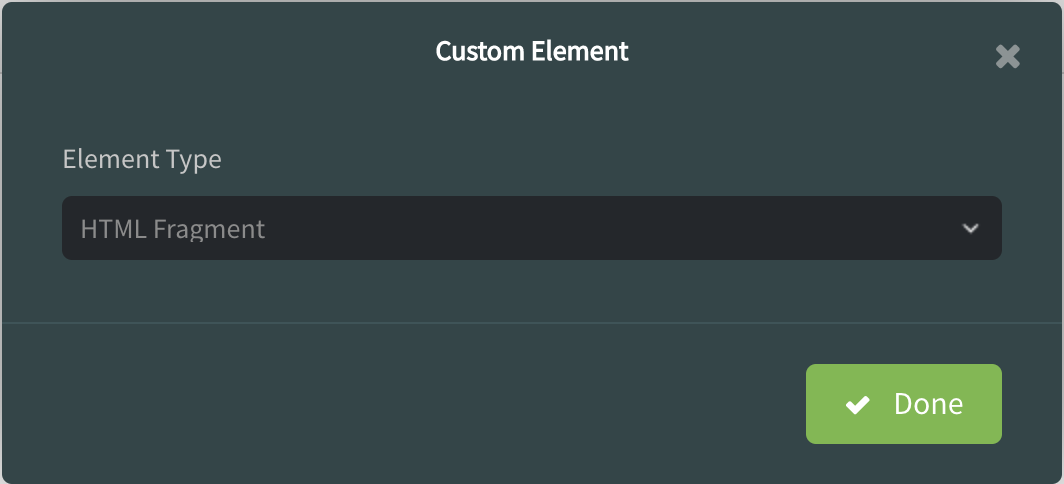
You’ll see you can select content including Widgets, HTML Fragments and Custom Forms, as well as combinations of other blocks such as Buttons, Headers, Images, Videos, Maps and Text.
A placeholder icon will be added to the page and if you click the Settings icon, you can specify exactly which widget or HTML fragment for example, you would like to use. Click Done and then save your changes.
Related Articles


More Questions?
If you have any further questions, please get in touch and we will be happy to help.
Get in Touch