Help Centre
Support > Promoting Your Website > Social Media
How to add Facebook Comments to your page
Social Media is one of the most effective ways to promote your business and reach a wider audience. It allows you to reach new potential customers at the click of a button, but what better way to advertise your site then to let existing customers comment and share their thoughts on your website on their own profile!
With the Facebook Comments Box this is exactly what you can facilitate and encourage. It allows your customers to post comments about your website in the comment box and it appears on their Facebook profile. This is perfect for any products you would like reviewing or where customers could leave comments about their experience with your business. In this guide we will be looking at how to add this to your website.
How to set up the Facebook Comments widget
To set up this widget please follow these steps:
- Click “Content” from the Top Menu.
- Select “Widgets” from the left-hand menu.
- Click the “Add New Widget” button.
- Click on the “Facebook Comments” box.
- Name your widget by filling in the “Widget Name” field.
- Choose whether you would like customers to comment on the “Current Website Page” that they are on or a “Custom URL”. If you would like them to comment on another page then please fill in the URL of this custom page in the “Enter your custom URL” field.
- Choose the width of your widget in the drop-down list, from “Small”, “Medium” or “Large”.
- In the “Number of posts to display” field, enter the number of posts you would like visible in your comments box.
- From the “Colour Scheme” drop-down list choose the colour of your widget box. You can see the different colour options available below:
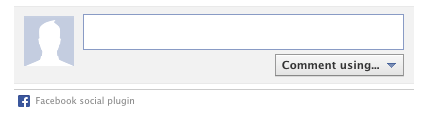
White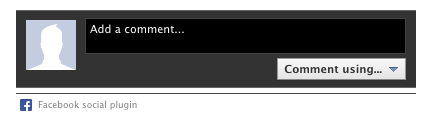
Black - Click the “Save Changes” button in the bottom left-hand corner
How to add the Facebook Comments widget to your page
Now your comments box is all set up and ready to go, you will now need to add this to your website page.To do this please follow these instructions:
-
Click Content on the top menu
-
Click Edit This Page (the pencil icon) next to the page you would like to edit
-
Click the +Add Block button
-
From the Add Block filters, select the Custom filter in the 'Blocks that include...' category
-
You can then drag and drop the Custom content block you need, onto the desired place on the page.
Once the Custom block has been added to the page, you can click the + icon and use the drop-down menu to select what content you would like to add to the page.
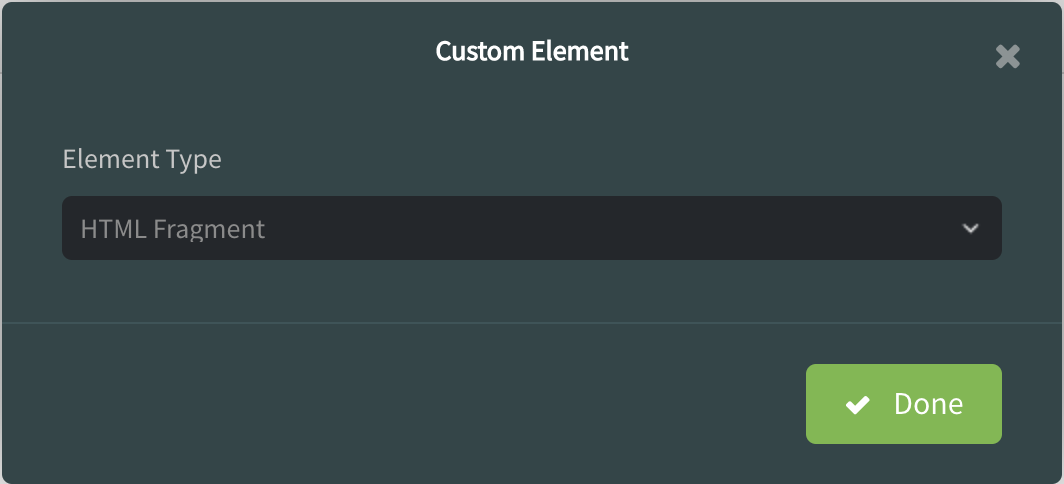
You’ll see you can select content including Widgets, HTML Fragments and Custom Forms, as well as combinations of other blocks such as Buttons, Headers, Images, Videos, Maps and Text.
A placeholder icon will be added to the page and if you click the Settings icon, you can specify exactly which widget or HTML fragment for example, you would like to use. Click Done and then save your changes.
Please remember you will need to "Publish To Web" for the changes to take effect on your live site.
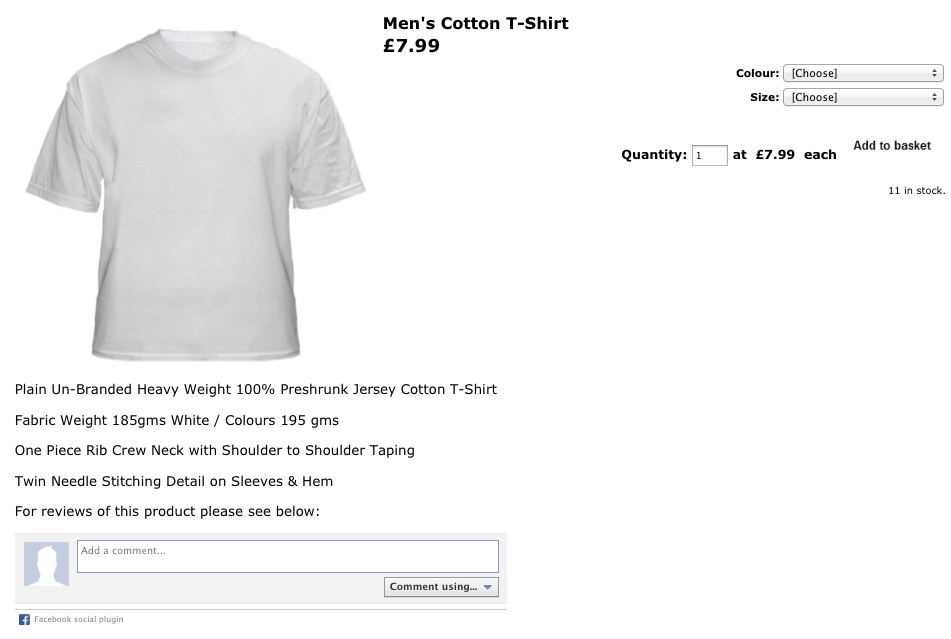
Once this has been added to your site your Facebook Comments box will appear on your live site, as shown below:
Related Articles


More Questions?
If you have any further questions, please get in touch and we will be happy to help.
Get in Touch