Help Centre
Support > Designing and Building Your Website > Designing Your Website
How To Edit Your Website Header and Footer
Using the Create platform allows you to easily alter the content included within your website header and footer.
The website header is the very top section of your website and is home to your company name or logo, site menu buttons and social icons.
The website footer is the very bottom section of your website and is usually the location where your site name copyright details are located, a newsletter signup form along with any icons and links you would like, such as your website terms and conditions.
In this help guide we cover the following areas:
How To Edit The Header
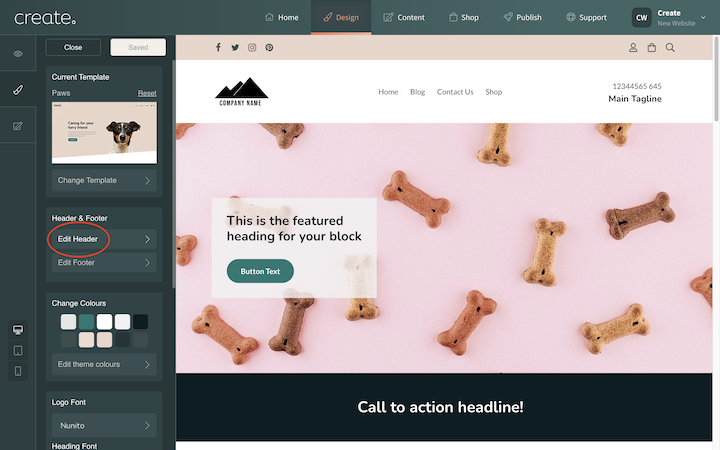
To edit your website header you need to enter the Design area of Create.
1. Click Design on the top menu
2. Click the Edit Header & Footer section in the left-hand menu
3. Click the Edit Header button
A side panel will be presented with a range of different website header layouts to choose from. If you hover your mouse over each header, a description of the layout will be presented.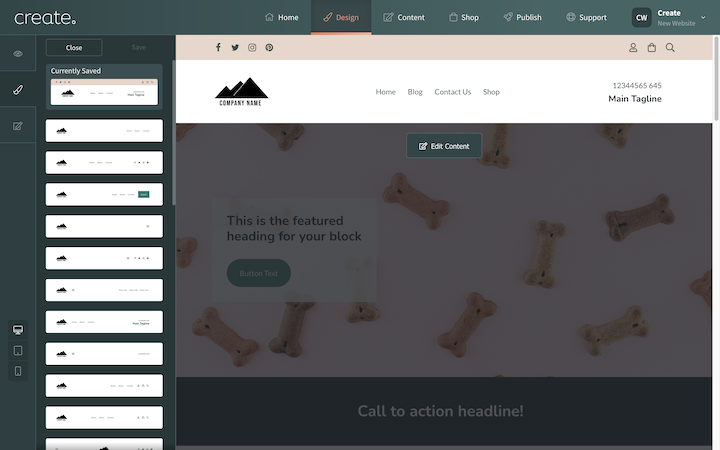
You can click on each header and it will be applied to your website in the preview panel on the right-hand side, to display how it looks.
Once you have found the header you want, click the Save button. That header will now be applied to your website build.
Once you have selected a header, you can make further changes to its content and appearance using the Header Settings icon. To access these settings, hover your mouse over the header section in the preview panel and the Header Settings icon should appear, click the icon to open up the settings.![]()
The Header Settings contains the following 3 sections:
- Layout
- Style
- Content
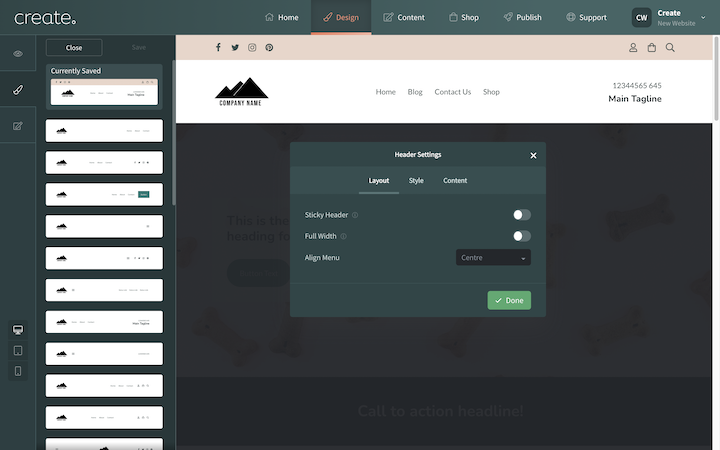
Layout allows you to alter the appearance of the header. The main features are the ability to enable a sticky header, enable full width, so the content fills more of the header area and the menu alignment.
Style allows you to alter how various elements of the header will appear. The main features are the option to alter the header topbar style (if one is present), and change the menu type to either text or an icon along with altering the menu font and text style.
Content allows you to hide or show various elements in the website header. It is here where you can fine-tune what content is displayed in your header and enable extra elements if you wish. You can add extra text links to show, add a button to the header and enable social icons.
Changing Your Website Logo
By default, your Create website will have a text logo. To edit this text, whilst in the Edit Header section of the Design area, place your mouse cursor over the text logo and 2 options will display. Edit logo text and Switch to image logo.![]()
Edit logo text allows you to alter the logo text, should you wish to change this at all. Type into the text box and click Done to confirm any changes.
Switch to image logo will replace the text logo with an image of your choice. Clicking Image Settings will allow you to choose an image to upload from your device. Once uploaded, you can then use the Image Size slider, to alter how much of the area it fills.
How To Edit The Footer
To edit your footer you need to enter the Design area of Create.
1. Click Design on the top menu
2. Click the Edit Header & Footer section in the left-hand menu
3. Click the Edit Footer button
A side panel will be presented with a range of different website footer layouts to choose from. If you hover your mouse over each footer, a description of the layout will be presented.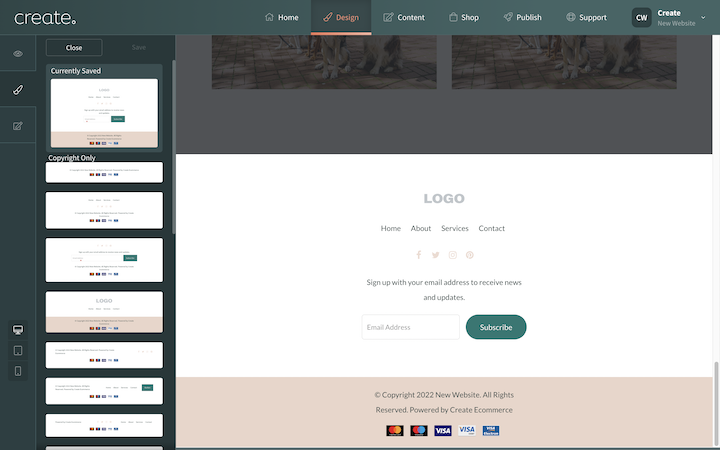
You can click on each footer and it will be applied to your website in the preview panel on the right-hand side, to display how it looks.
Once you have found the footer you want, click the Save button. That header will now be applied to your website build.
Similar to adjusting a header, once you have selected a footer, you can make further changes to its content and appearance using the Footer Settings icon. To access these settings, hover your mouse over the footer section in the preview panel and the Footer Settings icon should appear, click the icon to open up the settings.
The Footer Settings contains the following 3 sections:
- Layout
- Style
- Content
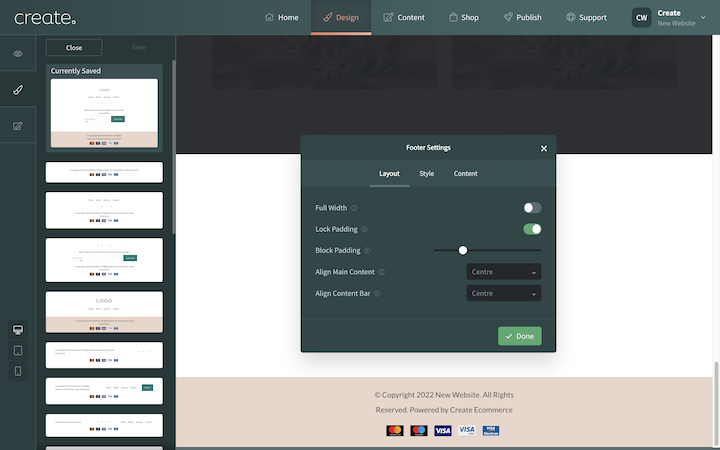
Layout allows you to alter the appearance of the footer. The main features are the ability to enable full width, so the content fills more of the footer area. You can control the padding, which alters how large the footer will be and the text alignment.
Style allows you to alter how various elements of the footer will appear. The main features are the option to add a background image to the footer area and alter the appearance of the footer bar (if it has one).
Content allows you to hide or show various elements in the website footer. It is here where you can fine-tune what content is displayed in your header and enable extra elements if you wish. You can add a newsletter sign-up, extra logos and social icons.
Footer Block Layout
When you hover your mouse over the footer area in the preview panel, below the Footer Settings icon on the right-hand side is the Block Layout icon.
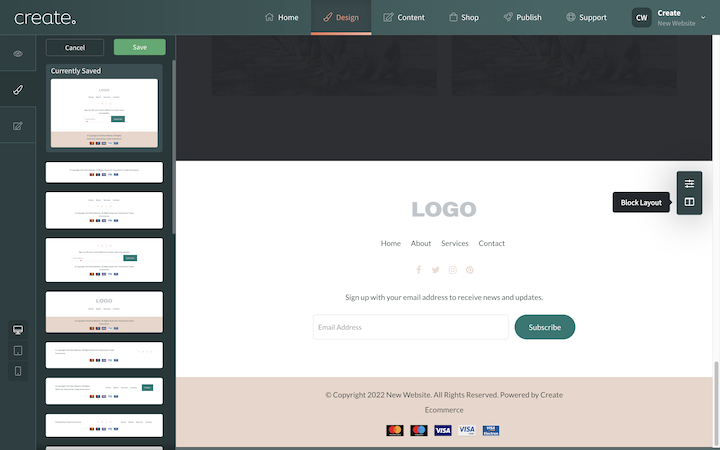
Clicking this icon will open a panel allowing you to set the area size of the footer content and also adjust its position, from left, central or right aligned.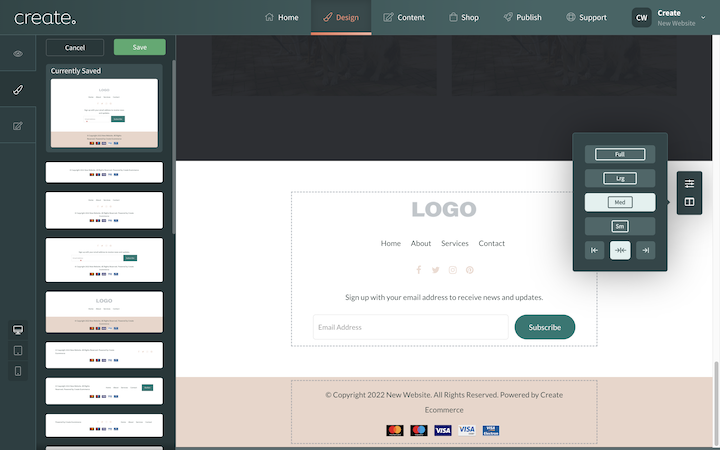
Related Articles


More Questions?
If you have any further questions, please get in touch and we will be happy to help.
Get in Touch