Help Centre
Support > Designing and Building Your Website > Adding Your Content
How To Add Privy’s Announcement Bar To Your Website

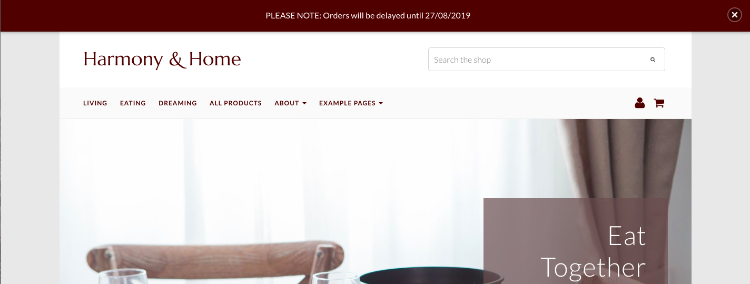
If you would like to apply a message to every page of your site, whether it’s to promote a special offer or let your customers know that you are going to be away for a while, this can be done easily using a plugin called Privy to create an announcement bar. You can see this in the screenshot above.
In addition to the Announcement Bar, Privy also offers a number of other marketing plugins including pop-ups for welcome discounts and exit intent messages. Once you have applied the Privy code on your website, any new plugins that you launch or edit from their dashboard will update automatically on your live Create site. This makes managing your communications easy and eliminates the need to code each new feature onto your site.
This guide will explain the process of setting up a customised Announcement Bar across every page of your website.
Please note, this plugin is only free up to 5000 page views a month.
Create is part of Privy.com’s affiliate program.
How To Set Up Your Privy Dashboard
-
When you first enter the Dashboard, click “Get Started” on their welcome message.
-
Then click “Unpublish & Edit” on the next window for the campaign they’ve already set up for you.
-
Follow the instructions to stop the campaign
How To Add The Privy Code To Your Website
You can add the Privy code to your Create website now, which will enable the banner you are about to make to appear when you publish it. To add the Privy code to your Create website, please follow these steps:
-
Within Privy, Click your username in the top-right, followed by Integrations
-
Click Privy Code in the left-hand menu
- Copy the code they provide to your clipboard.
-
Select Content on the Top Menu.
-
Click Integrations from the left-hand menu.
-
Click on the Add Integration button at the top of the screen and select Custom HTML
-
Enter a description for reference (e.g. Privy Code).
-
Paste your HTML code into the large "HTML Code" box.
-
In the Area section, select the Manual option.
-
Click Add Integreation to save your code.
-
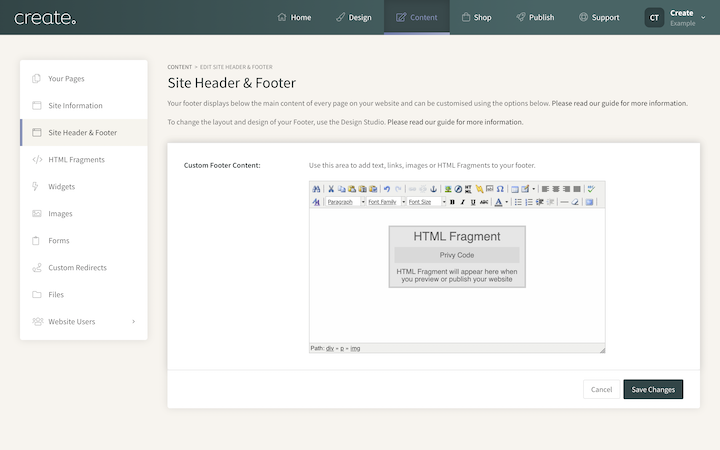
Next, click Site Header & Footer from the left-hand menu.
-
Add your Custom HTML to the Custom Footer Content by clicking the HTML icon on the toolbar, selecting it from the drop-down list and clicking the Save Changes button when done.

-
Publish your site for the changes to take effect on your live website.
-
Go back to Privy and click “Check My Install” in the pop-up window to finish the process.
How To Design Your Site-Wide Banner

-
From the main Privy dashboard, click the New Display button, followed by the Build Your Own option

- A pop-up will appear asking you to give the campaign a name. Enter any name, for example, 'Free Postage Bar'. The email toggle has to initially be enabled
- Click Create campaign
- Edit or remove the form field, depending on if you want it there, for a simple announcement banner, you most likely won't.
- Click Add Display and then click Bar in the left-hand menu
- Scroll through the selection and locate the bar you wish to use on your website and click Choose selected at the top of the screen. The colour and text are altered in the next stage.
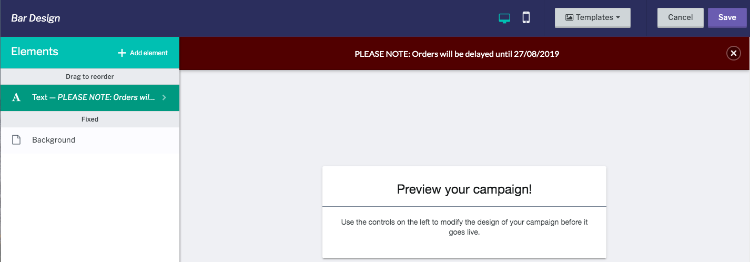
- Click the Text element on the left of the page.
- Enter and customise your message in their editor.
- (If you are going away, we advise not to word your message about being away from home/on holiday)
-
Exit the Text Editor and click the Background element.
-
Change your background colour to match your site and select your preferred banner placement.
-
Click Publish to publish your announcement bar immediately on your Create website.
Related Articles
More Questions?
If you have any further questions, please get in touch and we will be happy to help.
Get in Touch


