Help Centre
Support > Ecommerce > Categories and Products
How to personalise your products with Product Options
For many customers, personalising a product is a great way for their gift to feel that extra little bit special, which is why so many Create members choose to sell personalised gifts on their site! Product Options allow your visitors to add personalisation to your products and send a personal message along with their order.
In this guide we will be looking at how to offer your customers personalised products using Product Options.
How to set up your personalised Product Option
To set up personalisation for your products you will need to go to your "Shop" area from the Top Menu and select "Product Options" from the left-hand menu.
To add a new Product Option you will need to select "Add Product Option", after which the following modal window will appear: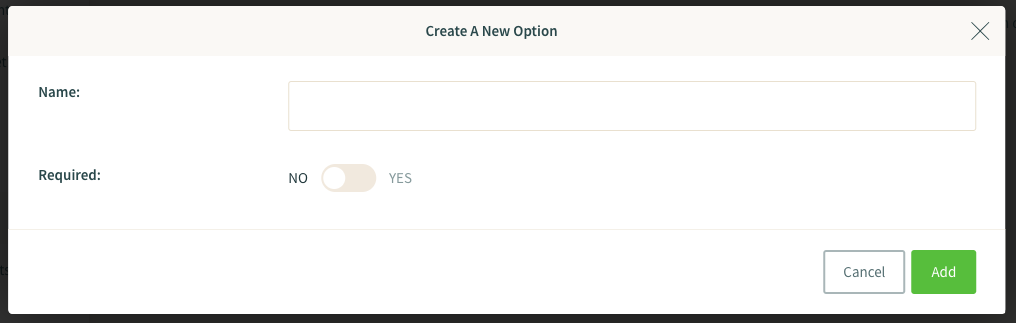
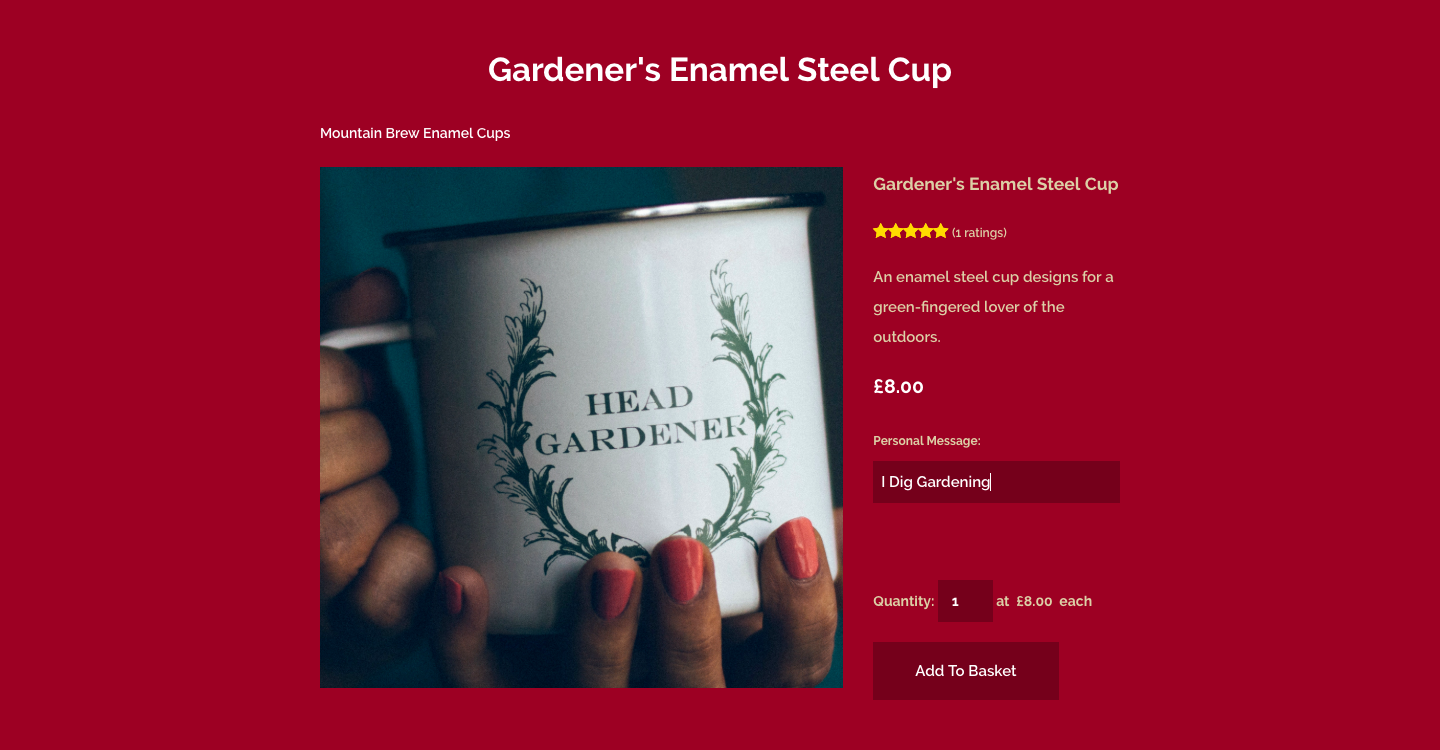
Here you can put the name of your Product Option in the "Name" Field. This will be the text that appears before the Text Box on your product page. For example, you could write “Personal Message" if you wish to enable your customer to add a message for you to their order.
You can then decide whether you would like this Product Option to be mandatory for your customer by selecting "Yes" or "No" in the "Required" field. For example, if you were selling wedding invitations with text printed on them you would set the “Required” field to “Yes”, so they can't accidentally order invitations with no text on them.
When you select "Add", the modal window will update to the following: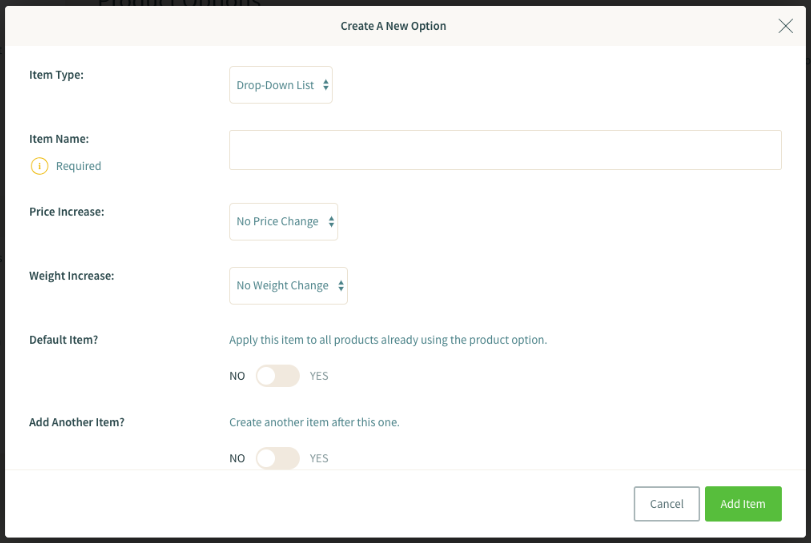
This window allows you to create an "Item" for your Product Option and determine your "Item Type" from the drop-down list.
From this list you will need to select “Custom Text Box” as this will allow your customer to personalise a product. The message from this Text Box will then be sent with the order details to your Order Management system.
When you choose "Custom Text Box" the window will expand to offer you the following options: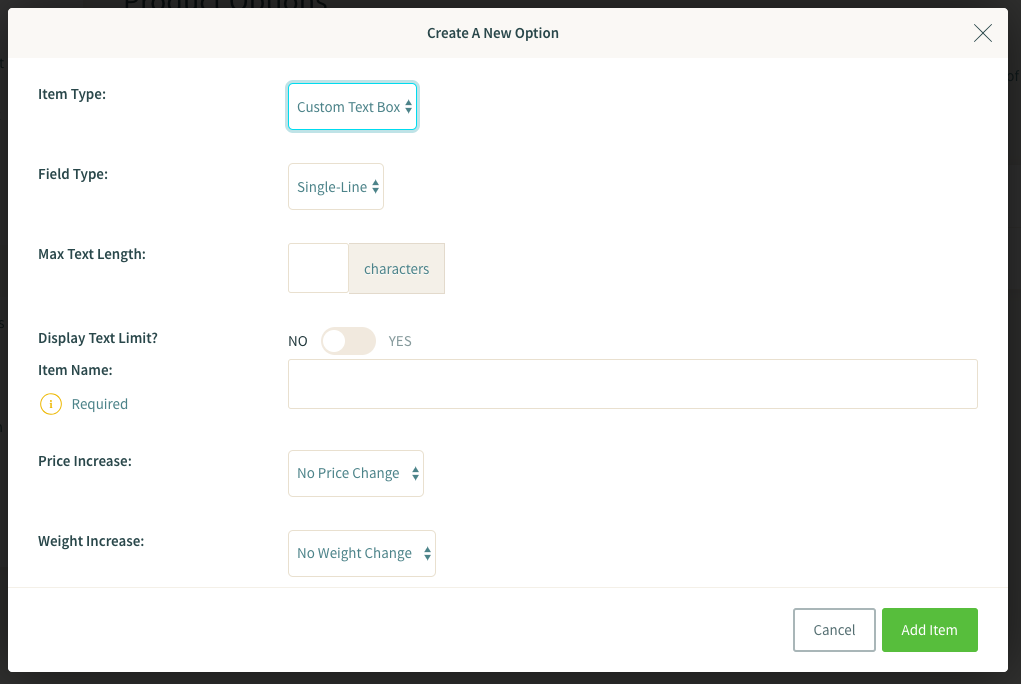
With these options you can choose whether to have a "Single-Line" or "Multi-Line" field and this will dictate how long the personal message can be. You can also choose a maximum character length and whether you would like to display this on your product. For example, if your wedding invitations only had enough space for 400 characters over several lines you would choose a “Multi-Line” field and set your maximum character length to display on the product page. This ensures that your customers know how much text they have space for.
Once you have chosen your "Item Type" you can choose your "Item Name". This is the text that will appear in the box before any text is entered, such as "Write your personal message here”.
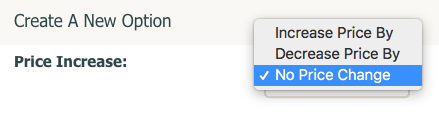
The next field, "Price" gives you the option to increase or decrease the price of your product when this item is chosen. For example, if it is more expensive to personalise your product you could select "Increase Price By" and enter the amount you would like to increase the price by. You are also given the option to have "No Price Change".
The "Weight" field allows you to increase or decrease the weight of this item, or opt for "No Weight Change".

Lastly, the "Default Option" field means allows you to choose whether this item is included in every product that uses this specific Product Option. For example, you may have only one product that you can personalise and so you would set your item to "No". Then when you have added your Product Option to your product you can select to add this optional item.
Once this is completed you can continue adding your items by selecting "Yes" in the drop-down list "Add Another Item" or save your item and return to the Product Options screen by selecting "Add".
Related Articles


More Questions?
If you have any further questions, please get in touch and we will be happy to help.
Get in Touch