Help Centre
Support > Designing and Building Your Website > Adding Your Content
How To Create a Custom Form
Custom Forms are a great feature to use with your Create site. They have many uses such as the ability to create an online registration form, or the option to allow customers to send you an image or specific information you require.

To locate the Custom Form area, please follow the steps below:
- Click Content from the top menu.
- Click Forms from the left-hand menu.
- Click the Add Form button.
- Enter the name of your form in the title box (this will appear above the form on your website page).
- Enter a name for the Form button, this is the button that the user needs to click to send the form e.g. “Submit” or “Send”.
- Click Save & Continue
After setting up the Form template, you next need to build the form by adding the fields you want visitors to fill out.
Building The Form
On this screen you will be presented with your form title and button text. You can adjust this here if you want to alter either of them.
In this section, you can also specify an alternative email in the To Email field. If you leave this field empty, messages sent through the form will be sent to the email address you have supplied in the Content > Site Information area of your account.
You can choose if you want the default Thank you page that customers see after they complete the form. You can change this to one of your existing pages if you would prefer.
Once you have amended this information as you wish you will need to click Save Changes.
Next, you will set up the Custom Form fields.
Adding Your Custom Fields
- Click the Add Field button to open the Field modal
- In the box Field Label enter the text you would like to appear next to the field, for example, “Full Name:”.
- In the Field Type select from the drop-down list the type of field you would like to add

- Set if you want the field to be a required entry on the form or an optional
- Click Add Field.
This will add the first field to your form, for example, Full Name. Repeat the above process for the remaining form fields you wish to have present in the form.
You will see a list of all fields you have created for the form displayed in on the Form screen. If needed, you can arrange the fields by clicking on the arrow icons next to each field to move them up or down the form list.

When you have finished adding all the fields, if you return to the main Custom Form section of Create, the form will be listed there. If you click on the Eye icon, you will see a preview of how the form looks.

Available Fields For Use In Custom Forms
Text Box

Best used for short information that cannot be selected, i.e. name, telephone number or a line of an address.
Large Text Box

Good to use for larger amounts of information that cannot be selected, i.e. descriptions or special requirements.
Radio Buttons

Displays a list where you can select one item using a small round blue "radio button".
Check Boxes

Displays a list where you can select more than one item by placing a tick in a box.
Drop Down

Displays a drop down list where you can select one item.
Date Selector

Displays a drop down list of dates you can select.
Upload File

Provides a box to upload or attach a file with a "browse" button. The file size limit is 6MB.
How To Add A Custom Form To A Page
Now you have your custom form created you'll want to insert it into one of your pages. To do so, please follow the steps below:
-
Click Content on the top menu
-
Click Edit This Page (the pencil icon) next to the page you would like to edit
-
Click the +Add Block button
-
From the Add Block filter menu, select Custom
-
You can then drag and drop the Custom Block onto the desired place on the page.
-
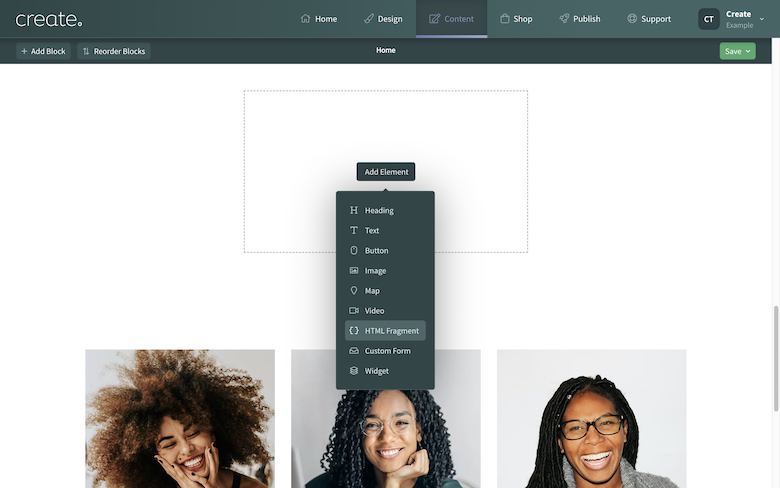
Once the Custom Element block has been added to the page, you can click the Add Element button and select Custom Form. You can then select the custom form you set up from the list. Click Done to finish.
Related Articles


More Questions?
If you have any further questions, please get in touch and we will be happy to help.
Get in Touch