Help Centre

Support > Ecommerce > Categories and Products

How to add multiple images to your products

Using product images are a great way to catch your customer’s eyes as well as show off your product. They give you the option to show different angles of your products, as well as the different selections available.

So, for example, if you had a piece of jewellery with intricate detail you may want to use product images to display this piece of jewellery from different angles. These images will then appear on your live site as below, so customers can click through the images to see the different angles available:
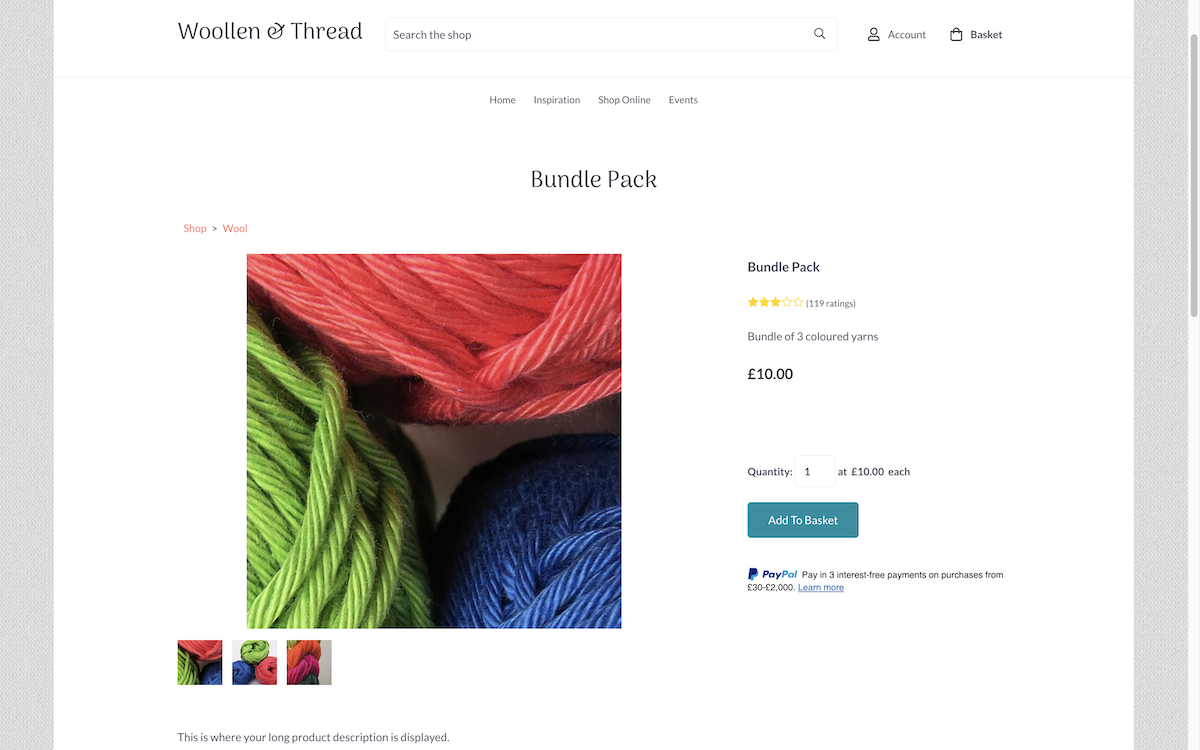
Screen_Shot_2013-12-17_at_16.13.16.png

Product Layout - Narrow

Screen_Shot_2013-12-17_at_16.10.54.png

Product Layout - Wide

Product Images are available with all our packages and the allowance for multiple product images is on these packages as follows:

Shop Builder - 6 images per product

Shop Builder Pro - 9 images per product

Shop Builder Advanced - 12 images per product

Please note: This allowance includes your main product image.

How to add product images to your product

To add multiple product images to your product please follow these steps:   

  1. Go to your “Shop” page on the Top Menu.
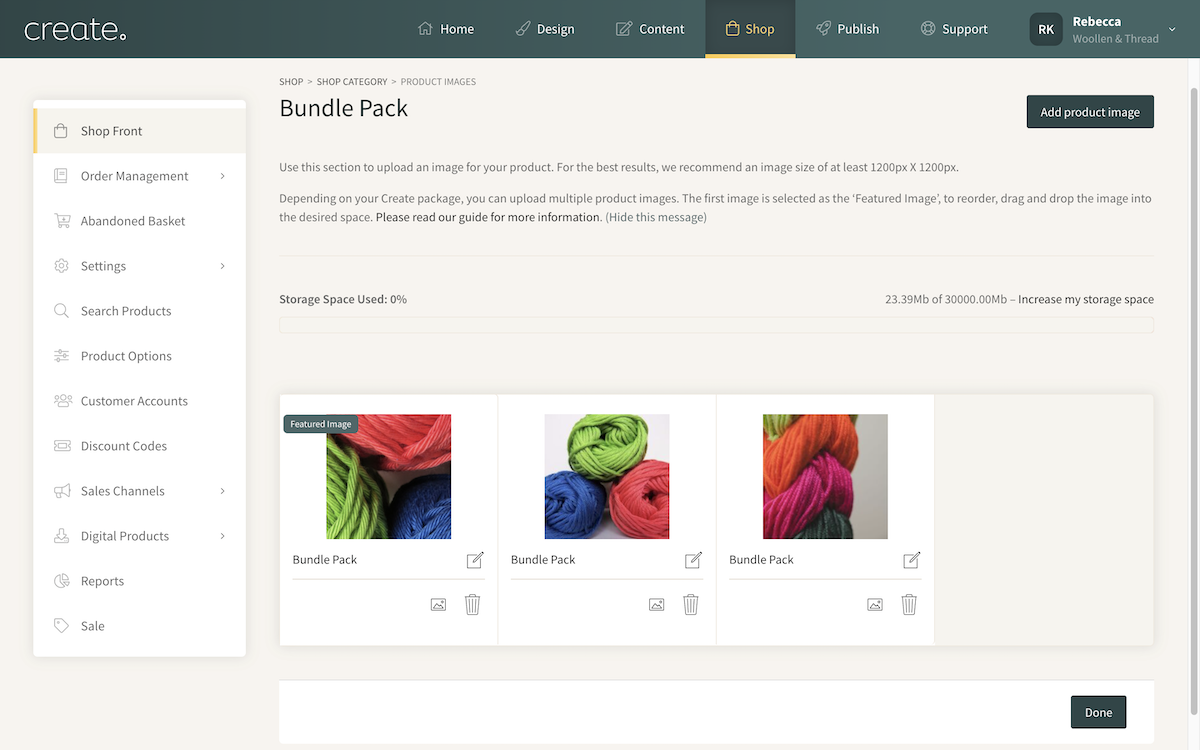
  2. Select the product you wish to add your images to and click the “Images” camera icon.
  3. Click on the text “Click here to upload your product images”, as seen below:

  4. You will then be taken through the image uploader to upload your images. For more information about this please click here.
  5. You will then be taken back to your product area, where your images will appear.
  6. Finally, when you have finished uploading your images, select the yellow “Done” button in the bottom right-hand corner.

Once your images are all uploaded they will appear on your live site!

As seen in the screenshots above, there are two product layouts available for product images and so to read more about these please see our Product and Category Layout guide.

How to re-order your product images

If you would like to change the order of your product images please follow the steps here:?

  1. Go to your “Shop” page on the Top Menu.
  2. Select the product you wish to add your images to and click the “Images” camera icon.
  3. Drag and drop your images in the order you would like them.

  4. Select the yellow “Done” button in the bottom right-hand corner.
  5. These changes will then go live immediately.

How to set your “Featured Product” image

When your product images are uploaded the first image will automatically be chosen as the “Featured Product” image. This means it will become your main product image and can be identified by the yellow “Featured Product” banner shown over the image.

It is also the one the thumbnail is automatically generated from. If you would like to know how to upload a custom thumbnail image please read this HelpCentre Guide.

However, if you would like to re-order these images to choose another for your “Featured Product” image please follow the steps below:

  1. Go to your “Shop” page on the Top Menu.
  2. Select the product you wish to add your images to and click the “Images” camera icon.
  3. Drag and drop your chosen image before your current “Featured Product” image.
  4. The new image first in the list will then update to be the “Featured Product” image and the yellow banner will appear in your product area.


  5. To save your changes select the yellow “Done” button in the bottom right-hand corner.

The best image sizes for Product Image

The best size for your images is as big as you can but, as a minimum size, anything over 1200x1200px would be best. This is because the bigger the image is, the better it will display on all screens! Especially when enlarged within a lightbox as shown below:

More Questions?

If you have any further questions, please get in touch and we will be happy to help.

Get in Touch