Help Centre
Support > Ecommerce > Accepting Payments Through Your Shop
How To Add Klarna On-Site Messaging
Klarna provides a series of on-site messaging that you can add to your website to make it clear to visitors that you offer Klarna as a payment option.
For customers on our Business package, we have added the option to add their on-site messaging to your website to highlight to your customers that you offer Klarna payment options.
You can add Klarna payment messaging to 3 different locations on your website, which are:
- Category Pages
- Product Pages
- Shopping Basket
How To Add The On-Site Messaging
In order to display the on-site messaging, you need to ensure you are using our latest category layout. If you need to update your category, please follow this help guide.
To enable the on-site messaging, please follow the steps below:
1. Log in to your Create account
2. Click on Shop, followed by Payment Gateways
3. Click Edit this gateway next to PayPal
4. In the gateway settings, locate the Show On-Site Messages toggle and enable it.
5. Further settings will display. You will need to locate your Klarna Client ID from your Klarna account.
You can copy your Client ID in the following way
5a. Log into your Klarna dashboard
5b. Click Conversion boosters in the top-menu
5c. Click the on-site messaging from the left-hand menu

5d. Select your store from the drop-down menu and click Get started
5e. Your Client Identifier will be displayed. Click the Copy button

6. Once you have copied that code, return to your Create account and paste the code into the Client ID section of the Klarna settings of Create.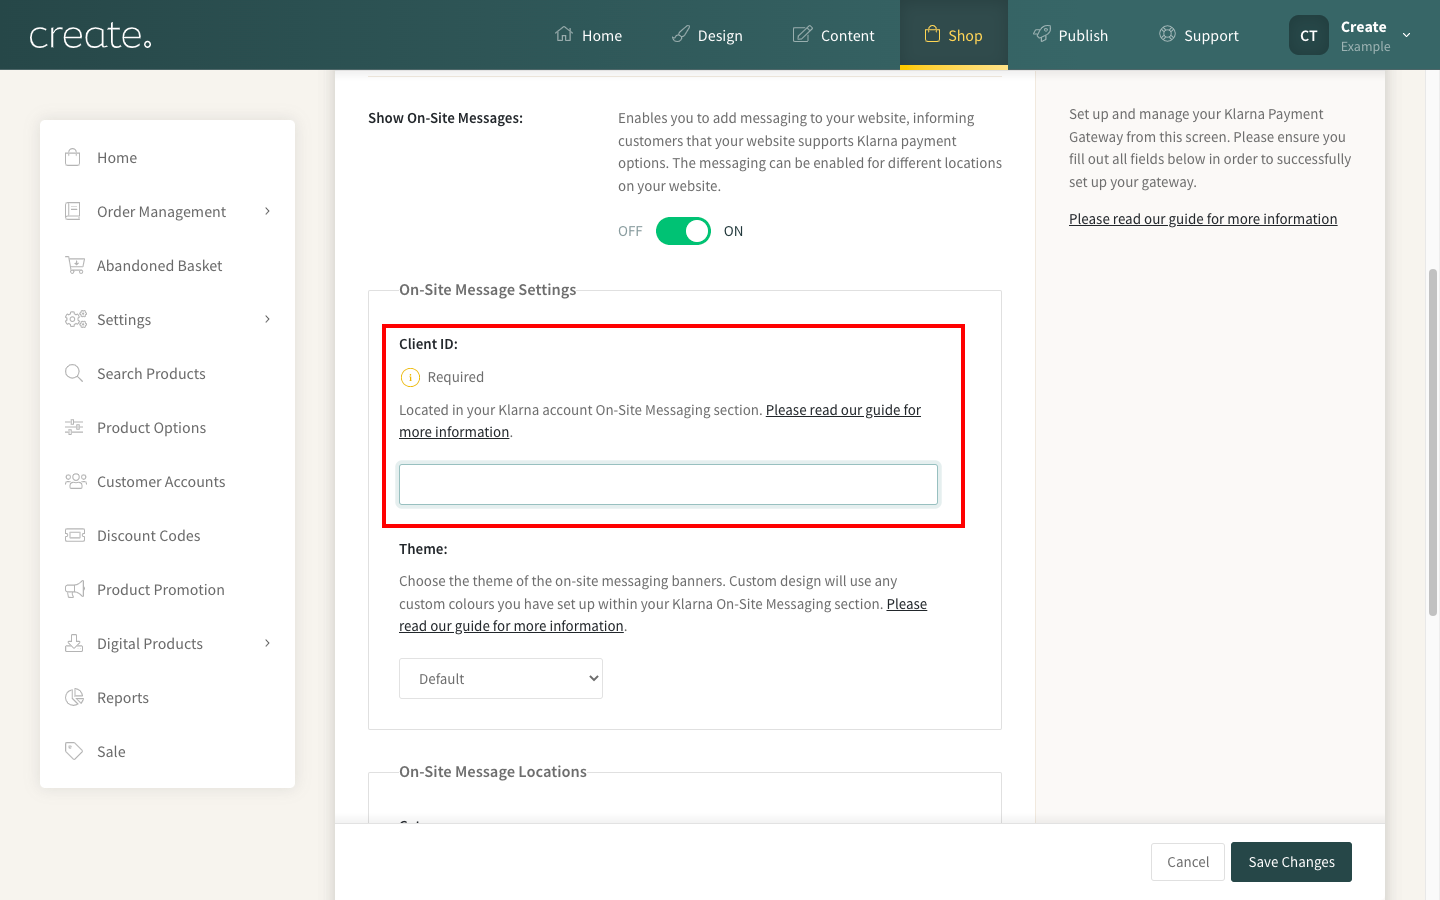
7. Next you can select a Theme for the on-site messaging. Default (Klarna’s default, white banners), Dark (black banners) or Custom (setup within Klarna directly).
If you would like to choose your own colours for the on-site messaging to better suit your website, you will need to customise the banners within Klarna directly.
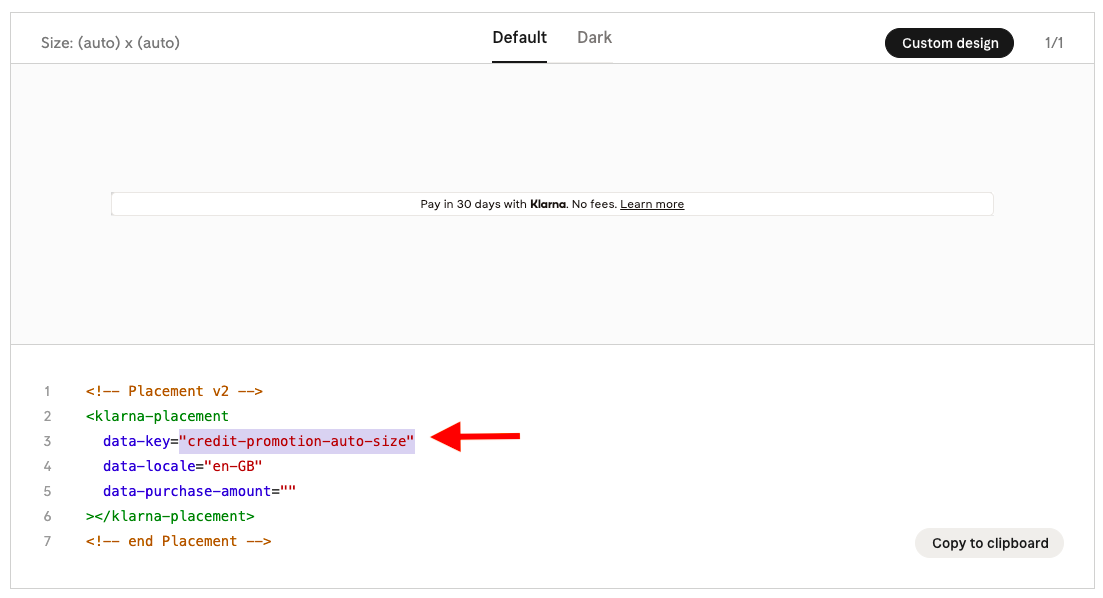
The three banners Create is using can be identified by their data key name, please see below:
"Credit-promotion-auto-size" (displays on the category pages)
"Top-strip-promotion-auto-size" (displays on the product pages)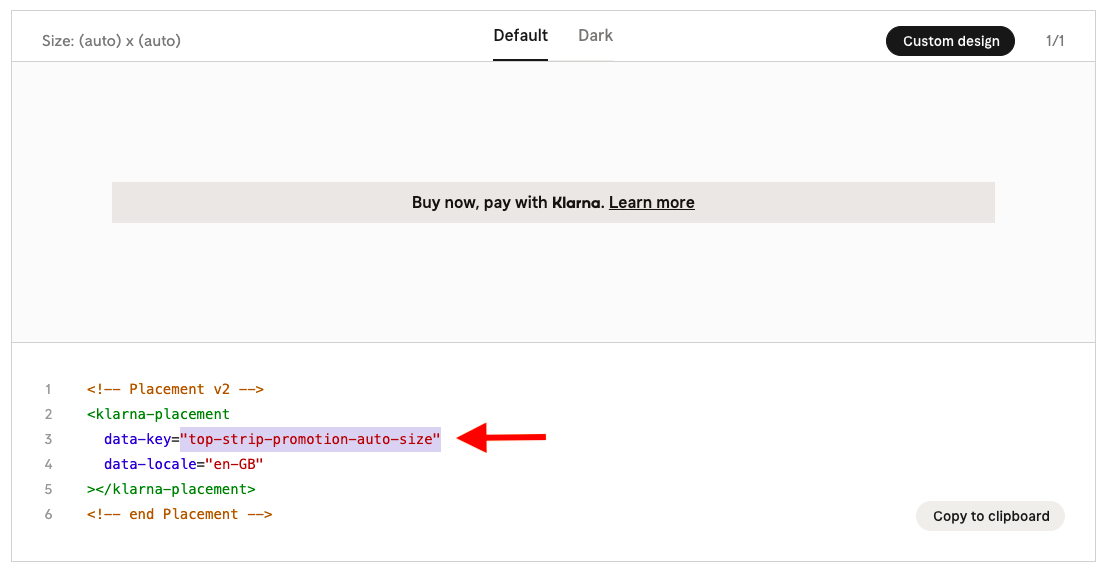
"Credit-promotion-badge" (displays on the basket)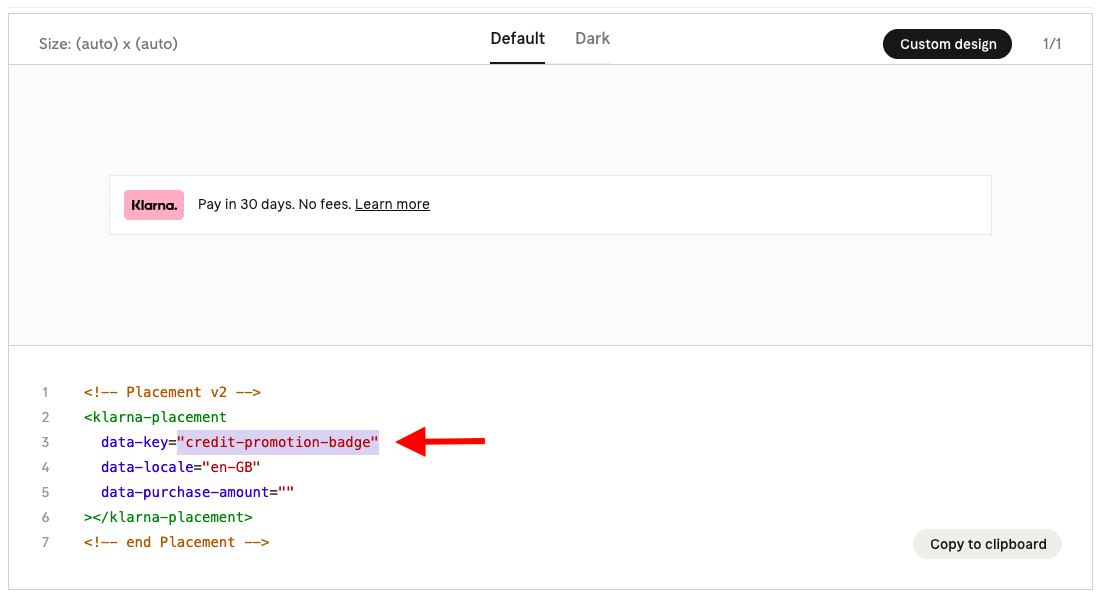
If you locate the correct banner, then click Custom design and you will be able to edit the colours and style of the banners.
8. Finally, you can enable/disable the locations you would like the messaging to show.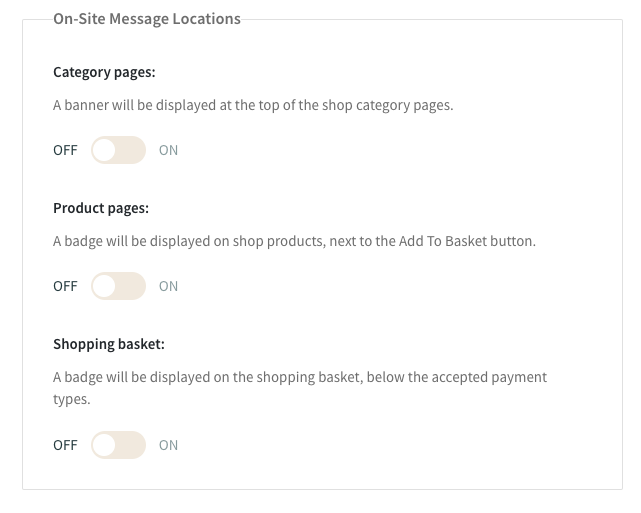
9. The messages you have enabled will now be displayed on your website. If the messaging doesn't display, then we recommend re-publishing your website.
Below you can see an example of how this messaging looks on a live website. For this instance, the website owner has customised the colours of the messaging to match their website branding.
Shop on-site messaging example (displays above the shop categories)
Product on-site messaging example (displays below the add to basket button)

Basket on-site messaging example (displays below accepted card icons)

Related Articles


More Questions?
If you have any further questions, please get in touch and we will be happy to help.
Get in Touch