Help Centre
Support > Security & Compliance > GDPR & Privacy
How Do I Add Age Verification To My Website?
AgeVerify offers a free, customisable age verification solution that you can build in minutes and is easily added to your Create website. This is an ideal solution if you intend to be selling age restricted goods or services.
Here, we will cover how to generate the code for their age verification tool and how to add it to your Create website.
Getting The AgeVerify Code
1. Go to https://ageverify.co/ and click ‘Get Started’

2. There a range of different templates to choose from, pick one that best suits the style of your product and/or website and click on ‘Learn More’.

3. A selection of packages are displayed; Basic, Pro and Custom. The basic package is free, but adverts are displayed at the bottom of the age gateway page.

4. You now need to configure how your age gateway screen will display to users.
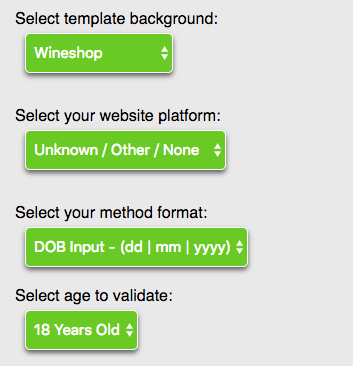
Select template background: The theme of your age gateway screen.
Select your website platform: Create isn’t listed, please select ‘Unknown/Other/None’
Select your method format: How the date of birth input will be displayed.
Select age to validate: This is the age you require visitors to be to access your website.
5. The next section is optional but allows you to customise the age gateway screen further.
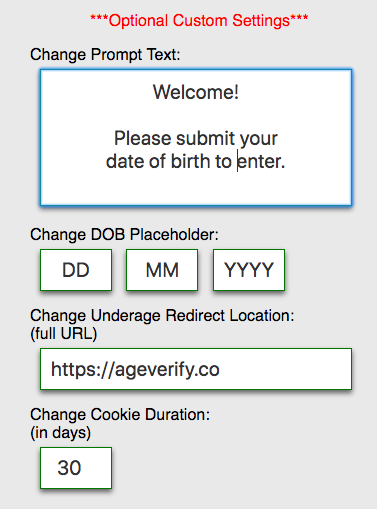
Change Prompt Text: You can customise the message displayed to your site visitors.
Change DOB Placeholder: The text displayed inside the date boxes.
Change underage Redirect Location: The site someone under your age requirement is directed to. By default it directs them to the AgeVerify.co website.
Change Cooke Duration: How long the cookie remains valid for. After this duration, the same visitor will have to enter their age details again. 30 is the default.
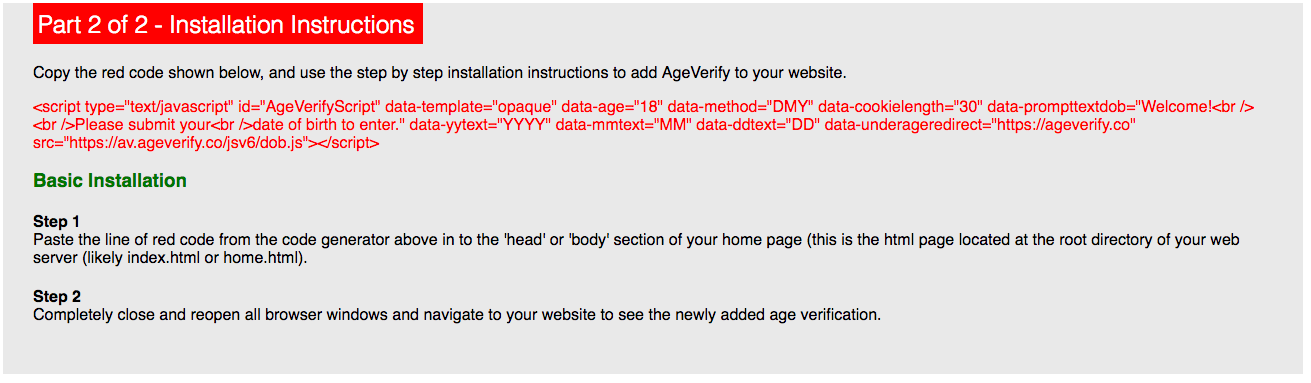
6. Finally, you will be presented with some unique code, specific to the requirements you have selected. Copy this code (shown in red) directly from the AgeVerify website.
Adding The Code To Your Website
1. Login to your Create Account
2. Click Content in the Top Menu
3. Click Integrations in the left-hand menu
4. Click the green Add Integration button and select Custom HTML
5. Name the HTML ‘Age Verify’’ under ‘Description’ and paste the code into the ‘HTML Code’ box.
6. For the Area, select the All Pages - Body option - this will ensure the fragment is applied to all of your pages.
6. Click Add Integration
You can test the code by previewing your website in Create by clicking on Publish in the top menu followed by Preview.
Related Articles


More Questions?
If you have any further questions, please get in touch and we will be happy to help.
Get in Touch