Help Centre
Support > Promoting Your Website > General Marketing
How To Add Hello Bar Announcements To Your Website
If you would like to apply a message to every page of your site, whether it’s to promote a special offer or let your customer's postage will be delayed, this can be done easily using a plugin from Hello Bar. They offer a range of different bars you can use to communicate messages to your website visitors.
This guide will explain the process of setting up one of their bars to display across all of your website.
Hello Bar offers a range of plans, but for this guide, we will be using their forever free plan which supports 5000 lifetime website views. More details about the plans can be found on their website.
How To Setup Hello Bar - Installing The Code On Your Create Website
1. Begin by signing up to their website and choosing the plan you wish to use
2. Once you are signed into your account, you will see the Hello Bar dashboard
3. Click the account drop-down in the top-right of the app, followed by Installation Instructions
4. Click the code displayed in the ‘I can install code myself’ box, the code will be copied to your device's clipboard
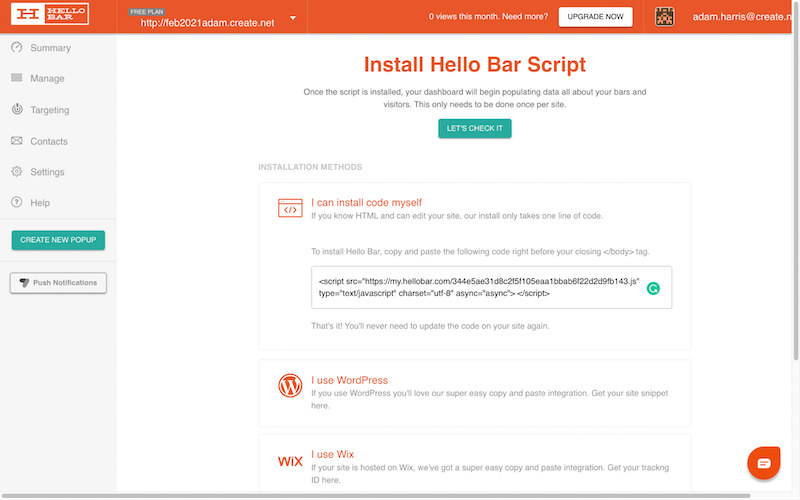
5. You will need to enter this code as a Custom HTML Integration in your Create account. To do this, log into your Create account.
6. Click Content from the top menu
7. Click Integrations from the left-hand menu
8. Click the Custom HTML button and give the fragment a name, for example, Hello Bar
9. Paste the code you copied from Hello Bar, into the HTML Code box
10. For the Area, you need to select All Pages > Body
11. Click Add Integration
When you next publish your website, the code you have just added will be applied. This will now allow any announcement bars you make in Hello Bar, to display on your website.
How To Design Your Announcement Bar
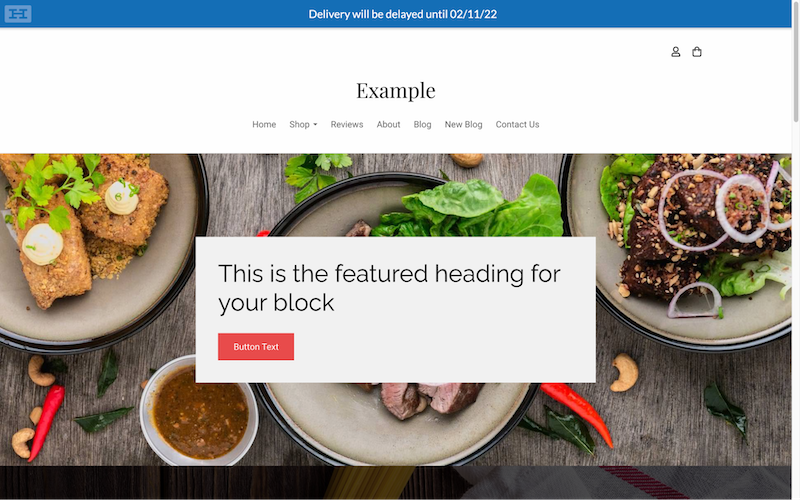
Now you have added the code to your Create website, it is ready for an announcement bar to be displayed. Hello Bar offers a wide range of different announcement bars and pop-ups you can set up and display on your website. For this help guide, we are going to make a simple announcement bar, stating delivery is going to be delayed.
1. From your Hello Bar dashboard, click the Create New Pop-Up button in the left-hand menu
2. An advert to upgrade from the free plan might be displayed here, but can be closed. A range of announcement types will be displayed, select the Announcement option
3. Select the type of announcement you would like, for this help guide we will select the Hello Bar option
4. You will be taken into the Hello Bar editor. Here there is a large range of options you can alter to adjust its style and design. Proceed through these to design your bar to suit your needs
5. The Headline section is where you will set the text content of the announcement bar
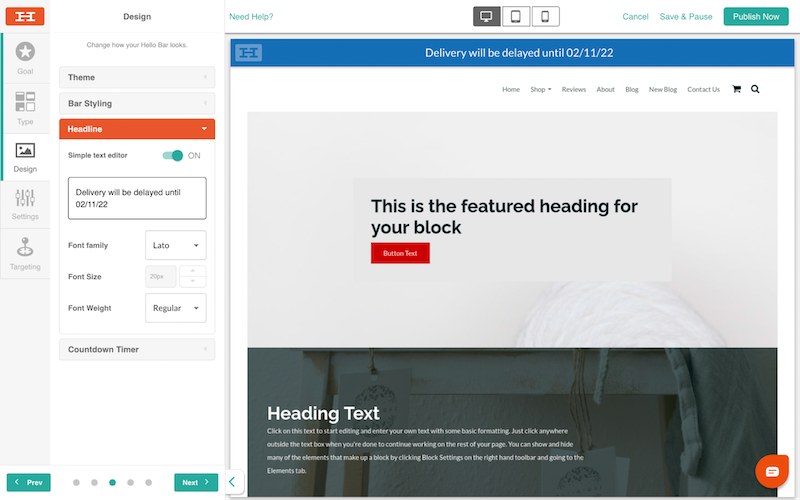
6. Things to consider are the font and colour scheme. It can be effective to select colours which complement your website colour scheme
7. An important tab to review is the Settings tab, as you can set how quickly you want the bar to appear. For this guide, I am setting it to Immediately
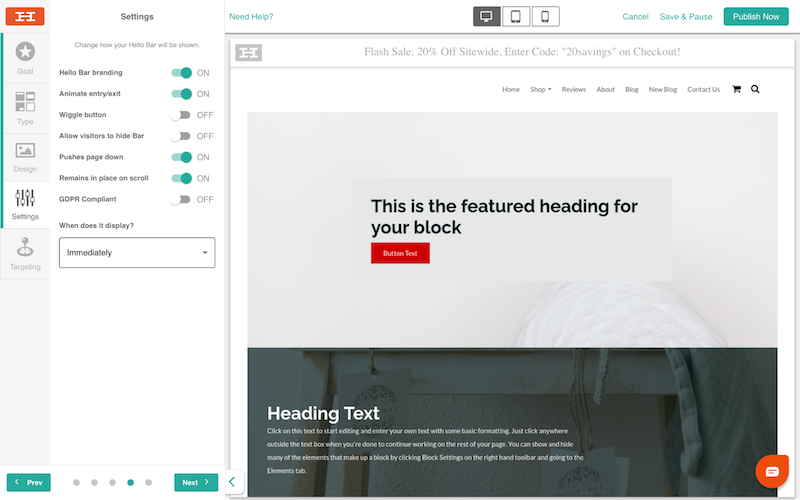
8. Hello Bar also displays icons at the top you can click to view how it will display on mobile devices
9. When you are happy with the look, click the Publish Now button located at the top right
10. Your Hello Bar will show on your website shortly.
If you ever wish to edit or pause the announcement, you can do this from the Manage option, located on the Hello Bar dashboard, which also displays data about the announcements you have set up.

Related Articles


More Questions?
If you have any further questions, please get in touch and we will be happy to help.
Get in Touch