Help Centre
Support > Designing and Building Your Website > Using The API
Creating a Zap with Zapier
Zapier makes the process of integrating your Create site with other web services easier than ever. With a library of over 500+ existing integrations, Zapier will allow you to quickly - and easily - automate your workflow. This article will explain how to get started using Zapier.
Please note that using the Create-Zapier integration is invite only, so please contact your Account Manager if you'd like to be invited.
What is Zapier?
Zapier is a tool designed to enable non-technical users to easily set up integrations (referred to as 'Zaps') between different web services. For instance, you could set up an integration to automatically import newsletter sign-ups on your Create site directly into MailChimp, and then use your Google Calendar to automatically let them know about an upcoming event you're hosting.
A comprehensive list of existing Zapier integrations can be found in Zapier's Zapbook.
Setting up a Zapier connection in your Create account
The first step to begin using Zapier is to set up a connection on your account. To do this, please follow the steps below:
- Log into your Create account
- Click ‘Account’ icon on the top menu
- Click ‘Connections’
- Click ‘Add Connection’
- Select ‘Zapier’ from the options available and click ‘Continue’ and then ‘Continue’ again
You will then need to publish your site.
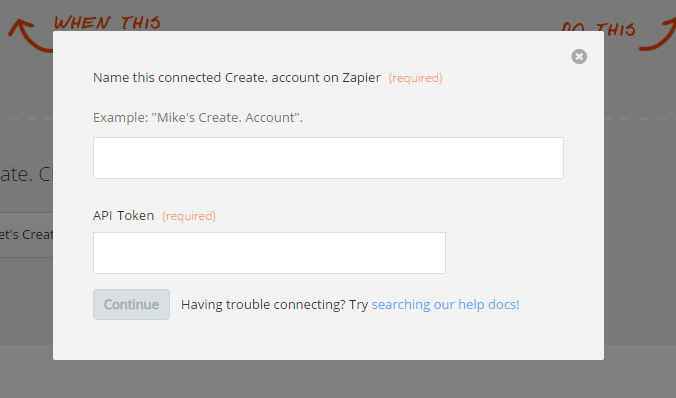
Once you've completed all of the above, you'll see a unique API Token for the Zapier connection in the 'Connections' area of your Create account. You'll need this later to create a Zap.
Getting started with Zapier
The first step is to sign up with Zapier to gain access to their existing integrations. Zapier offers a free plan as well as paid plans.
Once signed up, you can start setting up your Zaps. To do this:
- Ensure you are logged into Zapier
- From the dashboard, simply click the link 'Make a Zap!' from the top menu
- Select a Trigger App the first drop-down and then choose a trigger - this is the event that happens, e.g. you receive a new order through your Create account
- Select an Action App and choose an action - this is action that then takes place, e.g. add the email address to MailChimp - and then click continue
- Connect your applicable accounts. For Create, you'll need to enter your API Token for the Zapier connection on your Connections screen
- Once you've connected them, you can begin matching up the Trigger App and Action App and the behaviours you'd like to set.
- Test the Zap to make sure it works. Any errors will be displayed on the screen
- Once the test is successful, you can name your Zap and then turn it on
Zapier provide full support documentation and you can also contact them directly for any support with Zaps or their platform.
Related Articles


More Questions?
If you have any further questions, please get in touch and we will be happy to help.
Get in Touch